Dynamic List Filter: Vanilla JS Search with HTML/CSS
Hey! If you have wanted to build a interactive user interface but had no idea where to start, you are in the right place. Today, we’re going to build an awesome Dynamic List Filter project from scratch. You will learn how to create a user list that you can instantly search and filter. This project is super cool because it makes large amounts of data easy to navigate!
It’s a fantastic way to level up your JavaScript skills. We’ll use plain HTML, CSS, and vanilla JavaScript. No complex frameworks needed here!
What We Are Building: A Dynamic List Filter with Instant Search
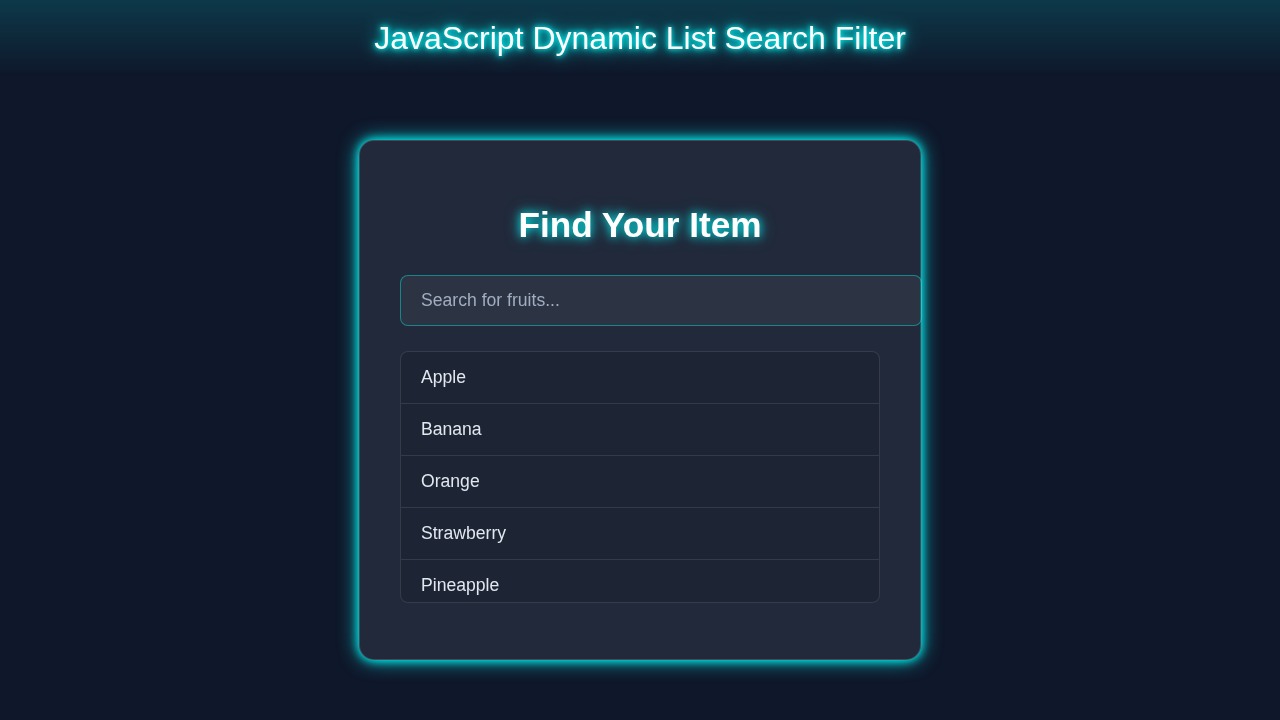
We are going to create a simple yet powerful web page. This page will display a list of users. Each user will have their name and location shown in a card. The really exciting part? Above this list, you will find a search bar. You can type anything into this search bar, and the list will update instantly! It will show only the users matching your search. For instance, you could search by name or by city. This kind of Dynamic List Filter is incredibly useful for directories, product catalogs, or contact lists.
Imagine displaying blog posts, recipes, or even a portfolio of your work. This fundamental skill is applicable everywhere. We will keep the design clean and modern. Your users will love how easy it is to find what they need!
HTML Structure: Laying the Foundation
First, we need to set up our basic HTML page. This structure will hold our search input and the list of user cards. We’ll have a main container to keep everything organized. And so, it gives us a clear place for our JavaScript to work its magic.
index.html
<!DOCTYPE html>
<html lang="en">
<head>
    <meta charset="UTF-8">
    <meta name="viewport" content="width=device-width, initial-scale=1.0">
    <title>Dynamic List Search Filter</title>
    <link rel="stylesheet" href="styles.css">
</head>
<body>
    <div class="container">
        <h1>Dynamic List Search</h1>
        <div class="search-box">
            <input type="text" id="searchInput" placeholder="Search items..." aria-label="Search list items">
        </div>
        <ul id="itemList" class="item-list">
            <li class="list-item">Apple</li>
            <li class="list-item">Banana</li>
            <li class="list-item">Orange</li>
            <li class="list-item">Grape</li>
            <li class="list-item">Strawberry</li>
            <li class="list-item">Blueberry</li>
            <li class="list-item">Pineapple</li>
            <li class="list-item">Mango</li>
            <li class="list-item">Kiwi</li>
            <li class="list-item">Peach</li>
        </ul>
    </div>
    <script src="script.js"></script>
</body>
</html>
CSS Styling: Making It Look Great
Now, let’s make our project visually appealing. We’ll use CSS to style our container, search input, and user cards. Our goal is a clean, readable, and responsive design. This ensures our list looks good on any device. We will use Flexbox for easy layout management. Therefore, all our elements will align beautifully.
Pro Tip: For responsive design, always consider using relative units like percentages,
em, orreminstead of fixed pixels. This helps your layouts adapt gracefully to different screen sizes. Learn more about Flexbox on MDN!
styles.css
/* Basic Reset and Box Sizing */
*, *::before, *::after {
    box-sizing: border-box;
    margin: 0;
    padding: 0;
}

body {
    font-family: Arial, Helvetica, sans-serif;
    background-color: #f4f7f6; /* Light background for the tutorial */
    color: #333;
    display: flex;
    justify-content: center;
    align-items: flex-start; /* Align to top to make room for eventual padding/margin */
    min-height: 100vh;
    padding: 20px;
}

.container {
    background-color: #ffffff;
    border-radius: 8px;
    box-shadow: 0 4px 15px rgba(0, 0, 0, 0.1);
    padding: 30px;
    width: 100%;
    max-width: 450px;
    margin-top: 20px; /* Space from top */
    overflow: hidden; /* Ensure nothing spills out */
}

h1 {
    text-align: center;
    color: #2c3e50;
    margin-bottom: 25px;
    font-size: 1.8em;
}

.search-box {
    margin-bottom: 20px;
}

#searchInput {
    width: 100%;
    padding: 12px 15px;
    border: 1px solid #ccc;
    border-radius: 5px;
    font-size: 1em;
    outline: none;
    transition: border-color 0.3s ease, box-shadow 0.3s ease;
}

#searchInput:focus {
    border-color: #007bff;
    box-shadow: 0 0 0 3px rgba(0, 123, 255, 0.25);
}

.item-list {
    list-style: none; /* Remove bullet points */
    max-height: 400px; /* Limit height for scrollability if many items */
    overflow-y: auto; /* Enable scrolling */
    border: 1px solid #eee;
    border-radius: 5px;
    padding: 5px;
}

/* Custom Scrollbar Styles for Webkit browsers */
.item-list::-webkit-scrollbar {
    width: 8px;
}

.item-list::-webkit-scrollbar-track {
    background: #f1f1f1;
    border-radius: 10px;
}

.item-list::-webkit-scrollbar-thumb {
    background: #888;
    border-radius: 10px;
}

.item-list::-webkit-scrollbar-thumb:hover {
    background: #555;
}


.list-item {
    padding: 12px 15px;
    border-bottom: 1px solid #eee;
    font-size: 1.05em;
    color: #555;
    transition: background-color 0.2s ease, color 0.2s ease;
}

.list-item:last-child {
    border-bottom: none;
}

.list-item:hover {
    background-color: #f8f8f8;
    color: #000;
}

/* Visibility class managed by JavaScript */
.list-item.hidden {
    display: none;
}

/* Responsive adjustments */
@media (max-width: 600px) {
    .container {
        padding: 20px;
        margin-top: 10px;
    }
    h1 {
        font-size: 1.5em;
    }
    #searchInput {
        padding: 10px 12px;
    }
    .list-item {
        padding: 10px 12px;
        font-size: 1em;
    }
}
JavaScript: Bringing Our List to Life
This is where the real fun begins! Our JavaScript will fetch user data. Then it will dynamically create the user cards. Most importantly, it will handle the search and filter logic. We will listen for user input in the search bar. Consequently, we will update the displayed list in real time. Therefore, the list always stays current and relevant.
script.js
document.addEventListener('DOMContentLoaded', () => {
    const searchInput = document.getElementById('searchInput');
    const itemList = document.getElementById('itemList');
    const listItems = itemList.querySelectorAll('.list-item'); // Get all list items

    /**
     * Filters the list items based on the search input value.
     */
    function filterList() {
        const searchTerm = searchInput.value.toLowerCase(); // Get search term and convert to lowercase

        listItems.forEach(item => {
            const text = item.textContent.toLowerCase(); // Get item text content and convert to lowercase
            if (text.includes(searchTerm)) {
                item.classList.remove('hidden'); // Show item if it matches
            } else {
                item.classList.add('hidden'); // Hide item if it doesn't match
            }
        });
    }

    // Add an event listener to the search input for 'input' events
    // The 'input' event fires whenever the value of an <input>, <select>, or <textarea> element has been changed.
    searchInput.addEventListener('input', filterList);

    // Initial filter call in case the input field has pre-filled content (e.g., from browser history)
    filterList();
});
How It All Works Together: The JavaScript Magic
Let’s break down the JavaScript step-by-step. You will see exactly how our components interact. Understanding each piece helps you build more complex projects later. This approach empowers you with fundamental web development knowledge.
Setting Up Our Data
First, we need some user data to display. In a real application, you might fetch this from an API. For this tutorial, we will use a simple placeholder array. This keeps our example focused on the search and filter logic. We store this initial data in a variable. This makes it easy to access and manipulate later. We also need to get references to our HTML elements. For example, we grab the search input and the user list container. Therefore, our JavaScript can interact with them directly.
Rendering the User List
Once we have our data, we need to show it on the page. We’ll write a function to do this. This function takes an array of users as input. It then iterates over each user. For each user, it creates a new HTML <li> element. This element will display the user’s name and location. We use string literals for easy HTML generation. After creating all the <li> elements, we append them to our user list container. This process happens every time the list needs to update. If you want to dive deeper into array methods for data manipulation, check out our tutorial on JavaScript Map Filter Reduce: Master JS Array Methods.
Implementing the Search Functionality
Here’s the cool part: making the search instant! We attach an 'input' event listener to our search bar. Every time you type a character, this event fires. Inside the event handler, we get the current value from the input field. We convert this search term and all user names/locations to lowercase. This ensures our search is case-insensitive. Then, we use the filter() array method. This method creates a new array containing only users whose name or location includes the search term. Finally, we call our rendering function again. This time, we pass it the newly filtered array. Consequently, the list on your screen updates instantly!
Handling Empty States
What happens if a user types something that doesn’t match anyone? We need to provide good feedback. If our filtered array is empty, we should display a message. Something like “No users found.” is perfect. This improves the user experience significantly. Otherwise, the user might think something is broken. We can add or remove a specific message element based on the filter results. This ensures our application is friendly and informative. Thus, users always know what is happening.
Tips to Customise Your Dynamic List Filter
You’ve built a fantastic foundation! Now, let’s explore ways to make your Dynamic List Filter even better:
- Add More Filter Options: Implement dropdowns or checkboxes to filter by criteria like age, country, or department. This provides more granular control.
- Implement Pagination: For very large lists, loading all items at once can be slow. Add pagination to load users in smaller chunks.
- Add Sorting: Allow users to sort the list by name, age, or any other field. This gives them more ways to organize data.
- Improve Styling: Get creative with your CSS! Add hover effects, different card layouts, or even dark mode. Explore awesome box-shadows on CSS-Tricks!
- Fetch Real Data: Connect your project to a public API (like JSONPlaceholder) to display real-world data. This is a great next step!
- Consider a Framework: While vanilla JS is powerful, for complex interfaces, frameworks like React can simplify development. If you enjoyed building this, perhaps check out our React To-Do List Tutorial: Functional Components & Hooks or even our React TypeScript Tasks App Tutorial – Build a To-Do List for your next challenge.
Conclusion: You Did It!
Awesome work, pro-coder! You just built a fully functional Dynamic List Filter with search capabilities. You learned about HTML structure, CSS styling, and dynamic JavaScript manipulation. This project teaches fundamental concepts that are crucial for any web developer. You can now proudly add this skill to your toolkit. Take what you’ve learned and apply it to new ideas. Share your creations with the world! Keep experimenting and building amazing things. Your coding journey is just getting started!
Remember: Every line of code you write is a step forward. Don’t be afraid to experiment, make mistakes, and learn from them. That’s how real developers grow!