Hey there, awesome coder! If you’ve been eager to build something dynamic and interactive, but felt a bit lost, you’re in the perfect spot. Today, we are diving deep into the JavaScript Fetch API. We’ll use it to create a super cool, dynamic quote generator. You’ll love seeing your web page come to life with fresh content! This powerful API makes fetching data from the internet straightforward and efficient. Get ready to impress yourself!
What We Are Building
Imagine a sleek web page with a beautiful quote on it. Also, imagine a button that, when clicked, instantly fetches a brand-new, inspiring quote! That’s exactly what we’re going to build. Our quote generator will grab data from an external API. This project is a fantastic way to understand how real-world websites get their content. It also makes your skills shine! We’re building a practical tool. Furthermore, you’ll gain valuable experience with client-server communication.
HTML Structure: The Foundation
First, let’s lay down the basic bones of our project. Our HTML will be simple yet effective. It holds a spot for our quote, an author, and a button to get new quotes. This is where all our content will live. It’s the canvas for our creation. We’ll set up clear div elements. Each will serve a specific purpose. This structure makes our JavaScript easier to manage. You will find it very intuitive.
index.html
<!DOCTYPE html>
<html lang="en">
<head>
    <meta charset="UTF-8">
    <meta name="viewport" content="width=device-width, initial-scale=1.0">
    <title>JavaScript Fetch API Tutorial</title>
    <link rel="stylesheet" href="styles.css">
</head>
<body>
    <header class="header">
        <h1>JavaScript Fetch API Tutorial</h1>
        <p>Learn how to make asynchronous HTTP requests using Fetch API.</p>
    </header>

    <main class="container">
        <section class="fetch-section">
            <h2>Fetch Data with GET</h2>
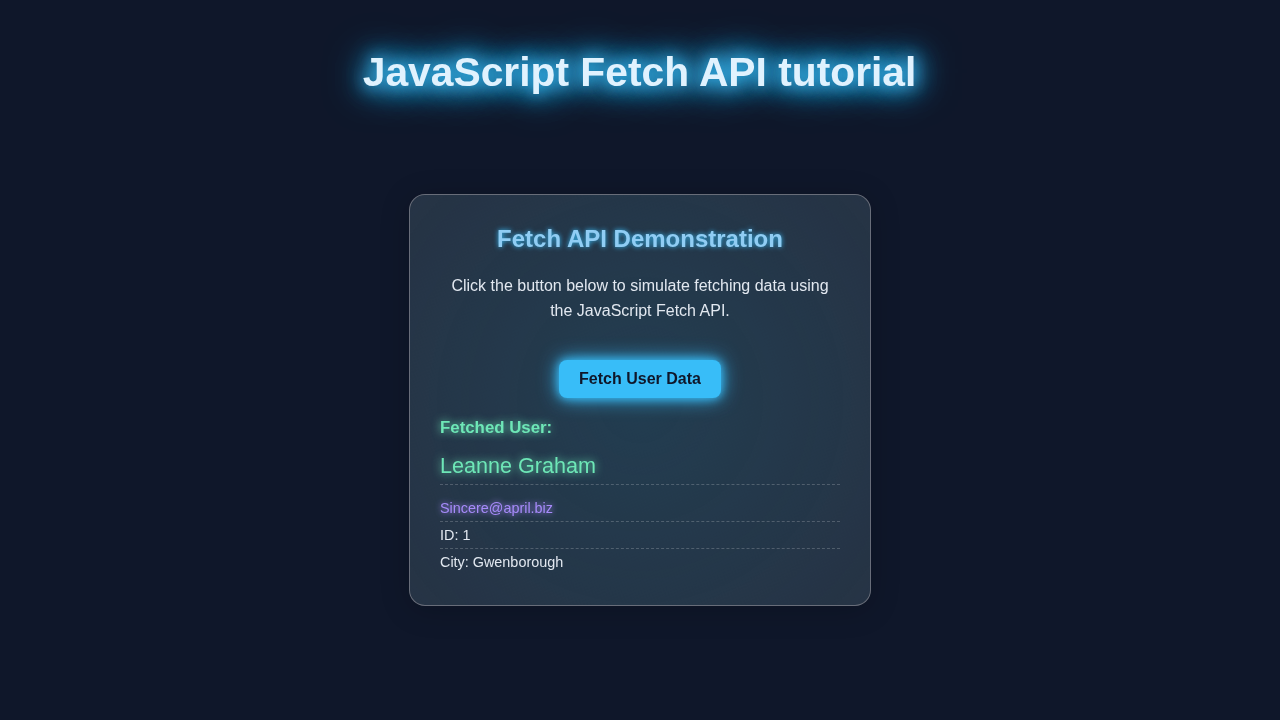
            <p>Click the button to fetch a list of users from a public API (JSONPlaceholder).</p>
            <button id="fetchUsersBtn" class="btn">Fetch Users</button>
            <div id="loadingIndicator" class="loading-indicator">Loading users...</div>
            <div id="errorDisplay" class="error-display"></div>
            <div id="usersContainer" class="data-container">
                <!-- User data will be inserted here -->
            </div>
        </section>

        <section class="post-section">
            <h2>Send Data with POST</h2>
            <p>Demonstrates sending data to an API using a POST request.</p>
            <form id="postForm" class="post-form">
                <input type="text" id="postTitle" placeholder="Post Title" required>
                <textarea id="postBody" placeholder="Post Body" required></textarea>
                <button type="submit" class="btn">Create Post</button>
            </form>
            <div id="postResponse" class="data-container">
                <!-- POST response will be inserted here -->
            </div>
        </section>

        <section class="error-handling-section">
            <h2>Error Handling Example</h2>
            <p>Click to fetch from a non-existent URL and observe error handling.</p>
            <button id="fetchErrorBtn" class="btn">Trigger Error</button>
            <div id="errorHandlingDisplay" class="error-display"></div>
        </section>
    </main>

    <script src="script.js" defer></script>
</body>
</html>
CSS Styling: Making It Look Great
Now, let’s add some flair! Our CSS will transform a plain page into something visually appealing. We’ll make our quote box stand out. Also, we’ll design our button to be inviting and clickable. Good styling makes a big difference to user experience. We will use modern CSS properties. This ensures our generator looks sleek. Furthermore, it will be responsive. You’ll be proud of the design.
styles.css
/* Universal box-sizing for consistent layout */
*, *::before, *::after {
    box-sizing: border-box;
}

body {
    font-family: Arial, Helvetica, sans-serif; /* Safe font stack */
    margin: 0;
    padding: 0;
    background-color: #1a202c; /* Dark background */
    color: #e2e8f0; /* Light text color */
    line-height: 1.6;
    display: flex;
    flex-direction: column;
    min-height: 100vh;
}

.header {
    background-color: #2d3748; /* Slightly lighter dark header */
    color: #edf2f7;
    padding: 20px;
    text-align: center;
    box-shadow: 0 2px 4px rgba(0, 0, 0, 0.2);
}

.header h1 {
    margin: 0 0 10px 0;
    font-size: 2.5em;
}

.header p {
    font-size: 1.1em;
    opacity: 0.8;
}

.container {
    max-width: 1000px;
    width: 100%; /* Ensure it takes full width up to max-width */
    margin: 20px auto;
    padding: 0 20px;
    display: grid;
    grid-template-columns: 1fr;
    gap: 30px;
}

@media (min-width: 768px) {
    .container {
        grid-template-columns: repeat(auto-fit, minmax(300px, 1fr));
    }
}

section {
    background-color: #2d3748; /* Section background */
    padding: 25px;
    border-radius: 8px;
    box-shadow: 0 4px 8px rgba(0, 0, 0, 0.3);
    border: 1px solid #4a5568; /* Subtle border */
    overflow: hidden; /* Important for contained elements */
}

section h2 {
    color: #90cdf4; /* Accent color for headings */
    margin-top: 0;
    border-bottom: 1px solid #4a5568;
    padding-bottom: 10px;
    margin-bottom: 20px;
}

.btn {
    display: inline-block;
    background-color: #4299e1; /* Blue button */
    color: white;
    padding: 10px 20px;
    border: none;
    border-radius: 5px;
    cursor: pointer;
    font-size: 1em;
    transition: background-color 0.3s ease, transform 0.2s ease;
    margin-top: 15px;
}

.btn:hover {
    background-color: #3182ce;
    transform: translateY(-2px);
}

.loading-indicator {
    color: #63b3ed; /* Light blue */
    font-style: italic;
    margin-top: 15px;
    display: none; /* Hidden by default */
}

.error-display {
    color: #fc8181; /* Red for errors */
    font-weight: bold;
    margin-top: 15px;
    padding: 10px;
    background-color: #fed7d71a; /* Very light red background */
    border-left: 4px solid #fc8181;
    display: none; /* Hidden by default */
}

.data-container {
    margin-top: 20px;
    background-color: #1a202c; /* Inner dark background */
    padding: 15px;
    border-radius: 5px;
    border: 1px solid #4a5568;
    max-height: 400px; /* Limit height for scrollability */
    overflow-y: auto; /* Enable scrolling for long content */
    -webkit-overflow-scrolling: touch; /* Smooth scrolling on iOS */
}

.data-container h3 {
    color: #63b3ed;
    margin-top: 0;
    padding-bottom: 5px;
    border-bottom: 1px dashed #4a5568;
}

.user-card, .post-response-item {
    background-color: #2d3748;
    padding: 15px;
    margin-bottom: 10px;
    border-radius: 5px;
    border: 1px solid #4a5568;
    transition: transform 0.2s ease;
}

.user-card:hover, .post-response-item:hover {
    transform: translateY(-3px);
}

.user-card p, .post-response-item p {
    margin: 5px 0;
}

.user-card strong {
    color: #68d391; /* Green accent for important info */
}

.post-form {
    display: flex;
    flex-direction: column;
    gap: 10px;
    margin-top: 15px;
}

.post-form input[type="text"],
.post-form textarea {
    padding: 10px;
    border: 1px solid #4a5568;
    border-radius: 5px;
    background-color: #4a5568;
    color: #edf2f7;
    font-size: 1em;
    width: 100%; /* Ensure inputs take full width */
}

.post-form input[type="text"]::placeholder,
.post-form textarea::placeholder {
    color: #a0aec0;
}

.post-form textarea {
    min-height: 100px;
    resize: vertical; /* Allow vertical resizing */
}

.post-response-item strong {
    color: #a78bfa; /* Purple accent for POST data */
}

/* Scrollbar styles for data-container */
.data-container::-webkit-scrollbar {
    width: 8px;
}

.data-container::-webkit-scrollbar-track {
    background: #2d3748;
    border-radius: 10px;
}

.data-container::-webkit-scrollbar-thumb {
    background-color: #4a5568;
    border-radius: 10px;
    border: 2px solid #2d3748;
}

.data-container::-webkit-scrollbar-thumb:hover {
    background-color: #63b3ed;
}
JavaScript: Making Dynamic Calls with the Fetch API
Here’s the cool part! Our JavaScript is where the magic truly happens. We’ll use the JavaScript Fetch API to grab quotes from an external source. Then, we’ll update our HTML dynamically. This is where your page becomes truly interactive. It’s an exciting process to watch unfold. We will write clear, concise functions. These functions will handle fetching and displaying data. You will master asynchronous operations here.
script.js
document.addEventListener('DOMContentLoaded', () => {
    // DOM elements
    const fetchUsersBtn = document.getElementById('fetchUsersBtn');
    const usersContainer = document.getElementById('usersContainer');
    const loadingIndicator = document.getElementById('loadingIndicator');
    const errorDisplay = document.getElementById('errorDisplay');

    const postForm = document.getElementById('postForm');
    const postTitleInput = document.getElementById('postTitle');
    const postBodyInput = document.getElementById('postBody');
    const postResponse = document.getElementById('postResponse');

    const fetchErrorBtn = document.getElementById('fetchErrorBtn');
    const errorHandlingDisplay = document.getElementById('errorHandlingDisplay');

    // --- Helper functions for UI updates ---

    /**
     * Shows a loading indicator.
     * @param {HTMLElement} indicatorElement - The loading indicator div.
     */
    function showLoading(indicatorElement) {
        indicatorElement.style.display = 'block';
    }

    /**
     * Hides a loading indicator.
     * @param {HTMLElement} indicatorElement - The loading indicator div.
     */
    function hideLoading(indicatorElement) {
        indicatorElement.style.display = 'none';
    }

    /**
     * Displays an error message.
     * @param {HTMLElement} displayElement - The element to display the error in.
     * @param {string} message - The error message.
     */
    function displayError(displayElement, message) {
        displayElement.textContent = `Error: ${message}`;
        displayElement.style.display = 'block';
    }

    /**
     * Clears an error message.
     * @param {HTMLElement} displayElement - The element displaying the error.
     */
    function clearError(displayElement) {
        displayElement.textContent = '';
        displayElement.style.display = 'none';
    }

    /**
     * Clears content from a data container.
     * @param {HTMLElement} containerElement - The data container div.
     */
    function clearContainer(containerElement) {
        containerElement.innerHTML = '';
    }

    // --- GET Request Example ---

    fetchUsersBtn.addEventListener('click', async () => {
        clearContainer(usersContainer);
        clearError(errorDisplay);
        showLoading(loadingIndicator);

        const API_URL = 'https://jsonplaceholder.typicode.com/users';

        try {
            // 1. Initiate the fetch request
            const response = await fetch(API_URL);

            // 2. Check if the request was successful (status code 200-299)
            if (!response.ok) {
                // If not successful, throw an error with status text
                throw new Error(`HTTP error! Status: ${response.status}`);
            }

            // 3. Parse the response body as JSON
            const users = await response.json();

            // 4. Process and display the fetched data
            usersContainer.innerHTML = '<h3>Fetched Users:</h3>';
            users.forEach(user => {
                const userCard = document.createElement('div');
                userCard.classList.add('user-card');
                userCard.innerHTML = `
                    <p><strong>Name:</strong> ${user.name}</p>
                    <p><strong>Username:</strong> ${user.username}</p>
                    <p><strong>Email:</strong> ${user.email}</p>
                    <p><strong>City:</strong> ${user.address.city}</p>
                `;
                usersContainer.appendChild(userCard);
            });

        } catch (error) {
            // 5. Handle any errors that occurred during the fetch operation
            console.error('Fetch error:', error);
            displayError(errorDisplay, error.message);
        } finally {
            // 6. Always hide the loading indicator, regardless of success or failure
            hideLoading(loadingIndicator);
        }
    });

    // --- POST Request Example ---

    postForm.addEventListener('submit', async (event) => {
        event.preventDefault(); // Prevent default form submission
        clearContainer(postResponse);
        clearError(errorDisplay); // Re-using general error display for simplicity

        const title = postTitleInput.value.trim();
        const body = postBodyInput.value.trim();
        const userId = 1; // Example user ID

        if (!title || !body) {
            displayError(errorDisplay, 'Please fill in both title and body.');
            return;
        }

        const API_URL = 'https://jsonplaceholder.typicode.com/posts';

        try {
            showLoading(loadingIndicator); // Can re-use, or create specific loading for post
            const response = await fetch(API_URL, {
                method: 'POST', // Specify the HTTP method
                headers: {
                    'Content-Type': 'application/json', // Indicate sending JSON data
                },
                body: JSON.stringify({ // Convert JavaScript object to JSON string
                    title: title,
                    body: body,
                    userId: userId,
                }),
            });

            if (!response.ok) {
                throw new Error(`HTTP error! Status: ${response.status}`);
            }

            const newPost = await response.json(); // Parse the response

            postResponse.innerHTML = '<h3>Created Post:</h3>';
            const postItem = document.createElement('div');
            postItem.classList.add('post-response-item');
            postItem.innerHTML = `
                <p><strong>ID:</strong> ${newPost.id}</p>
                <p><strong>Title:</strong> ${newPost.title}</p>
                <p><strong>Body:</strong> ${newPost.body}</p>
                <p><strong>User ID:</strong> ${newPost.userId}</p>
            `;
            postResponse.appendChild(postItem);

            // Clear the form fields
            postTitleInput.value = '';
            postBodyInput.value = '';

        } catch (error) {
            console.error('POST error:', error);
            displayError(errorDisplay, error.message);
        } finally {
            hideLoading(loadingIndicator);
        }
    });

    // --- Error Handling Example ---

    fetchErrorBtn.addEventListener('click', async () => {
        clearError(errorHandlingDisplay);
        // This URL intentionally points to a non-existent endpoint to trigger an error
        const NON_EXISTENT_URL = 'https://jsonplaceholder.typicode.com/nonexistent-resource';

        try {
            showLoading(loadingIndicator); // Using main loading for simplicity
            const response = await fetch(NON_EXISTENT_URL);

            // Fetch API does NOT throw an error for 404/500 responses.
            // You must manually check `response.ok` or `response.status` to detect HTTP errors.
            if (!response.ok) {
                // If the response is not ok, we can get more details from the response
                // For example, try to parse error JSON if the API sends it, otherwise just text
                let errorDetails = `Status: ${response.status} (${response.statusText})`;
                try {
                    const errorJson = await response.json();
                    errorDetails += `\nMessage: ${errorJson.message || JSON.stringify(errorJson)}`;
                } catch (parseError) {
                    const errorText = await response.text();
                    errorDetails += `\nResponse Body: ${errorText.substring(0, 100)}...`;
                }
                throw new Error(`Failed to fetch resource. ${errorDetails}`);
            }

            // This part won't be reached if response.ok is false for a true error
            const data = await response.json();
            console.log('Successfully fetched (unexpectedly):', data);
            errorHandlingDisplay.textContent = 'Unexpected success for an error URL!';

        } catch (error) {
            // This catches network errors (e.g., disconnected internet, CORS issues)
            // AND errors explicitly thrown by us (e.g., from !response.ok check)
            console.error('Caught error during fetch:', error);
            displayError(errorHandlingDisplay, error.message);
        } finally {
            hideLoading(loadingIndicator);
        }
    });
});
How It All Works Together: A Step-by-Step Guide
You’ve seen the code, but let me explain what’s happening here. We’ve built a solid foundation. Now, let’s connect the dots. We’ll explore how HTML, CSS, and JavaScript cooperate perfectly. This is the essence of web development. You’ll see the power of combining these technologies. Each piece plays a vital role. Understanding their interaction is key. Let’s break it down.
Setting Up Our HTML Elements
First, our HTML provides containers for the quote and its author. We also have a button. This button is crucial. It acts as our trigger. Each element has an ID, like quote-display or new-quote-btn. These IDs allow JavaScript to find and manipulate them easily. Think of them as unique labels. Therefore, our JavaScript knows exactly what to update. The HTML gives our page its structure. It defines where content will appear. This simple setup is very effective. Moreover, it is easy to understand. You’ve got this!
Styling with CSS for Impact
Next, our CSS adds visual appeal. We use Flexbox to center everything nicely. This creates a clean layout. We also style the quote text, the author’s name, and the button. The button gets a nice hover effect. This makes it more interactive. Good design keeps users engaged. Find more CSS tips at CSS-Tricks Flexbox Guide. It is a wonderful resource. We ensure readability with proper font sizes. We also use contrasting colors. A visually appealing interface enhances the user experience. You’ll notice the difference immediately.
Pro Tip: Always think about user experience when styling. A beautiful, easy-to-use interface makes your project shine!
Deep Dive: Understanding the JavaScript Fetch API
This section is crucial for truly understanding our dynamic project. The fetchData function is called when the page loads initially. It’s also called every time you click the “New Quote” button. This function orchestrates our API interaction. It makes our application feel alive.
Making the Fetch Request
Inside our fetchData function, we use the powerful fetch() method. The fetch() method starts a request to a network resource. It returns a Promise. This Promise resolves to the Response to that request. It’s a modern, straightforward way to make HTTP requests. Learn more about the Fetch API on MDN. It truly simplifies asynchronous data handling. We point it to our chosen quote API endpoint. This action initiates the data retrieval process. Consequently, our application requests fresh data.
Processing the Response and Handling Errors
Once the fetch() call is made, and a response is received, we must process it. We use .then(response => response.json()) to parse the response as JSON. This converts the raw network data into a usable JavaScript object. It’s a critical step. Then, we handle any potential errors with .catch(error => console.error('Error fetching quote:', error)). Robust error handling is always a good practice. It prevents your app from crashing gracefully. Furthermore, it improves user experience. Finally, the successfully received quote data updates our HTML elements. This entire process happens asynchronously. It means your page remains responsive and smooth. You’re now a master of fetching data!
Updating the UI Dynamically
Once we have our quote object, we access its properties. We find the quote text and the author’s name. Then, we target our HTML elements using their IDs. We use element.textContent = data.quote (or similar). This dynamically injects the new quote and author into our page. It’s instant and seamless. This is how you make a truly interactive web app. Moreover, it creates a great user experience. This final step brings everything together. Your UI refreshes without a full page reload. This is a hallmark of modern web applications. You’re building something impressive!
Encouragement: Don’t be afraid to experiment! Change colors, fonts, or even the API. Learning by doing is the best way to grow your skills.
Tips to Customise It
You’ve built a functional quote generator. That’s awesome! Now, let’s make it truly yours. Here are some ideas to take your project further:
- Add Social Share Buttons: Allow users to share their favorite quotes on Twitter or Facebook. You could dynamically generate the share link! This adds great user engagement.
- Implement a Loading State: Show a “Loading…” message while the quote is being fetched. This improves user feedback. It tells users something is happening.
- Create a “Favorite” Feature: Use
localStorageto save favorite quotes. You could build a simple list of saved quotes. This makes your app more personalized. - Explore Different APIs: Try fetching jokes, facts, or even images! The world of APIs is vast. This will expand your knowledge of clean JavaScript API calls. You can always learn more!
Conclusion
You did it! You’ve successfully built a dynamic quote generator using HTML, CSS, and the powerful JavaScript Fetch API. You learned how to grab data from the internet. You also learned how to display it on your page. This skill is super valuable for any web developer. This project demonstrates real-world application of front-end skills. If you enjoyed this, you might also like building a React User Registration Form with JSX or diving into a React Quiz App with JSX. Keep building, keep learning, and don’t forget to share your amazing creation! You are on your way to becoming a pro!