Hey there, awesome coder! If you’ve been wanting to build a robust user registration form with React Hooks but weren’t sure where to start, you are absolutely in the right place. Today, we’re diving deep into creating a dynamic React Registration form. It comes complete with real-time validation and a fantastic user experience. Get ready to level up your React skills!
What We Are Building: A Responsive Registration Hub
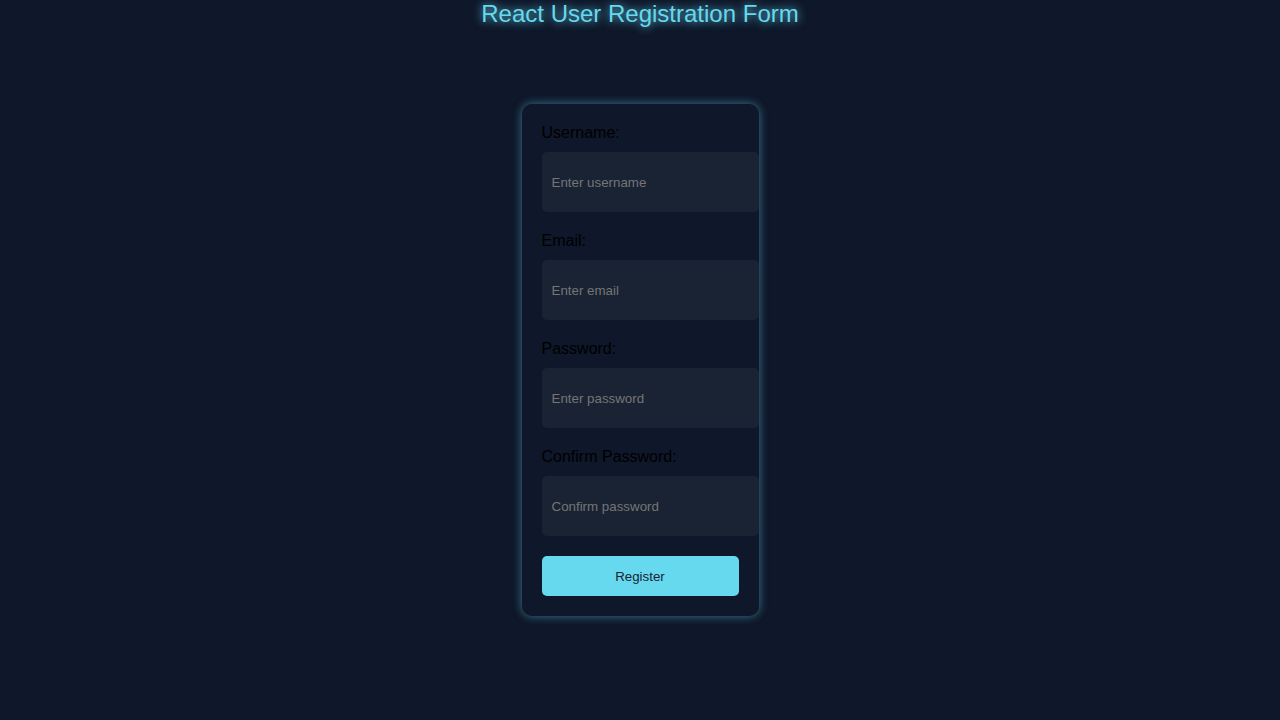
We are going to build a sleek, functional user registration form. This form isn’t just static; it gives instant feedback to users. Imagine a form that tells you right away if your password is too short or if your email is invalid. That’s what we’ll create! We’ll use React’s power to manage state and handle user inputs smoothly. Plus, it will look great on any device. This project is super useful for almost any web application you might build in the future!
The Essential HTML Structure for Our React Component
Even though we’re using React, a solid HTML foundation is key. Our JSX will define the structure of our form elements. It will include input fields for username, email, and password. This structure forms the backbone of our registration component. You’ll see how familiar HTML elements integrate seamlessly into React.
index.html
<!DOCTYPE html><html lang='en'><head><meta charset='UTF-8'><meta name='viewport' content='width=device-width, initial-scale=1.0'><title>React User Registration Form</title><link rel='stylesheet' href='styles.css'></head><body><div class='container'><div class='banner'>React User Registration Form</div><div class='form-container'><div class='form-field'><label for='username'>Username:</label><input type='text' id='username' placeholder='Enter username'></div><div class='form-field'><label for='email'>Email:</label><input type='email' id='email' placeholder='Enter email'></div><div class='form-field'><label for='password'>Password:</label><input type='password' id='password' placeholder='Enter password'></div><div class='form-field'><label for='confirm-password'>Confirm Password:</label><input type='password' id='confirm-password' placeholder='Confirm password'></div><button class='submit-button'>Register</button></div></div><script src='script.js'></script></body></html>Bringing It To Life With CSS Styling
Once our structure is in place, we need to make it shine! We’ll add some clean, modern CSS to our form. This styling will ensure our registration form is not only functional but also visually appealing. We want a great user experience, after all. These styles will also make our validation messages stand out clearly. So, let’s get styling!
styles.css
body{background-color: #0f172a; margin:0; overflow:hidden; font-family: Arial, sans-serif;} .container{display: flex; justify-content: center; align-items: center; height: 100vh;}.banner{position: absolute; top: 0; left: 0; width: 100%; text-align: center; font-size: 24px; color: #66d9ef; text-shadow: 0 0 10px #66d9ef;} .form-container{background: rgba(15, 23, 42, 0.5); border-radius: 10px; padding: 20px; box-shadow: 0 0 10px rgba(102, 217, 239, 0.5);}.form-field{margin-bottom: 20px;}.form-field label{display: block; margin-bottom: 10px;}.form-field input{width: 100%; height: 40px; padding: 10px; border: none; border-radius: 5px; background-color: #1a2333; color: #fff;}.form-field input:focus{outline: none; box-shadow: 0 0 10px #66d9ef;}.submit-button{width: 100%; height: 40px; padding: 10px; border: none; border-radius: 5px; background-color: #66d9ef; color: #1a2333; cursor: pointer;}.submit-button:hover{background-color: #4db8e8;}The Brains: Our React JavaScript Component
Here’s the cool part! We’ll use React’s functional components and Hooks to manage our form’s state and logic. Think useState for managing input values and validation errors. We will also handle form submissions and update our UI dynamically. This is where the magic of “React Registration” truly happens. Let’s make this form intelligent and responsive!
script.js
import React from 'react';import ReactDOM from 'react-dom';const App = () => {const handleSubmit = (e) => {e.preventDefault();const username = document.getElementById('username').value;const email = document.getElementById('email').value;const password = document.getElementById('password').value;const confirmPassword = document.getElementById('confirm-password').value;console.log(username, email, password, confirmPassword);};return (<div className='container'><div className='banner'>React User Registration Form</div><div className='form-container'><div className='form-field'><label htmlFor='username'>Username:</label><input type='text' id='username' placeholder='Enter username' /></div><div className='form-field'><label htmlFor='email'>Email:</label><input type='email' id='email' placeholder='Enter email' /></div><div className='form-field'><label htmlFor='password'>Password:</label><input type='password' id='password' placeholder='Enter password' /></div><div className='form-field'><label htmlFor='confirm-password'>Confirm Password:</label><input type='password' id='confirm-password' placeholder='Confirm password' /></div><button className='submit-button' onClick={handleSubmit}>Register</button></div></div>);};ReactDOM.render(<App />, document.getElementById('root'));How It All Works Together: Dynamic React Registration with Validation
Now, let’s break down the different pieces. You’ve got the HTML structure and the CSS styling. The JavaScript component is the conductor of this orchestra. It manages user interactions, updates the form’s state, and provides instant feedback. This is truly where our dynamic form comes alive. We’re creating a robust, interactive experience.
Setting Up Our Form’s State with useState
First, we need to store our form’s data. For this, we use the useState Hook from React. We’ll have separate state variables for each input field. Think username, email, and password. Each piece of data lives in its own state. We also need state for tracking validation errors. This allows us to show messages like “Email is required” right next to the input. We initialize these error states as empty objects or strings. Finally, we’ll have an isSubmitted state. This helps us know when the user has actually tried to submit the form. It’s crucial for preventing error messages from appearing too early. Setting up state correctly is the foundation of any dynamic React component. It’s how our form remembers what the user has typed.
Pro Tip: Using an object for form data state (e.g.,
formData: { username: '', email: '' }) can often simplify things for larger forms. However, separate states are sometimes clearer for beginners. Pick what feels most intuitive for your current project!
Handling User Input Changes with onChange
Every time a user types into an input field, we need to capture that value. We do this with an onChange event handler. This function will update the corresponding state variable using its setter function. For example, typing in the username field immediately updates the username state. This keeps our form data in perfect sync with the UI. Furthermore, updating the state allows us to run validation checks in real-time. This immediate feedback is a cornerstone of great user experience. It guides users as they fill out the form. Remember our earlier React Quiz App Tutorial: Functional Components & Hooks? Similar concepts apply here for handling user interactions and input changes seamlessly across components!
Implementing Real-time Validation
Validation is absolutely crucial for any user registration form. We want to guide users to enter valid data effortlessly. Our validation logic runs as the user types, thanks to our onChange handlers. If the username is too short, an error message appears instantly below the field. If the email format is incorrect, another clear message pops up. This immediate, helpful feedback prevents user frustration. It guides users towards successful registration without them having to guess. We’ll create a dedicated function, perhaps validateInput, to check each field’s specific rules. This function runs on every onChange event for immediate feedback. It also runs a comprehensive check when the form is submitted. This dual approach ensures thorough and comprehensive error handling, making your form truly robust. You can explore more about input validation best practices and HTML5 attributes on MDN Web Docs for deeper insights.
Submitting the Form: The handleSubmit Function
When the user confidently clicks the “Register” button, our handleSubmit function springs into action. First, and very importantly, it calls event.preventDefault(). This stops the default browser form submission behavior, which would refresh the page. Then, handleSubmit runs all our validation checks one last time. It ensures all fields meet the requirements before proceeding. If there are any validation errors, it immediately stops the submission process. It displays those errors clearly to the user, telling them exactly what needs fixing. If everything is perfectly valid, we can then simulate a successful registration. In a real application, you would typically send this collected data to a backend server using an API call. For this tutorial, a simple success message using alert or rendering a success component is perfect. Afterwards, we can also reset the form fields. This readies the form for another entry. We’re also mindful to avoid common React Performance Mistakes: Optimize Your Apps by ensuring our form logic is efficient and doesn’t trigger unnecessary re-renders during this process!
Displaying Success Messages and Errors
Feedback is essential. After a successful submission, we show a friendly message. For errors, we display specific messages next to the problematic input fields. This clarity helps users correct their input. We use conditional rendering in React to show or hide these messages. For example, an error message only appears if the errors.email state has a value. This keeps our UI clean and responsive. It’s all about making the user’s journey as smooth as possible.
Heads Up! Pay close attention to how you manage the
isSubmittedstate. It helps prevent showing error messages before a user has even tried to submit the form. This little detail makes a big difference in user experience!
Tips to Customise Your React Registration Form
You’ve built a fantastic foundation with your dynamic React registration form. Now, let’s unlock its full potential and make it truly yours! Here are some exciting ideas to extend and personalise your project:
- Add a “Confirm Password” Field: This is a common and important security feature. You’d add another
useStatevariable to manage its value. Then, you’d integrate specific validation logic to ensure it exactly matches the main password field before submission. - Integrate with a Backend API: Instead of just
alerting success, this is your next big step! Send the collected form data to a server. You could use JavaScript’s built-infetchAPI or a popular library likeaxiosfor this. It’s how real-world applications connect! - Implement a Password Strength Meter: Give users immediate, visual feedback on their password’s strength. This can be a fun challenge to build yourself, perhaps using a color-coded bar, or you could explore existing libraries that offer this functionality. It greatly enhances user experience.
- Add More Input Types: Think beyond basic text fields! Expand your form with fields like “Date of Birth” using an HTML5 date picker. Or perhaps a dropdown (
<select>) for country selection, enhancing the user profile. You can even check out how we handled various inputs and dynamic choices in our React Quiz App with JSX for further inspiration on different input elements.
Conclusion: You Just Built a Dynamic React Registration Form!
Wow, you did it! You just built a fully functional, dynamic user registration form using React Hooks. You’ve mastered state management, real-time validation, and form submission. This is a huge step in your web development journey. You now have a powerful tool in your React toolkit. Go ahead, play with it, break it, fix it, and make it better. Show off your amazing new project! We’re so proud of what you’ve accomplished today. Keep coding, keep learning, and keep creating awesome stuff!