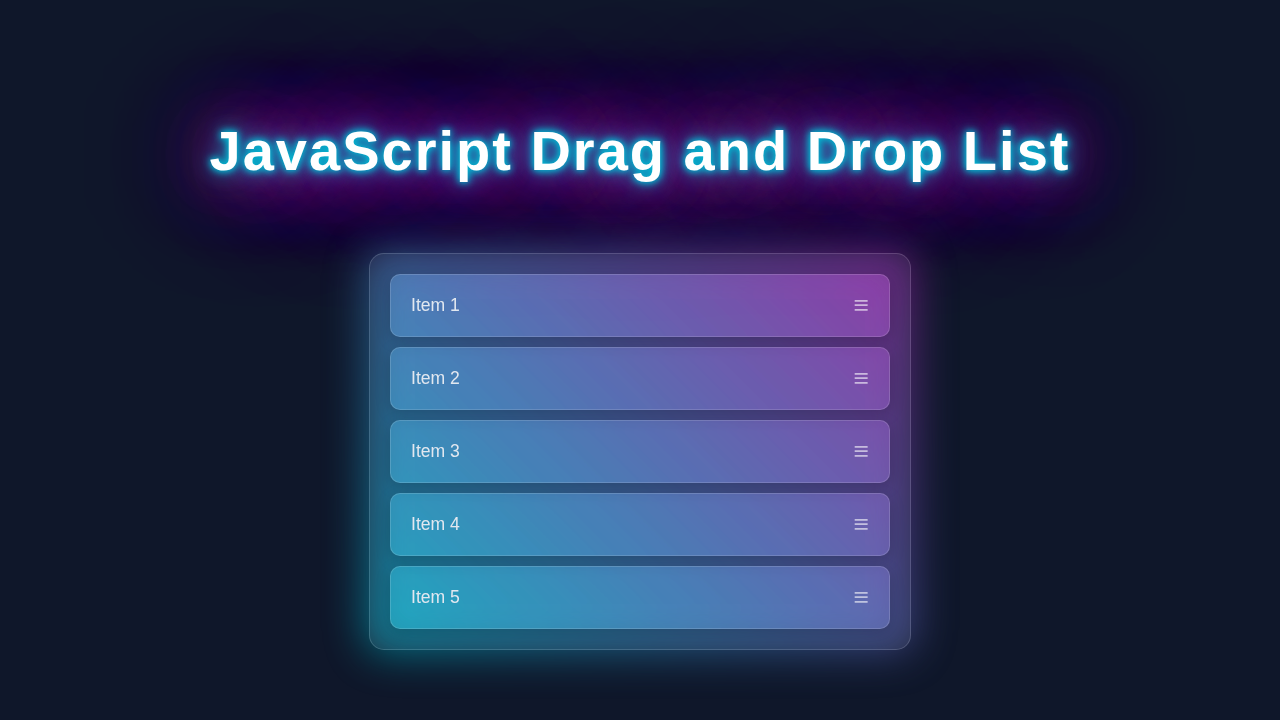
Hey there, fellow coders! If you’ve wanted to build a cool interactive feature but weren’t sure where to begin, you’re in the perfect spot. Today, we’re diving into how to build a JavaScript Drag Drop List. It’s a fantastic skill for any web developer. We will create a list where you can click, drag, and reorder items easily. This is super useful for task managers or custom dashboards. Get ready to add some amazing interactivity to your projects!
What We Are Building
We are going to build a sleek and functional reorderable list. Imagine a list of your favorite fruits or tasks. You can grab any item with your mouse. Then, you can drag it to a new position. The other items will elegantly shift to make space. This creates a smooth user experience. This kind of functionality makes your web apps feel polished and professional. It’s also incredibly fun to build!
HTML Structure
First, let’s lay down the basic foundation for our list. We need a simple div to hold everything. Inside that, we’ll use an ul (unordered list). Each list item li will be our individual draggable element. We’ll add some crucial attributes to these elements. These attributes will tell the browser they are indeed draggable.
index.html
<!DOCTYPE html>
<html lang="en">
<head>
    <meta charset="UTF-8">
    <meta name="viewport" content="width=device-width, initial-scale=1.0">
    <title>Drag and Drop List</title>
    <link rel="stylesheet" href="styles.css">
</head>
<body>
    <div class="container">
        <h1>My Draggable List</h1>
        <ul id="draggable-list">
            <li class="list-item" draggable="true">
                <span>Task 1: Learn HTML</span>
                <span class="handle">≡</span>
            </li>
            <li class="list-item" draggable="true">
                <span>Task 2: Master CSS</span>
                <span class="handle">≡</span>
            </li>
            <li class="list-item" draggable="true">
                <span>Task 3: Practice JavaScript</span>
                <span class="handle">≡</span>
            </li>
            <li class="list-item" draggable="true">
                <span>Task 4: Build Projects</span>
                <span class="handle">≡</span>
            </li>
            <li class="list-item" draggable="true">
                <span>Task 5: Deploy to Web</span>
                <span class="handle">≡</span>
            </li>
        </ul>
    </div>

    <script src="script.js" defer></script>
</body>
</html>
CSS Styling
Now, let’s make our list look good and provide visual cues. We’ll add styles for the main container and the individual list items. Moreover, we’ll create a special style for when an item is actually being dragged. This gives immediate visual feedback to the user. It makes the drag-and-drop experience intuitive and clear. Styling is absolutely key to a great user interface.
styles.css
/* Global Styles */
body {
    font-family: 'Arial', 'Helvetica', sans-serif; /* Safe fonts */
    margin: 0;
    padding: 0;
    background-color: #f0f2f5;
    display: flex;
    justify-content: center;
    align-items: center;
    min-height: 100vh;
    color: #333;
    box-sizing: border-box; /* Include padding and border in the element's total width and height */
}

.container {
    background-color: #ffffff;
    border-radius: 10px;
    box-shadow: 0 4px 20px rgba(0, 0, 0, 0.1);
    padding: 30px;
    max-width: 500px; /* Ensure component doesn't get too wide */
    width: 100%; /* Occupy full width within max-width */
    box-sizing: border-box;
}

h1 {
    text-align: center;
    color: #333;
    margin-bottom: 25px;
    font-size: 1.8em;
}

/* Draggable List Styles */
#draggable-list {
    list-style: none;
    padding: 0;
    margin: 0;
}

.list-item {
    background-color: #ffffff;
    border: 1px solid #e0e0e0;
    border-radius: 8px;
    padding: 15px 20px;
    margin-bottom: 10px;
    display: flex;
    justify-content: space-between;
    align-items: center;
    cursor: grab;
    transition: background-color 0.2s ease-in-out, transform 0.2s ease-in-out, box-shadow 0.2s ease-in-out;
    box-shadow: 0 2px 5px rgba(0, 0, 0, 0.05);
}

.list-item:last-child {
    margin-bottom: 0;
}

.list-item:hover {
    background-color: #f9f9f9;
    transform: translateY(-2px);
    box-shadow: 0 4px 10px rgba(0, 0, 0, 0.08);
}

/* Styling for the item being dragged */
.list-item.dragging {
    opacity: 0.6;
    transform: scale(0.98);
    background-color: #e0f7fa; /* Light blue background for visual cue */
    border-color: #00bcd4;
    box-shadow: 0 5px 15px rgba(0, 188, 212, 0.3);
    cursor: grabbing;
}

/* Optional handle for better UX */
.handle {
    font-size: 1.5em;
    color: #a0a0a0;
    cursor: grab;
    line-height: 1;
    margin-left: 15px;
}

.list-item.dragging .handle {
    color: #00bcd4;
}
JavaScript Drag Drop List Logic
Here’s the cool part! We’ll use vanilla JavaScript Drag Drop List logic to bring this entire feature to life. We will listen for several specific drag events. These events help us track when an item starts dragging, moves over other items, and finally drops into place. Don’t worry, we’ll break down each step clearly and concisely.
script.js
// Get references to the list container and all draggable items
const draggableList = document.getElementById('draggable-list');
const listItems = document.querySelectorAll('.list-item');

let draggedItem = null; // Stores the item currently being dragged

// Add event listeners to each list item
listItems.forEach(item => {
    // When dragging starts on an item
    item.addEventListener('dragstart', () => {
        draggedItem = item;
        // Add 'dragging' class for visual feedback (e.g., opacity change).
        // setTimeout with 0ms delay ensures the class is added before the browser captures the drag image.
        setTimeout(() => item.classList.add('dragging'), 0);
    });

    // When dragging ends on an item (e.g., mouse button released)
    item.addEventListener('dragend', () => {
        if (draggedItem) {
            draggedItem.classList.remove('dragging');
            draggedItem = null;
        }
    });
});

// Add event listener to the list container for handling drag over events
draggableList.addEventListener('dragover', (e) => {
    e.preventDefault(); // Prevent default to allow dropping elements

    if (!draggedItem) return; // If no item is being dragged, do nothing

    // Find the element that the dragged item should be placed after
    const afterElement = getDragAfterElement(draggableList, e.clientY);

    // If 'afterElement' is null, it means the dragged item should be appended to the end of the list
    if (afterElement == null) {
        draggableList.appendChild(draggedItem);
    } else {
        // Otherwise, insert the dragged item before the determined 'afterElement'
        draggableList.insertBefore(draggedItem, afterElement);
    }
});

/**
 * Determines which existing list item the currently dragged item should be placed before.
 * This function calculates the target insertion point based on the mouse cursor's Y position.
 *
 * @param {HTMLElement} container - The parent container (UL) of the draggable items.
 * @param {number} y - The Y-coordinate (vertical position) of the mouse cursor.
 * @returns {HTMLElement|null} The HTML element to insert before, or null if the item should be appended.
 */
function getDragAfterElement(container, y) {
    // Get all immediate children of the container that are NOT the currently dragged item
    const draggableElements = [...container.querySelectorAll('.list-item:not(.dragging)')];

    // Use reduce to find the closest element to the mouse cursor
    return draggableElements.reduce((closest, child) => {
        const box = child.getBoundingClientRect(); // Get the size and position of the child element
        // Calculate the vertical offset from the child's center to the mouse cursor
        const offset = y - box.top - box.height / 2;

        // If the mouse cursor is above the center of this child element (offset < 0)
        // AND this child is closer to the cursor than any previously found 'closest' element
        if (offset < 0 && offset > closest.offset) {
            // This child is a potential insertion point
            return { offset: offset, element: child };
        } else {
            // Keep the current closest element
            return closest;
        }
    }, { offset: Number.NEGATIVE_INFINITY }).element; // Initialize 'closest' with an impossible offset
}

// Note: For this real-time reordering approach, a 'drop' event listener
// on the container is not strictly necessary as 'dragover' handles the DOM updates.
How It All Works Together
Setting Up Drag Events
Our journey begins by identifying all of our draggable items. We grab all li elements using querySelectorAll. This gives us a collection of every list item on the page. For each list item, we attach several important event listeners. The draggable="true" attribute in HTML is absolutely essential here. It explicitly tells the browser that this specific element can be dragged. Without it, the drag functionality simply won’t work as expected. We listen for dragstart on each item. This event fires as soon as the user begins dragging an element. When an item starts dragging, we store a reference to it. We also add a special CSS class, like dragging, to this item. This provides immediate visual feedback to the user. This visual cue helps users understand exactly what’s happening. The dataTransfer object is also super important. It holds data about the drag operation itself. We set its effectAllowed property to “move”. This signals to the browser that the item is intended to be moved, not copied. We are making sure everything is clear for the browser and the user.
Handling Drag Over and Drop
The dragover event is incredibly important for this process. It fires continuously when a draggable element is dragged over a valid drop target. We must prevent its default behavior. This is a crucial step for enabling a successful drop later on. Otherwise, the browser will not allow any drop to occur. We also listen for dragleave and dragenter. These events help us visually indicate valid drop zones to the user. For instance, we might change a background color or add a border. When an item is dragged over another list item, we need to figure out precisely where it should go. We compare the current item’s position to the drag target’s position. Specifically, we check the mouse’s Y coordinate against the target’s vertical center. This helps us decide if we need to insert the dragging item before or after the target. This logic ensures a very smooth and natural reordering experience. It feels intuitive to the user.
Pro Tip: Preventing the default behavior of
dragoveris a common pitfall. If you forget to callevent.preventDefault(), your drop event might not fire at all! Always remember this small but mighty step.
The drop event finally fires when the user releases the mouse button over a valid drop target. This is where the magic of reordering happens! Inside this event, we execute the actual reordering logic we determined earlier. First, we remove the dragging class from our active item. This removes the visual indicator. Then, we apply the insertBefore or appendChild method. These methods help us to put the dragged item in its new spot within the list. This makes the list update visually and immediately. It perfectly reflects the user’s action. This instant feedback is a core part of a good user experience. You can really dig into these browser events at MDN Web Docs on Drag and Drop. This API offers a surprising amount of power and flexibility.
Reordering the List Dynamically
Let me explain what’s happening behind the scenes for the reordering. When an item is being dragged, we constantly need to find its new home. We start by getting all the current list items that are not the one currently being dragged. This gives us a clean list of potential drop targets. We then iterate through these potential targets. We need to determine the “closest” target to where the mouse is. We use the getBoundingClientRect() method. This gives us the size and position of each item. If the dragged item is over the first half of a target item, it should logically go before it. If it’s over the second half, it makes sense for it to go after. This precise calculation provides a very natural and expected feel to the drag-and-drop. It’s all about making the user experience seamless and predictable. The querySelector('.dragging') helps us find the item that is currently active. The dropTarget.parentNode.insertBefore() method then places our item correctly.
Heads Up: Thinking about building more complex interactive UIs? Features like this often involve managing component state, especially in frameworks like React. If you ever dive into React, understanding how a component’s state changes affects its re-rendering is absolutely key to performance and predictability. Take a peek at React Re-Render Explained: Visual Guide & Neon Diagram for a deeper understanding!
Tips to Customise It
Now you have a working JavaScript Drag Drop List! How cool is that to have built something so interactive? But don’t stop here. The real fun comes from making it your own. Here are some fantastic ideas to extend or personalise your project even further:
- Add Delete Functionality: Implement a small “X” button or an icon on each list item. This would allow users to easily remove items from the list. It’s a brilliant way to practice event delegation and DOM manipulation. You could even add a confirmation dialog for extra flair.
- Save Order to Local Storage: Make the reordered list persistent across browser sessions. Use the browser’s
localStorageAPI to save the current order of items. Then, load it back when the page reloads. This creates a much more robust and user-friendly application. Your users will love that their changes stick around! - Integrate with an API: Instead of a static list, imagine fetching data from an external API. You could then empower users to reorder items that are dynamically loaded from a server. This is a very common pattern you’ll find in real-world, dynamic web applications. You could even send the new order back to the API! If you like dynamic data, you might also enjoy learning how to create an Interactive Data Table with Vanilla JS, HTML, and CSS.
- Visual Enhancements and Feedback: Add subtle animations or smooth transitions to your list items. When items shift around during a drag, make them animate elegantly. This can greatly improve the perceived quality and responsiveness of your UI. Check out CSS-Tricks for Transition Property examples for inspiration. You could also add a ghost image of the dragged item!
Conclusion
Wow! You just built a fully functional drag-and-drop reorderable list from scratch. Give yourself a huge pat on the back for that accomplishment. You bravely tackled complex browser events and mastered dynamic list manipulation. This project proudly showcases your growing ability to create engaging, interactive web interfaces. Remember, the journey to becoming a pro-coder is all about building and experimenting. This is a fantastic and practical step forward. Keep experimenting, keep coding, and definitely don’t forget to share what you’ve created with others! You’ve truly got this, and there’s so much more you can build!