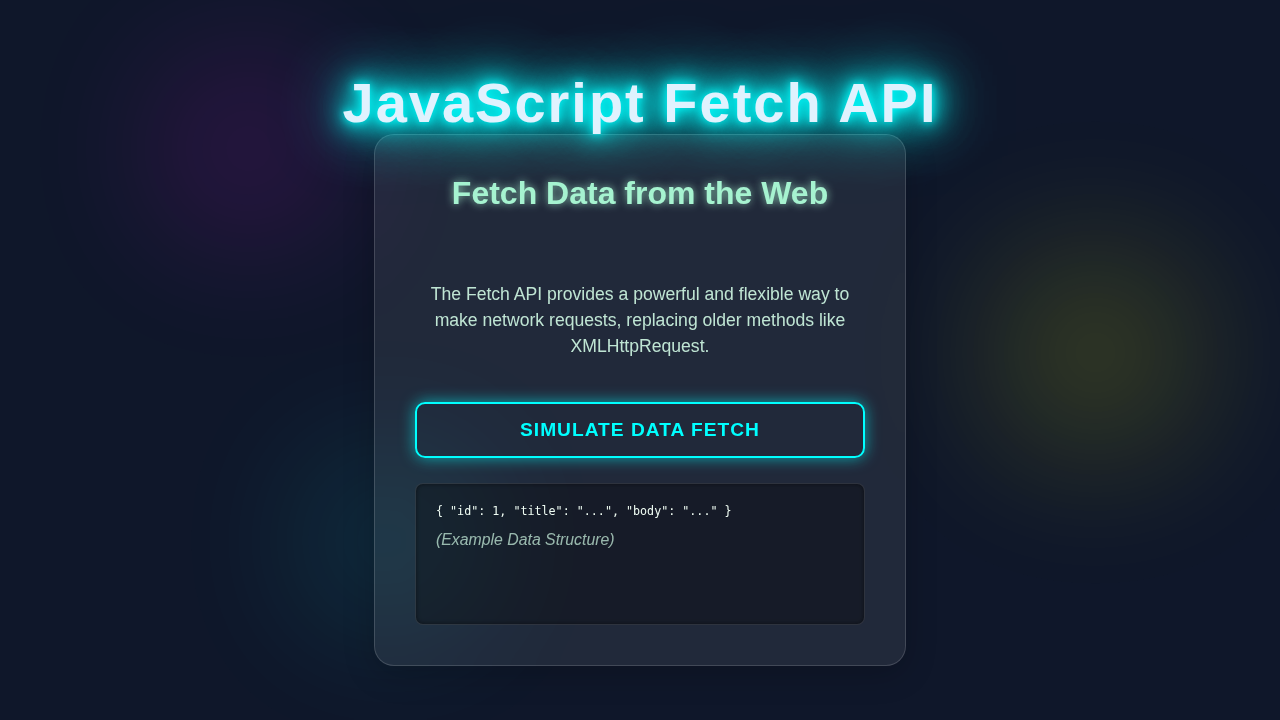
Hey there, future web wizard! If you’ve ever wanted to make your websites truly dynamic, you’re absolutely in the right place. Today, we will dive deep into the powerful JavaScript Fetch API. This amazing tool lets your website talk to other services on the internet. We’re going to build a cool little app together. It will fetch and display random user data from a public API. Get ready to bring your web projects to life!
What We Are Building: A Dynamic User Profile Card
Imagine a sleek, modern card that shows you interesting details about a random person. This isn’t just any card, though. It’s a dynamic user profile card! We will meticulously build a simple web page. It will prominently feature a button. When you enthusiastically click that button, new user data will magically appear. This fresh data comes straight from a remote server. We will carefully display the user’s name, their email address, and a charming profile picture. It’s a fantastic, hands-on way to see the Fetch API in action. Plus, you’ll learn how to present this data nicely for your users.
HTML Structure: Laying the Foundation
First, we need a solid and well-organized foundation for our project. Our HTML will be quite simple and straightforward. It will mainly set up the main container for our user card. It also includes a designated area for loading text. Finally, we’ll have a clear button to trigger our data fetch. This gives us all the necessary elements to start.
index.html
<!DOCTYPE html>
<html lang="en">
<head>
    <meta charset="UTF-8">
    <meta name="viewport" content="width=device-width, initial-scale=1.0">
    <title>JavaScript Fetch API Tutorial</title>
    <link rel="stylesheet" href="styles.css">
</head>
<body>
    <div class="container">
        <h1>JavaScript Fetch API Tutorial</h1>
        <p class="intro-text">
            Learn how to use the Fetch API to make network requests (GET and POST) and handle responses in your web applications.
            We'll fetch data from <a href="https://jsonplaceholder.typicode.com/" target="_blank" rel="noopener noreferrer">JSONPlaceholder</a>, a free fake API for testing and prototyping.
        </p>

        <div class="fetch-section">
            <div class="button-group">
                <button id="fetchGetBtn" class="action-button">Fetch GET Request</button>
                <button id="fetchPostBtn" class="action-button post-button">Fetch POST Request</button>
                <button id="clearBtn" class="action-button clear-button">Clear Output</button>
            </div>

            <div id="dataDisplay" class="data-display">
                <h2>Response Output:</h2>
                <pre id="dataContent" class="code-block">Click a button to see the data...</pre>
                <p id="errorContent" class="error-message"></p>
            </div>
        </div>
    </div>

    <script src="script.js"></script>
</body>
</html>
CSS Styling: Making It Look Great
Now, let’s make our user card look sharp, clean, and inviting. Our CSS will thoughtfully add some modern flair and style. We’ll expertly use Flexbox for easy centering of our content. We’ll also style the card itself to make it stand out. Furthermore, we’ll make the button inviting and easy to click. You can even check out how a dark mode toggle can enhance your UI/UX, similar to the Tailwind Dark Mode Toggle tutorial if you want to explore more styling concepts later!
styles.css
/* General Resets & Box Model */
*, *::before, *::after {
    box-sizing: border-box;
    margin: 0;
    padding: 0;
}

body {
    font-family: Arial, Helvetica, sans-serif;
    background-color: #1a202c; /* Dark slate background */
    color: #e2e8f0; /* Light gray text */
    line-height: 1.6;
    display: flex;
    justify-content: center;
    align-items: flex-start; /* Align to top for better tutorial flow */
    min-height: 100vh; /* Full viewport height */
    padding: 20px;
    overflow-x: hidden; /* Prevent horizontal scroll */
}

a {
    color: #63b3ed; /* Light blue link */
    text-decoration: none;
    transition: color 0.3s ease;
}

a:hover {
    color: #90cdf4; /* Lighter blue on hover */
    text-decoration: underline;
}

/* Main Container */
.container {
    background-color: #2d3748; /* Slightly lighter dark background for card */
    border-radius: 12px;
    padding: 30px;
    max-width: 900px;
    width: 100%;
    box-shadow: 0 10px 25px rgba(0, 0, 0, 0.4); /* Deeper shadow */
    border: 1px solid rgba(255, 255, 255, 0.1); /* Subtle border */
    overflow: hidden; /* Contains any overflowing content */
}

h1 {
    color: #4fd1c5; /* Teal heading */
    text-align: center;
    margin-bottom: 25px;
    font-size: 2.5em;
    letter-spacing: 0.5px;
    text-shadow: 0 0 8px rgba(79, 209, 197, 0.5); /* Subtle glow */
}

.intro-text {
    font-size: 1.1em;
    color: #cbd5e0;
    text-align: center;
    margin-bottom: 30px;
    max-width: 700px;
    margin-left: auto;
    margin-right: auto;
}

/* Fetch Section & Buttons */
.fetch-section {
    margin-top: 40px;
    padding-top: 30px;
    border-top: 1px solid rgba(255, 255, 255, 0.15);
}

.button-group {
    display: flex;
    flex-wrap: wrap; /* Allow buttons to wrap */
    gap: 15px;
    justify-content: center;
    margin-bottom: 30px;
}

.action-button {
    background-color: #4299e1; /* Blue button */
    color: white;
    padding: 12px 25px;
    border: none;
    border-radius: 8px;
    font-size: 1em;
    font-weight: bold;
    cursor: pointer;
    transition: all 0.3s ease;
    box-shadow: 0 4px 15px rgba(0, 0, 0, 0.2);
}

.action-button:hover {
    background-color: #63b3ed; /* Lighter blue on hover */
    transform: translateY(-2px);
    box-shadow: 0 6px 20px rgba(0, 0, 0, 0.3);
}

.post-button {
    background-color: #f6ad55; /* Orange for POST */
}

.post-button:hover {
    background-color: #fbd38d; /* Lighter orange */
}

.clear-button {
    background-color: #e53e3e; /* Red for clear */
}

.clear-button:hover {
    background-color: #fc8181; /* Lighter red */
}


/* Data Display Area */
.data-display {
    background-color: #232d3a; /* Darker background for code */
    border-radius: 8px;
    padding: 20px;
    min-height: 150px;
    border: 1px solid rgba(255, 255, 255, 0.1);
    box-shadow: inset 0 2px 8px rgba(0, 0, 0, 0.3);
}

.data-display h2 {
    color: #a0aec0; /* Gray heading */
    margin-bottom: 15px;
    font-size: 1.5em;
    border-bottom: 1px dashed rgba(255, 255, 255, 0.1);
    padding-bottom: 10px;
}

.code-block {
    background-color: #1a202c; /* Even darker for pre block */
    color: #a7f3d0; /* Light green for code */
    padding: 15px;
    border-radius: 6px;
    overflow-x: auto; /* Enable horizontal scroll for long lines */
    white-space: pre-wrap; /* Wrap long lines */
    word-break: break-all; /* Break words if they are too long */
    font-size: 0.9em;
    line-height: 1.4;
    max-height: 400px; /* Limit height */
    overflow-y: auto; /* Enable vertical scroll if content overflows */
    border: 1px solid rgba(79, 209, 197, 0.2); /* Subtle glow-like border */
}

.error-message {
    color: #f56565; /* Red for errors */
    background-color: #fed7d722; /* Very light red background */
    padding: 10px;
    border-radius: 5px;
    margin-top: 15px;
    border: 1px solid #f5656555;
    font-weight: bold;
    display: none; /* Hidden by default */
}

/* Responsive Adjustments */
@media (max-width: 768px) {
    h1 {
        font-size: 2em;
    }

    .container {
        padding: 20px;
    }

    .action-button {
        width: 100%; /* Full width buttons on small screens */
    }

    .button-group {
        flex-direction: column; /* Stack buttons vertically */
        align-items: center; /* Center stacked buttons */
    }
}
JavaScript (Getting Started): The Brains of Our Operation
This is where the real magic truly happens! Our JavaScript will be responsible for several key and exciting tasks. First, we will select our HTML elements. Then, we will write the essential function to fetch data from the internet. Finally, we will update the page dynamically with the new information. We’ll tie it all together with event listeners. This is precisely how we make our button interactive and responsive!
script.js
// Get DOM elements
const fetchGetBtn = document.getElementById('fetchGetBtn');
const fetchPostBtn = document.getElementById('fetchPostBtn');
const clearBtn = document.getElementById('clearBtn');
const dataContent = document.getElementById('dataContent');
const errorContent = document.getElementById('errorContent');

// Base URL for JSONPlaceholder API
const API_BASE_URL = 'https://jsonplaceholder.typicode.com';

/**
 * Displays data in the pre tag.
 * @param {Object|string} data - The data to display.
 */
function displayData(data) {
    errorContent.style.display = 'none'; // Hide error
    dataContent.style.color = '#a7f3d0'; // Reset color for success
    if (typeof data === 'object') {
        dataContent.textContent = JSON.stringify(data, null, 2); // Pretty print JSON
    } else {
        dataContent.textContent = data;
    }
}

/**
 * Displays an error message.
 * @param {string} message - The error message.
 */
function displayError(message) {
    dataContent.textContent = ''; // Clear data content
    errorContent.style.display = 'block'; // Show error
    errorContent.textContent = `Error: ${message}`;
    console.error(message); // Log error to console
}

/**
 * Handles clearing the output area.
 */
function clearOutput() {
    dataContent.textContent = 'Click a button to see the data...';
    dataContent.style.color = '#a0aec0'; // Default gray color
    errorContent.style.display = 'none';
    errorContent.textContent = '';
}

/**
 * Fetches data using a GET request.
 */
async function fetchDataGet() {
    clearOutput(); // Clear previous output
    dataContent.textContent = 'Fetching data...';
    dataContent.style.color = '#63b3ed'; // Blue for loading

    try {
        // Make a GET request to fetch a specific post
        const response = await fetch(`${API_BASE_URL}/posts/1`);

        // Check if the request was successful (status code 200-299)
        if (!response.ok) {
            // If not successful, throw an error with the status text
            throw new Error(`HTTP error! Status: ${response.status} - ${response.statusText}`);
        }

        // Parse the JSON response
        const data = await response.json();

        // Display the fetched data
        displayData(data);

    } catch (error) {
        // Catch any network errors or errors thrown above
        displayError(`Failed to fetch GET request: ${error.message}`);
    }
}

/**
 * Sends data using a POST request.
 */
async function fetchDataPost() {
    clearOutput(); // Clear previous output
    dataContent.textContent = 'Sending POST request...';
    dataContent.style.color = '#f6ad55'; // Orange for loading

    // Data to be sent in the POST request body
    const postData = {
        title: 'foo bar',
        body: 'This is a custom post sent from the Fetch API tutorial.',
        userId: 1
    };

    try {
        // Make a POST request
        const response = await fetch(`${API_BASE_URL}/posts`, {
            method: 'POST', // Specify the HTTP method
            headers: {
                'Content-Type': 'application/json; charset=UTF-8', // Indicate JSON content
            },
            body: JSON.stringify(postData), // Convert JavaScript object to JSON string
        });

        // Check if the request was successful
        if (!response.ok) {
            throw new Error(`HTTP error! Status: ${response.status} - ${response.statusText}`);
        }

        // Parse the JSON response from the server (often includes the new ID for POSTs)
        const data = await response.json();

        // Display the server's response
        displayData(data);

    } catch (error) {
        // Catch any network errors or errors thrown above
        displayError(`Failed to fetch POST request: ${error.message}`);
    }
}

// Attach event listeners to buttons
fetchGetBtn.addEventListener('click', fetchDataGet);
fetchPostBtn.addEventListener('click', fetchDataPost);
clearBtn.addEventListener('click', clearOutput);

// Initial call to clear output on page load
clearOutput();
How It All Works Together: Unpacking the JavaScript Fetch API
Now, let’s break down the core logic, step-by-step. We’ve set up our HTML and CSS. These provide the visual framework. The real power, however, comes from our JavaScript. It cleverly manages both the data fetching and its dynamic display. We’ll look at each essential step carefully, ensuring you understand every piece.
Initial Setup and Element Selection
First things first, we absolutely need to grab our HTML elements. These are the specific parts of the web page we intend to manipulate. We achieve this by using document.getElementById(). This method is super handy! We specifically get references to the user card container, our helpful loading indicator, and, of course, our “Fetch User” button. By doing this, these references let us interact with our page elements programmatically. Think of it like giving our JavaScript a precise map to find all the important spots on our page.
Pro Tip: Always make it a practice to select your DOM elements at the very beginning of your script. This approach keeps your code much cleaner and significantly easier to read. Furthermore, it crucially prevents frustrating errors that might occur from trying to access elements that simply haven’t loaded yet.
Initially, we start by making our loading indicator visible. This immediately tells the user that something important is happening behind the scenes. Then, the real exciting action begins when our “Fetch User” button is clicked.
JavaScript Fetch API: Making the Request
The absolute star of our show is the fetch() function. This powerful function is a core part of the amazing JavaScript Fetch API. It provides an incredibly easy and modern way to make network requests. Imagine it like sending a tiny, super-efficient messenger out to the vast internet. This messenger’s job is to politely ask for data from a specific address, known as an API endpoint. For our project, we are strategically using https://randomuser.me/api/. This particular API is fantastic because it reliably sends back random, mock user information every time we ask.
When fetch() successfully returns, it doesn’t immediately give us the raw data we want. Instead, it thoughtfully gives us a Promise. A Promise is essentially like a placeholder for a future value. It clearly tells us that an operation is currently ongoing. It also assures us that this operation will eventually either succeed with some data or fail with an error. We primarily use .then() to elegantly handle the successful outcome of this Promise. First, we receive a Response object. We must convert this response into a format that JavaScript can properly understand. For data formatted as JSON, we simply call .json() on the response. Importantly, this also returns a new Promise itself! Therefore, we logically chain another .then() to process the actual, usable data. This sequential chain of .then() methods is a fundamental concept known as “Promise chaining.” You might even recall seeing a similar approach when you deal with data fetching in other programming languages, such as when using the versatile requests library in Python.
Displaying the Fetched Data
Once we successfully have the data in hand, our next crucial step is to stylishly show it on our web page. The randomuser.me API, when called, returns an object. This object significantly contains an results array. Each individual item within this array represents a distinct user object. For our current task, we are primarily interested in the very first user listed in the results array.
We carefully access specific properties like name.first, name.last, email, and picture.large from this user object. Then, we expertly construct new HTML content. This new HTML content will elegantly populate our user card. We achieve this by updating the innerHTML property of our userCardContainer. This action smoothly replaces any previous content with the freshly fetched user data. Importantly, we also make sure to hide the loading spinner at this stage. This visual cue immediately indicates to the user that the data is completely ready and available for them to view.
<!-- For illustration, here's how the data structure maps to our display: -->
<img src="user.picture.large" alt="User Profile Picture" />
<p class="user-name">user.name.first user.name.last</p>
<p class="user-email">user.email</p>
Always remember to utilize powerful template literals (those backticks: ```) in JavaScript. They make creating dynamic, multi-line HTML strings significantly easier and much more readable.
Handling Errors Like a Pro
What happens, however, if something unexpected goes wrong during our data fetch? Perhaps the internet connection suddenly drops. Or maybe the external API server is temporarily offline. We absolutely need a robust way to gracefully catch and handle these potential issues. To do this, we strategically use .catch() at the very end of our Promise chain. This powerful function specifically runs if any Promise in our entire chain rejects, meaning an error occurred. It allows us to handle errors with grace and precision. For instance, we might choose to display a friendly error message directly on the page. Alternatively, we could log the detailed error to the browser’s console for debugging. Implementing this makes our application much more robust and reliable. Crucially, it vastly improves the user experience during any unforeseen circumstances.
Learning Tip: Promises are an absolutely fundamental concept to truly grasp in modern asynchronous JavaScript development. I highly encourage you to dive much deeper into them on the official MDN Web Docs whenever you have a moment. A thorough understanding of Promises will genuinely unlock a vast array of possibilities for your web projects!
Tips to Customise It: Make It Your Own!
You’ve built a functional data display, and that’s awesome! Now, let’s think about how you can make it even better and truly your own. Customization is where the real fun begins!
- More Data Fields: The
randomuser.meAPI provides tons of data, so explore it! Try adding the user’s location, phone number, or age to the card. Just inspect the data object in your browser’s console to see all available fields. Then, add new HTML elements to display these exciting new fields. - Styling Variations: Don’t be shy; play with the CSS! Change colors, experiment with different fonts, or completely redesign the card layouts. Experiment with different shadow effects or subtle animations. Maybe even implement a dark mode for your user card, similar to what you might build using a React Dark Mode with Context API approach for a larger application.
- Multiple Users: Instead of fetching just one user, why not fetch a whole list of users? Modify the
fetchrequest to ask for multiple results. Then, loop through theresultsarray. Create a new user card for each person. Display them elegantly in a grid layout. - Search Functionality: Add an input field to your page. Let users search for specific types of data, if the API you choose supports it. Or, combine this with the multiple users idea. You could filter the displayed users based on a search term entered by the user.
Conclusion: You Did It!
Fantastic job! You’ve successfully learned about the incredible JavaScript Fetch API. You’ve built a dynamic web page that confidently fetches and displays data from a remote API. This is a huge and exciting step in your web development journey. You can now make your applications truly interactive and data-driven. You’ve also gained invaluable hands-on experience with HTML, CSS, and JavaScript working seamlessly together. Keep experimenting with different APIs and explore new features. Most importantly, share what you’ve built with your friends and the community! Keep coding, and keep creating amazing things!