JavaScript BroadcastChannel API: Cross-Tab Communication (HTML, CSS, JS)
Hey there, future web wizard! Ever felt like your browser tabs were living in separate universes? You’ve probably wished they could talk to each other, right? Building a truly seamless experience across multiple open windows can seem like a complex task. Today, we will dive into the amazing JavaScript BroadcastChannel API. You will learn how to build an inter-tab communication app with ease. It’s a surprisingly simple yet incredibly powerful tool. Get ready to synchronize your browser tabs like never before!
What We Are Building
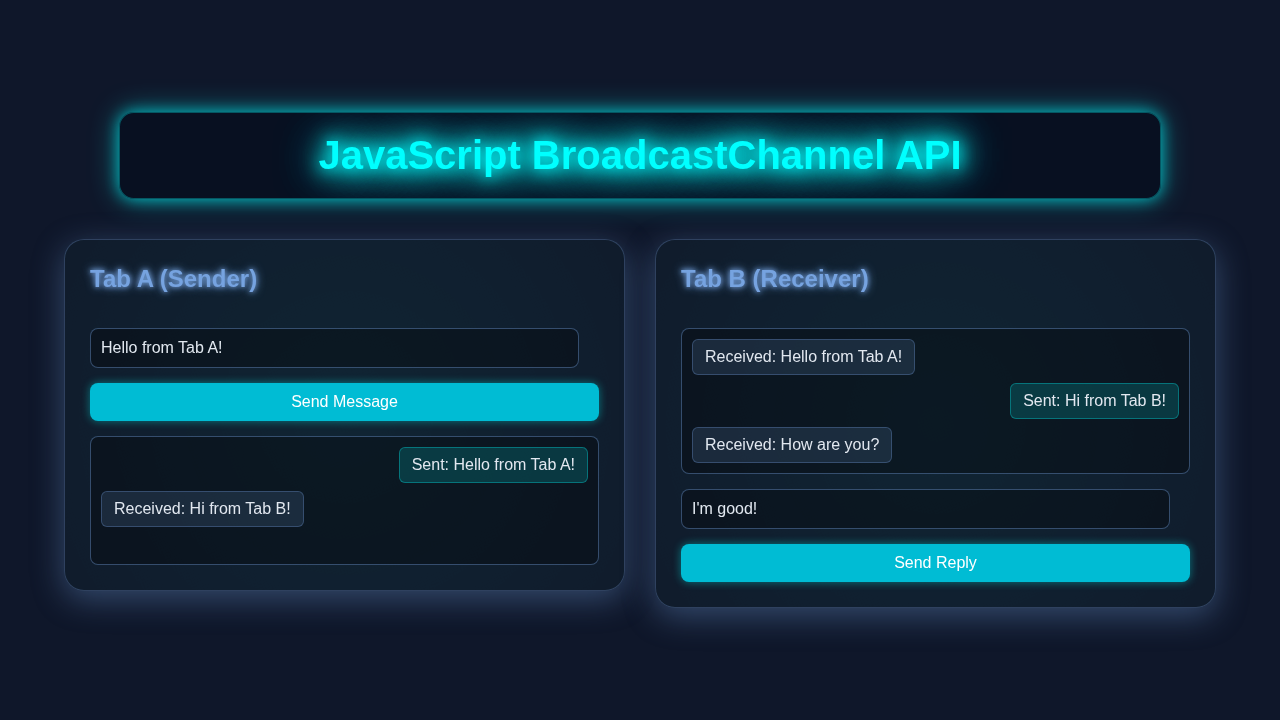
Imagine opening several tabs of the same web page. What if changing a setting in one tab instantly updated all the others? That’s exactly the magic we’re going to create today! We’ll build a fun, interactive “color picker” application. When you select a new color in one tab, every other open tab will automatically switch to that same hue. This project powerfully demonstrates the concept of syncing data across your browser. It’s incredibly useful for building dynamic dashboards. Think about collaborative tools where real-time updates are crucial. Or even for delivering instant notifications to users across their open windows. You’ll be genuinely amazed at how easily you can achieve this effect. Prepare to impress yourself!
HTML Structure
First things first, we need a solid foundation for our exciting app. We’ll set up a very basic HTML page. This page will include a clear title for our project. It will also feature a prominent color display area. Plus, we’ll add a few stylish buttons. These buttons will allow us to pick different colors. This simple HTML structure keeps everything organized. It makes our project easy to understand.
index.html
<!DOCTYPE html>
<html lang="en">
<head>
    <meta charset="UTF-8">
    <meta name="viewport" content="width=device-width, initial-scale=1.0">
    <title>BroadcastChannel API Demo</title>
    <link rel="stylesheet" href="styles.css">
</head>
<body>
    <div class="container">
        <h1>BroadcastChannel API Demo</h1>
        <p>Open this page in multiple browser tabs or windows to see cross-tab communication in action.</p>

        <div class="channel-wrapper">
            <div class="channel-window">
                <h2>Message Sender</h2>
                <div class="input-area">
                    <input type="text" id="messageInput" placeholder="Type your message here..." aria-label="Message to send">
                    <button id="sendMessageBtn">Send Message</button>
                </div>
            </div>

            <div class="channel-window received-window">
                <h2>Received Messages</h2>
                <div id="messagesDisplay" class="messages-display">
                    <!-- Messages will appear here -->
                    <p class="initial-message">No messages received yet. Try sending from another tab!</p>
                </div>
                <button id="clearMessagesBtn" class="clear-button">Clear Messages</button>
            </div>
        </div>
    </div>

    <script src="script.js"></script>
</body>
</html>
CSS Styling
Next, let’s add some visual flair to our application! We’ll incorporate some clean CSS to style our main display area. The buttons will also receive a modern look. Our goal is a user-friendly, clean interface. This styling will truly emphasize the color changes. Don’t worry too much about the specific design details here. The main focus is on the powerful JavaScript logic.
styles.css
/* Basic Reset & Box Sizing */
*, *::before, *::after {
    box-sizing: border-box;
    margin: 0;
    padding: 0;
}

body {
    font-family: Arial, Helvetica, sans-serif;
    background-color: #f4f7f6; /* Light background for tutorial */
    color: #333;
    line-height: 1.6;
    display: flex;
    justify-content: center;
    align-items: center;
    min-height: 100vh;
    padding: 20px;
    overflow-x: hidden; /* Prevent horizontal scroll */
}

.container {
    background-color: #ffffff;
    border-radius: 12px;
    box-shadow: 0 4px 15px rgba(0, 0, 0, 0.1);
    padding: 30px;
    max-width: 900px;
    width: 100%;
    text-align: center;
}

h1 {
    color: #2c3e50;
    margin-bottom: 15px;
    font-size: 2.2em;
}

p {
    color: #555;
    margin-bottom: 25px;
    font-size: 1.1em;
}

.channel-wrapper {
    display: flex;
    flex-wrap: wrap; /* Allow wrapping on smaller screens */
    gap: 30px;
    margin-top: 30px;
    justify-content: center;
}

.channel-window {
    flex: 1;
    min-width: 300px; /* Ensure a minimum width */
    max-width: 45%; /* Keep reasonable width for two columns */
    background-color: #fdfdfd;
    border: 1px solid #e0e0e0;
    border-radius: 10px;
    padding: 20px;
    box-shadow: 0 2px 8px rgba(0, 0, 0, 0.05);
    display: flex;
    flex-direction: column;
    gap: 15px;
}

.channel-window.received-window {
    background-color: #f5fafd; /* Slightly different for received */
    border-color: #cce7ff;
}

h2 {
    color: #3498db;
    margin-bottom: 15px;
    font-size: 1.6em;
}

.input-area {
    display: flex;
    gap: 10px;
    margin-bottom: 15px;
}

#messageInput {
    flex-grow: 1;
    padding: 10px 12px;
    border: 1px solid #ccc;
    border-radius: 6px;
    font-size: 1em;
    font-family: Arial, Helvetica, sans-serif;
    outline: none;
    transition: border-color 0.3s;
}

#messageInput:focus {
    border-color: #3498db;
}

#sendMessageBtn {
    padding: 10px 15px;
    background-color: #3498db;
    color: white;
    border: none;
    border-radius: 6px;
    cursor: pointer;
    font-size: 1em;
    font-family: Arial, Helvetica, sans-serif;
    transition: background-color 0.3s, box-shadow 0.3s;
}

#sendMessageBtn:hover {
    background-color: #2980b9;
    box-shadow: 0 2px 8px rgba(0, 0, 0, 0.1);
}

.messages-display {
    flex-grow: 1; /* Allows it to take available space */
    border: 1px solid #eee;
    background-color: #f9f9f9;
    padding: 15px;
    border-radius: 8px;
    min-height: 150px; /* Ensure visibility even with no messages */
    max-height: 300px; /* Limit height for aesthetic */
    overflow-y: auto; /* Enable scrolling for messages */
    text-align: left;
    display: flex; /* Use flexbox for messages */
    flex-direction: column;
    gap: 8px; /* Gap between messages */
}

.message-item {
    padding: 10px 15px;
    border-radius: 8px;
    word-wrap: break-word; /* Prevent overflow for long messages */
    font-size: 0.95em;
    color: #333;
    max-width: 85%; /* Limit message bubble width */
}

.message-item-received {
    background-color: #e8f5fe; /* Light blue for received messages */
    border: 1px solid #d0e7fb;
    align-self: flex-start; /* Align to the left for received */
}

.message-item-sent {
    background-color: #e0ffe8; /* Light green for sent messages */
    border: 1px solid #c0f7d0;
    align-self: flex-end; /* Align to the right for sent */
}

.initial-message {
    color: #888;
    text-align: center;
    margin-top: 20px;
    font-style: italic;
    background: none; /* No background for this hint */
    border: none;
    align-self: center; /* Center align */
}

.clear-button {
    padding: 8px 12px;
    background-color: #e74c3c;
    color: white;
    border: none;
    border-radius: 6px;
    cursor: pointer;
    font-size: 0.9em;
    font-family: Arial, Helvetica, sans-serif;
    transition: background-color 0.3s, box-shadow 0.3s;
    margin-top: 10px;
    align-self: flex-end; /* Align to the right in flex column */
}

.clear-button:hover {
    background-color: #c0392b;
    box-shadow: 0 2px 8px rgba(0, 0, 0, 0.1);
}


/* Responsive adjustments */
@media (max-width: 768px) {
    .channel-wrapper {
        flex-direction: column;
        align-items: center;
    }

    .channel-window {
        max-width: 100%;
        width: 100%; /* Take full width on small screens */
    }

    .input-area {
        flex-direction: column;
    }

    #sendMessageBtn {
        width: 100%;
    }
}
JavaScript BroadcastChannel: The Core Logic
Now for the really exciting part! We will write the JavaScript code. This code handles all user interactions. More importantly, it leverages the fantastic BroadcastChannel API. This powerful API allows different browsing contexts to communicate. Think of tabs, windows, or even iframes. It creates a dedicated channel for messages. It’s like setting up a private chat room just for your related browser tabs! Let me walk you through exactly what’s happening here.
script.js
// script.js

// --- DOM Elements --- (Selecting HTML elements)
const messageInput = document.getElementById('messageInput');
const sendMessageBtn = document.getElementById('sendMessageBtn');
const messagesDisplay = document.getElementById('messagesDisplay');
const clearMessagesBtn = document.getElementById('clearMessagesBtn');

// --- BroadcastChannel Setup ---
// Initialize a new BroadcastChannel. All tabs/windows with the same channel name
// will be able to communicate. The channel name is a string identifier.
const channelName = 'my_cross_tab_channel';
const bc = new BroadcastChannel(channelName);

// --- Event Listeners ---

// 1. Sending messages: When the send button is clicked or Enter is pressed
sendMessageBtn.addEventListener('click', () => {
    const message = messageInput.value.trim();
    if (message) {
        // Post the message to the channel. This message will be received by all
        // other tabs/windows listening on 'my_cross_tab_channel'.
        bc.postMessage(message);

        // Display the sent message in the current tab's display area
        // to show what was sent from THIS tab.
        displayMessage(`You: "${message}"`, 'sent');
        messageInput.value = ''; // Clear the input field after sending
        messageInput.focus(); // Keep focus on the input for quick follow-up messages
    }
});

// Allow sending messages by pressing the Enter key in the input field
messageInput.addEventListener('keypress', (event) => {
    if (event.key === 'Enter') {
        sendMessageBtn.click(); // Programmatically click the send button
    }
});

// 2. Receiving messages: Listen for messages posted to this BroadcastChannel
//    from other tabs/windows.
bc.onmessage = (event) => {
    // The received message data is available in event.data.
    // event.data can be any clonable JavaScript object (string, number, array, object).
    displayMessage(`Other Tab: "${event.data}"`, 'received');
};

// 3. Clear messages: When the clear button is clicked
clearMessagesBtn.addEventListener('click', () => {
    messagesDisplay.innerHTML = '<p class="initial-message">Messages cleared.</p>';
});

// --- Helper Functions ---

/**
 * Displays a message in the messagesDisplay area.
 * @param {string} messageText - The text content of the message to display.
 * @param {string} [type='received'] - 'sent' or 'received' to apply specific styling.
 *                                      'initial' for the welcome message.
 */
function displayMessage(messageText, type = 'received') {
    // Remove the initial prompt message if it's still there
    const initialMessage = messagesDisplay.querySelector('.initial-message');
    if (initialMessage) {
        initialMessage.remove();
    }

    const messageElement = document.createElement('div');
    messageElement.classList.add('message-item');

    // Apply specific classes for styling based on message type
    if (type === 'sent') {
        messageElement.classList.add('message-item-sent');
    } else if (type === 'received') {
        messageElement.classList.add('message-item-received');
    } else if (type === 'initial') {
        messageElement.classList.add('initial-message'); // Re-add initial style for a custom message
    }

    messageElement.textContent = messageText;
    messagesDisplay.appendChild(messageElement);

    // Automatically scroll to the bottom to show the newest message
    messagesDisplay.scrollTop = messagesDisplay.scrollHeight;
}

// Initial message when the page loads, guiding the user
displayMessage('Welcome! Open another tab to start broadcasting.', 'initial');

// --- Cleanup (Optional but good practice) ---
// When a tab is closed, the BroadcastChannel is automatically cleaned up by the browser.
// However, if you need to manually stop listening or close a channel earlier (e.g.,
// when a specific component unmounts in a SPA), you can use `bc.close()`.
// For this simple demo, it's not strictly necessary, but here's how you might use it:
//
// window.addEventListener('beforeunload', () => {
//     bc.close(); // Close the channel when the tab is about to be unloaded
//     console.log('BroadcastChannel closed for this tab.');
// });
How It All Works Together
Let’s carefully break down how our brilliant inter-tab communication app operates. We have several crucial components. Each piece plays a significant and interconnected role. Understanding these steps will fully unlock the magic of cross-tab syncing.
Setting Up the BroadcastChannel
Firstly, we initialize a new instance of the BroadcastChannel. This is a critical first step. You must provide it with a unique name. This name acts like a secret handshake. All tabs that wish to communicate must use this identical name. Consider it like tuning into a specific radio station frequency. Only listeners tuned to “color_channel” will be able to receive our messages. Therefore, const channel = new BroadcastChannel('color_channel'); establishes this vital link. It prepares all our browser tabs for real-time conversation.
Sending Messages Across Tabs
Whenever you click one of our vibrant color buttons, a special action occurs. We need to alert all other open tabs about this exciting color change. We achieve this by using the channel.postMessage() method. This method efficiently sends data through our established channel. The data you send can be any standard JavaScript object. It could also be a primitive value, such as a string or number. In our specific application, we dispatch the new color string. For example, channel.postMessage({ color: 'red' }); effectively broadcasts the color red. This message travels swiftly to every single tab listening on our ‘color_channel’.
Pro Tip: The
postMessage()method is incredibly versatile. You can reliably send strings, numbers, arrays, or even complex objects. Just make absolutely sure your receiving end is prepared for the data’s structure! It’s similar to how JavaScript Closures: Deep Dive into Scope & Functions gracefully manage their own encapsulated data and state.
Receiving Messages in Other Tabs
Now, how do our other tabs actually discover that a new message has arrived? The BroadcastChannel provides a convenient onmessage event listener. Every single open tab that has subscribed to ‘color_channel’ will instantly “hear” this event. When a message successfully arrives, our predefined event handler function executes. It thoughtfully receives an event object. This object securely contains the data that was sent by postMessage(). We access this crucial data using event.data. Subsequently, we dynamically update the user interface of the current tab. This specifically means changing the background color of our prominent display element. This entire process creates that wonderful, instant synchronization effect you observe. Learn more about EventTarget on MDN for handling events.
Initializing a Newly Opened Tab
What exactly happens when you open a brand new tab of our application? This fresh tab needs to know the current color state immediately. Our clever JavaScript initiates an “initial request” message. It politely asks for the current active color from any other existing tab. channel.postMessage({ type: 'request_color' }); performs this important query. The very first tab to receive this specific request will then courteously broadcast its current color. This intelligent mechanism ensures that new tabs always commence with the absolutely correct state. It’s a neat trick for providing a consistently smooth user experience.
Handling Initial Color Requests
When any tab receives a request_color message, it has a responsibility to respond. It promptly checks if it currently has a color actively set. If it does, it immediately broadcasts its current color back to the channel. This action effectively fulfills the request originating from the new tab. This intelligent two-way communication makes our entire system remarkably robust. Furthermore, it explicitly guarantees that all tabs remain perfectly in sync. This dynamic data handling is much like how React Infinite Scroll: Build Seamless Data Loading with JSX Hooks dynamically loads more content as users scroll.
Cleaning Up Your Channels
It is good practice to close your BroadcastChannel when it is no longer needed. This frees up resources. For our simple app, closing it might not be strictly necessary right now. However, for larger applications, channel.close() is important. This method effectively disconnects the channel. It stops it from listening or sending further messages. Thus, you manage your browser’s memory more efficiently.
Pro Tip: The JavaScript BroadcastChannel API is fantastic for simple, local state synchronization across tabs. However, for more complex, bidirectional communication involving a server, or for broadcasting large datasets, consider exploring WebSockets. They offer a persistent, full-duplex connection for powerful real-time interaction. Learn more about WebSockets on MDN.
Tips to Customise It
Congratulations! You’ve successfully built a truly awesome inter-tab communication app. But why stop here? Here are some fantastic ideas to extend and personalize your project:
- Sync Other UI Elements: Beyond just colors, think bigger! Try syncing text content, the checked state of a checkbox, or even small profile images.
- Add User Authentication: Imagine the convenience if logging into one tab automatically logged you into all other related tabs! This enhances user experience greatly.
- Real-time Notifications: Implement a system where a “new message” or “alert” notification can be sent across tabs instantly, without needing constant server interaction.
- Build a Shared Counter: Create a simple numerical counter. It could increment in one tab and magically update in all others. This could be a fun challenge, perhaps by applying advanced concepts from JavaScript Closures Unveiled: Abstract Neon Code Guide for persistent state.
- Develop a Collaborative Whiteboard (Simple): Imagine a tiny drawing app. A line drawn in one tab appears in all synced tabs! This would be a more advanced but very rewarding project.
- Theme Switcher: Allow users to toggle between light and dark modes. Ensure this change applies instantly across all open tabs. You could even persist the theme using
localStorage!
Conclusion: Your JavaScript BroadcastChannel Mastery!
Wow, you absolutely crushed it! You just built your very own, fully functional inter-tab communication application. You brilliantly mastered the powerful JavaScript BroadcastChannel API. Isn’t it truly amazing how simple yet incredibly effective this API is for browser-level communication? You’ve taken a significant step forward in understanding modern browser capabilities. Now you possess the knowledge to create even more dynamic and interconnected web applications. Go ahead, open multiple instances of your creation, and witness the instant synchronization in action! Share your newly synced app with your friends and fellow coders. Keep experimenting with these fantastic web APIs, and as always, happy coding! You are well on your way to becoming a true pro coder!