JavaScript Filter List Tutorial: HTML, CSS & Vanilla JS
Hey there, future coding rockstar! Have you ever wanted to build a dynamic search feature for your web projects? It feels super complex, right? Well, today, we will master building a powerful JavaScript Filter List. This feature lets users quickly find exactly what they need. It’s an incredibly useful skill. Let’s make something awesome together!
What We Are Building: A Dynamic JavaScript Filter List
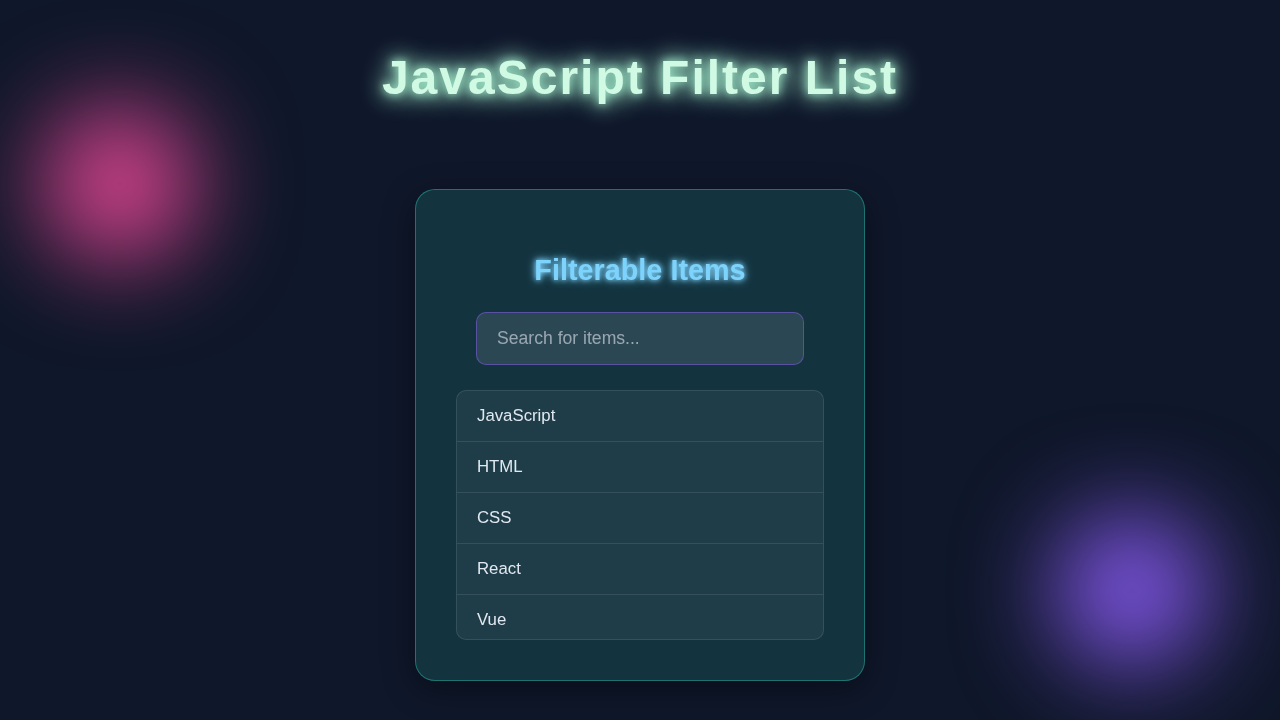
We are building an interactive list! Imagine a page with many items. A search box sits right at the top. As you type into that box, our list magically filters itself. Only matching items remain visible. This is a practical skill for any web developer. It makes user interfaces much more friendly. You will see how powerful vanilla JavaScript can be!
HTML Structure
First, we need the basic skeleton for our project. We’ll set up a simple div to hold everything. This includes our search input. We will also add an unordered list (<ul>) for our items. Each list item (<li>) will hold some text. It’s clean and straightforward, perfect for learning.
index.html
<!DOCTYPE html>
<html lang="en">
<head>
    <meta charset="UTF-8">
    <meta name="viewport" content="width=device-width, initial-scale=1.0">
    <title>JavaScript Filter List</title>
    <link rel="stylesheet" href="styles.css">
</head>
<body>
    <div class="container">
        <h1>Filter List</h1>
        <input type="text" id="filterInput" placeholder="Search items...">
        <ul id="itemList">
            <li>Apple</li>
            <li>Banana</li>
            <li>Cherry</li>
            <li>Date</li>
            <li>Elderberry</li>
            <li>Fig</li>
            <li>Grape</li>
            <li>Honeydew</li>
            <li>Kiwi</li>
            <li>Lemon</li>
            <li>Mango</li>
            <li>Nectarine</li>
            <li>Orange</li>
            <li>Pear</li>
        </ul>
    </div>
    <script src="script.js"></script>
</body>
</html>
CSS Styling
Next, let’s make our project look good! A little CSS goes a long way. We will add some basic styling to our container. This makes it centered and readable. We’ll also style the input field. The list items will get a touch of flair. This makes our dynamic filter visually appealing.
styles.css
/* General body styling */
body {
    font-family: Arial, Helvetica, sans-serif; /* Safe font stack */
    background-color: #f4f7f6; /* Light background for the tutorial */
    margin: 0;
    padding: 20px;
    display: flex;
    justify-content: center;
    align-items: flex-start; /* Align to top for potentially longer content */
    min-height: 100vh;
    box-sizing: border-box; /* Include padding and border in the element's total width and height */
    overflow-x: hidden; /* Prevent horizontal scroll */
}

/* Container for the filter list component */
.container {
    background-color: #ffffff;
    border-radius: 8px;
    box-shadow: 0 4px 15px rgba(0, 0, 0, 0.1); /* Soft shadow */
    padding: 30px;
    width: 100%;
    max-width: 400px; /* Constrain the maximum width of the component */
    text-align: center;
    margin-top: 50px; /* Space from the top of the viewport */
    box-sizing: border-box;
}

/* Heading styling */
h1 {
    color: #333;
    margin-bottom: 25px;
    font-size: 1.8em;
}

/* Input field styling */
#filterInput {
    width: calc(100% - 20px); /* Full width minus padding for input */
    padding: 12px 10px;
    margin-bottom: 20px;
    border: 1px solid #ccc;
    border-radius: 5px;
    font-size: 1em;
    box-sizing: border-box;
    outline: none; /* Remove default outline */
    transition: border-color 0.3s ease; /* Smooth transition for border color */
}

#filterInput:focus {
    border-color: #007bff; /* Highlight border on focus */
}

/* List container styling */
#itemList {
    list-style: none; /* Remove default bullet points */
    padding: 0;
    margin: 0;
    border: 1px solid #eee;
    border-radius: 5px;
    max-height: 300px; /* Limit height to enable scrolling for many items */
    overflow-y: auto; /* Enable vertical scrollbar if content overflows */
    background-color: #f9f9f9;
}

/* Custom scrollbar for better aesthetics */
#itemList::-webkit-scrollbar {
    width: 8px;
}

#itemList::-webkit-scrollbar-thumb {
    background-color: #ccc;
    border-radius: 4px;
}

#itemList::-webkit-scrollbar-track {
    background-color: #f1f1f1;
}

/* List item styling */
#itemList li {
    padding: 12px 15px;
    border-bottom: 1px solid #eee; /* Separator between items */
    text-align: left;
    color: #555;
    transition: background-color 0.2s ease, transform 0.2s ease; /* Smooth hover effects */
}

#itemList li:last-child {
    border-bottom: none; /* No border for the last item */
}

#itemList li:hover {
    background-color: #e9f5ff; /* Light blue background on hover */
    transform: translateX(5px); /* Slight movement on hover */
    cursor: pointer; /* Indicate interactivity */
}

/* Utility class for hiding items with JavaScript */
.hidden {
    display: none; /* Hide element */
}
JavaScript for Our Filter List Magic
Now, for the exciting part: JavaScript! This is where the real magic happens. We will grab elements from our HTML. Then we will listen for user input. The core of our logic involves array methods. These methods help us filter the list dynamically. It’s efficient and very powerful!
script.js
document.addEventListener('DOMContentLoaded', () => {
    // Get references to the DOM elements
    const filterInput = document.getElementById('filterInput');
    const itemList = document.getElementById('itemList');
    const listItems = itemList.querySelectorAll('li'); // Select all list items

    // Add an event listener to the filter input field
    // This event fires every time the input value changes (e.g., typing, pasting)
    filterInput.addEventListener('input', (event) => {
        // Get the current value from the input field and convert it to lowercase
        // This makes the search case-insensitive
        const filterText = event.target.value.toLowerCase();

        // Iterate over each list item
        listItems.forEach(item => {
            // Get the text content of the current list item and convert it to lowercase
            const itemText = item.textContent.toLowerCase();

            // Check if the item's text includes the filter text
            if (itemText.includes(filterText)) {
                // If it matches, ensure the item is visible by removing the 'hidden' class
                item.classList.remove('hidden');
            } else {
                // If it doesn't match, hide the item by adding the 'hidden' class
                item.classList.add('hidden');
            }
        });
    });
});
How It All Works Together: Unpacking Our JavaScript Filter List
You have set up the HTML. You also styled it with CSS. Now, let’s connect everything with JavaScript. We will break down each step. This way, you understand the entire process. It’s simpler than you might think!
Getting Our Elements Ready
First things first, we need to grab our HTML elements. We use document.querySelector() for specific single elements. It helps us select the main input field. We also select the unordered list (<ul>) that holds our items. Then, we need all the individual list items (<li>). For this, document.querySelectorAll() is perfect. It returns a special collection called a NodeList. This NodeList contains all matching elements. We store these initially in a variable. Remember, NodeLists are not exactly arrays. They miss out on some cool array methods like filter(). So, converting it to a proper array is a smart move! We achieve this easily using the spread syntax ([...nodeList]). This array is much easier to work with. It opens up all the powerful JavaScript array methods we love.
Listening for Input Changes
The search input is where all the user interaction begins. We attach an event listener to this input field. We specifically listen for the ‘input’ event. This event is fantastic because it fires every single time a user types a character. It also triggers when they delete text. This provides that instant, real-time feedback. Inside our event listener function, we first capture the user’s typed value. We then immediately convert this value to lowercase using .toLowerCase(). This crucial step makes our search truly case-insensitive. So, whether a user types “apple”, “Apple”, or “APPLE”, it will always match “apple” in our list. This small detail significantly improves the user experience. It also makes our filter more robust.
The filter() Method: Our Core Logic
Here’s the cool part: the filter() method! This is a powerful, non-mutating JavaScript array method. It creates a brand new array. This new array contains only elements that pass a specific test. The test itself is a function that you provide. For our project, we iterate over our listItems array. For each item, we access its text content. We also convert this item’s text to lowercase. This ensures our comparison is fair, just like with the search term. Then, we check if this item’s text includes the user’s lowercase search term. We use the .includes() string method for this. If it does, the item passes the test. It will be included in our filteredItems array. If not, it’s excluded.
Pro Tip: The
filter()method is a cornerstone of functional programming in JavaScript. It allows you to transform arrays by selecting subsets without altering the original data source. This keeps your code predictable and easier to debug.
This approach keeps our data clean and our filtering efficient. You can learn more about filter() and other array methods on CSS-Tricks.
Showing and Hiding Items
After we get our filteredItems array, we need to update the display. This is a crucial step for visual feedback. We want to show only the matching items. We hide all the others. To do this efficiently, we loop through our original listItems array. For each original item, we check if it exists in our newly filteredItems array. We can use the includes() method on filteredItems to quickly check this.
If an item IS found in filteredItems, it means it passed the search test. We then set its display style to ‘block’ (or whatever default display it had). This makes it visible again.
If an item IS NOT found in filteredItems, it means it didn’t match the search. We set its display style to ‘none’. This effectively hides it from view.
This dynamic toggling of display styles creates that immediate search effect. It makes our JavaScript Filter List truly interactive and responsive. When you move to frameworks, managing such UI changes often involves concepts like React derived state – Mastering Component Data Flow. However, in vanilla JS, direct DOM manipulation like this is perfectly effective.
Performance Considerations (Optional but Good to Know)
For very long lists, say with thousands of items, filtering on every keystroke can sometimes feel sluggish. Each time a user types a letter, our JavaScript runs the filter function. This might lead to many rapid computations. This is especially true if the list is huge. You can greatly optimize this. A powerful technique called “debouncing” helps a lot. Debouncing delays the execution of a function. It waits until a certain amount of time passes without any further events. So, our filter function would only run once the user pauses typing for, let’s say, 300 milliseconds. This dramatically reduces unnecessary computations. It makes the user experience much smoother for large datasets. If you are interested in implementing this, check out our detailed guide on building a JavaScript Debounced Search Input: HTML, CSS & Vanilla JS Tutorial. It’s an excellent next step to refine your skills! Similarly, if you’re exploring how to manage user inputs and complex validation in more structured ways, especially in modern libraries, our article on React Forms Handling Tutorial: Mastering Inputs & State in JSX offers valuable insights.
Tips to Customise It
You just built a fantastic JavaScript Filter List! But don’t stop here. Here are some ideas to make it even better:
- Add more data: Instead of just text, filter by categories or tags. You could add an attribute to each
<li>. - Highlight matches: When an item is filtered, highlight the matching text. This provides extra visual feedback.
- “No results found” message: Display a message when no items match the search. It makes the user experience smoother.
- Sort the filtered list: After filtering, add an option to sort the results alphabetically. This adds another layer of utility.
Conclusion
Congratulations! You have successfully built a dynamic JavaScript Filter List! You used HTML, CSS, and vanilla JavaScript array methods. This is a super practical skill. You can now add powerful search features to your own projects. What a great achievement!
Keep coding and experimenting! The best way to learn is by doing. Share your creations with the world!
We are so proud of what you’ve accomplished. Happy coding!