JavaScript Fetch API Tutorial: Modern Data Fetching with HTML, CSS
Hey there, coding adventurers! If you have wanted to build something interactive but felt stuck, you are in the right place. Today, we’re diving into the amazing world of the JavaScript Fetch API. It’s a modern way to grab data from anywhere on the web. We will build a super cool dynamic random quote generator. This project is perfect for boosting your skills!
What We Are Building: Your Own Quote Machine!
Imagine a button. When you click it, a fresh, inspiring quote appears! This is exactly what we’re going to create. Our quote generator will be sleek and responsive. It will fetch quotes dynamically from an external API. This means new content with every click. No more static pages for us! You’ll learn essential web development techniques. It’s truly exciting to see it come alive.
HTML Structure: The Foundation of Our Project
First, we need the bones of our application. This is where HTML comes in. We’ll set up a simple container for our quote. There will also be a button to fetch new quotes. It’s straightforward and easy to understand. Here’s what our basic HTML looks like:
index.html
<!DOCTYPE html>
<html lang="en">
<head>
<meta charset="UTF-8">
<meta name="viewport" content="width=device-width, initial-scale=1.0">
<title>JavaScript Fetch API Tutorial</title>
<link rel="stylesheet" href="styles.css">
</head>
<body>
<div class="container">
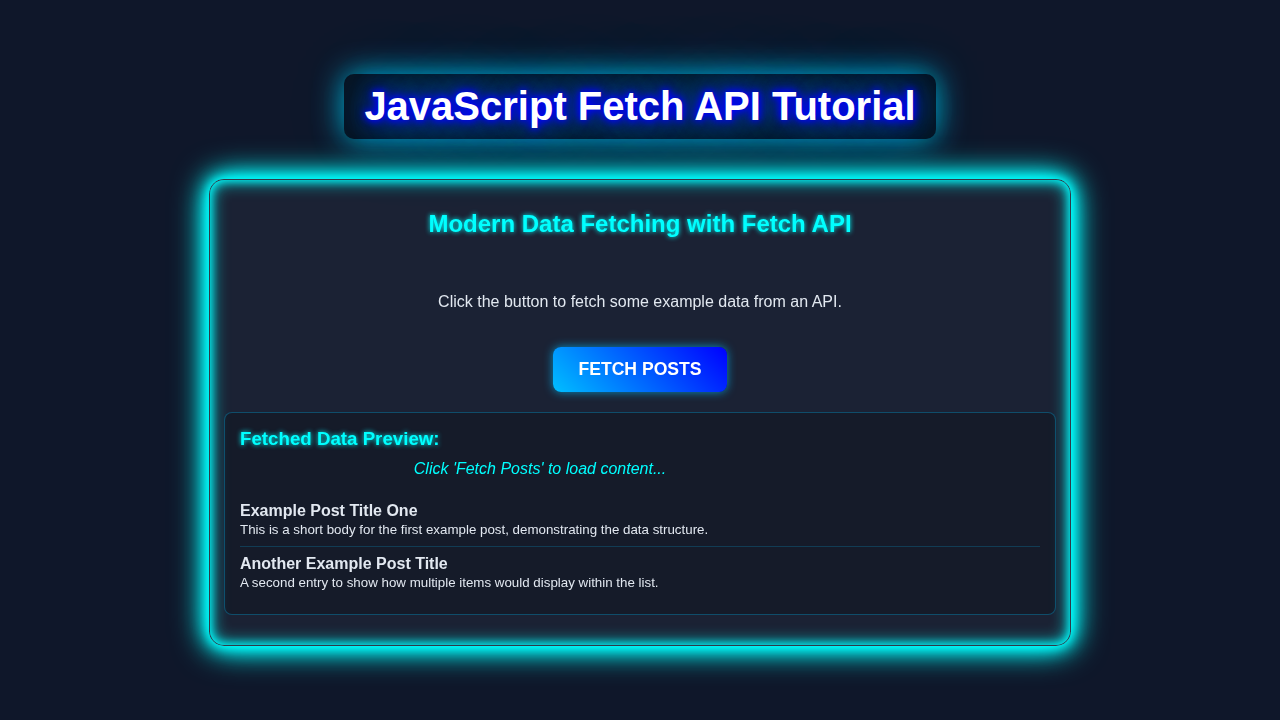
<h1>Understanding the JavaScript Fetch API</h1>
<p>The Fetch API provides a modern, promise-based way to make network requests, replacing older methods like XMLHttpRequest. It's powerful, flexible, and integrated into modern browsers.</p>
<section class="api-example">
<h2>Fetch Example: Get Public Posts</h2>
<p>We'll fetch a list of posts from <a href="https://jsonplaceholder.typicode.com/" target="_blank" rel="noopener noreferrer">JSONPlaceholder</a>, a free fake API for testing and prototyping.</p>
<button id="fetchPostsBtn" class="action-button">Fetch Posts</button>
<button id="clearDataBtn" class="action-button secondary">Clear Data</button>
<div class="status-message" id="statusMessage"></div>
<div class="data-display">
<h3>Posts:</h3>
<ul id="postsList">
<!-- Fetched posts will be inserted here -->
</ul>
</div>
</section>
<section class="api-example">
<h2>Fetch Example: Post New Data</h2>
<p>Let's simulate creating a new post. This demonstrates a <code>POST</code> request.</p>
<button id="createPostBtn" class="action-button">Create New Post</button>
<div class="status-message" id="postStatusMessage"></div>
</section>
<section class="key-concepts">
<h2>Key Concepts:</h2>
<ul>
<li><strong>Promises:</strong> Fetch returns a Promise, allowing you to use <code>.then()</code> for success and <code>.catch()</code> for errors, or <code>async/await</code> for cleaner syntax.</li>
<li><strong>Response Object:</strong> The first <code>.then()</code> receives a Response object, which has properties like <code>status</code>, <code>ok</code>, and methods like <code>.json()</code> or <code>.text()</code> to parse the body.</li>
<li><strong>Request Options:</strong> You can pass an optional second argument (an `init` object) to configure the request (method, headers, body, etc.).</li>
<li><strong>Error Handling:</strong> Fetch does NOT reject the Promise on HTTP error statuses (e.g., 404, 500). You must check <code>response.ok</code> or <code>response.status</code> yourself. It only rejects on network errors or if a request could not be completed.</li>
</ul>
</section>
</div>
<script src="script.js"></script>
</body>
</html>
See? It’s just a few key elements. We have a div to hold the quote text. Another div will display the author. Finally, that crucial button brings in fresh wisdom. We’ve also linked our stylesheet and JavaScript file. These will make our project look great and function perfectly.
CSS Styling: Making Our Generator Look Fantastic
Now for the fun part: making it pretty! CSS brings our project to life. We will add some basic styling to center everything. It will also make our quote stand out. A little flair goes a long way. Don’t worry if CSS isn’t your strongest suit yet. Just follow along and see the magic happen. Here’s the CSS we will use:
styles.css
/* Universal Box Model */
*, *::before, *::after {
    box-sizing: border-box;
}

/* Body Styling */
body {
    margin: 0;
    padding: 20px;
    font-family: Arial, Helvetica, sans-serif;
    line-height: 1.6;
    color: #333;
    background-color: #f4f4f4;
    display: flex;
    justify-content: center;
    min-height: 100vh;
}

/* Container for main content */
.container {
    background: #fff;
    padding: 30px;
    border-radius: 8px;
    box-shadow: 0 4px 10px rgba(0, 0, 0, 0.1);
    max-width: 900px;
    width: 100%;
    overflow: hidden; /* Ensure content doesn't spill */
}

/* Headings */
h1 {
    color: #0056b3;
    text-align: center;
    margin-bottom: 30px;
}

h2 {
    color: #007bff;
    border-bottom: 2px solid #e0e0e0;
    padding-bottom: 10px;
    margin-top: 40px;
    margin-bottom: 20px;
}

h3 {
    color: #0056b3;
    margin-top: 20px;
}

/* Paragraphs and links */
p {
    margin-bottom: 15px;
}

a {
    color: #007bff;
    text-decoration: none;
}

a:hover {
    text-decoration: underline;
}

/* Section specific styling */
.api-example {
    background-color: #f9f9f9;
    border: 1px solid #e0e0e0;
    border-radius: 5px;
    padding: 20px;
    margin-bottom: 30px;
}

/* Buttons */
.action-button {
    background-color: #007bff;
    color: white;
    padding: 10px 20px;
    border: none;
    border-radius: 5px;
    cursor: pointer;
    font-size: 1rem;
    margin-right: 10px;
    margin-bottom: 10px;
    transition: background-color 0.3s ease, transform 0.2s ease;
}

.action-button:hover {
    background-color: #0056b3;
    transform: translateY(-2px);
}

.action-button.secondary {
    background-color: #6c757d;
}

.action-button.secondary:hover {
    background-color: #5a6268;
}

/* Status Messages */
.status-message {
    padding: 10px;
    margin-top: 15px;
    border-radius: 5px;
    font-weight: bold;
    color: #333;
    min-height: 20px; /* Ensure it takes space even when empty */
}

.status-message.loading {
    background-color: #e7f3ff;
    border: 1px solid #cce5ff;
    color: #004085;
}

.status-message.success {
    background-color: #d4edda;
    border: 1px solid #c3e6cb;
    color: #155724;
}

.status-message.error {
    background-color: #f8d7da;
    border: 1px solid #f5c6cb;
    color: #721c24;
}

/* Data Display Area */
.data-display {
    margin-top: 20px;
    background-color: #fdfdfd;
    border: 1px solid #e0e0e0;
    border-radius: 5px;
    padding: 15px;
    max-height: 400px; /* Limit height for scrollability */
    overflow-y: auto; /* Enable scrolling for long lists */
}

.data-display ul {
    list-style: none;
    padding: 0;
    margin: 0;
}

.data-display li {
    background-color: #ffffff;
    border-bottom: 1px solid #eee;
    padding: 10px 0;
}

.data-display li:last-child {
    border-bottom: none;
}

.data-display li strong {
    color: #007bff;
}

/* Scrollbar for data-display */
.data-display::-webkit-scrollbar {
    width: 8px;
}

.data-display::-webkit-scrollbar-track {
    background: #f1f1f1;
    border-radius: 10px;
}

.data-display::-webkit-scrollbar-thumb {
    background: #888;
    border-radius: 10px;
}

.data-display::-webkit-scrollbar-thumb:hover {
    background: #555;
}

/* Key Concepts List */
.key-concepts ul {
    list-style-type: disc;
    padding-left: 20px;
}

.key-concepts li {
    margin-bottom: 10px;
}

.key-concepts li strong {
    color: #007bff;
}
With this CSS, our quote box will be centered. It will have a nice shadow effect. The text will be easy to read. Even the button will look inviting. We’re creating a pleasant user experience. This makes our quote generator truly engaging. Good design always matters, doesn’t it?
JavaScript Fetch API in Action: Bringing Data to Life
This is where the real power comes in! We’ll use JavaScript to make our generator dynamic. The core of this is the JavaScript Fetch API. It lets us request data from servers. Our goal is to grab a random quote. Then we display it on our page. It’s simpler than you might think. Here is the JavaScript code:
script.js
/**
 * JavaScript Fetch API Tutorial
 *
 * This script demonstrates how to use the modern Fetch API for making network requests.
 * We'll cover GET and POST requests, handling responses, loading states, and error handling.
 *
 * API Endpoint: JSONPlaceholder (https://jsonplaceholder.typicode.com/)
 * A free fake API for testing and prototyping.
 */

document.addEventListener('DOMContentLoaded', () => {
    const fetchPostsBtn = document.getElementById('fetchPostsBtn');
    const clearDataBtn = document.getElementById('clearDataBtn');
    const postsList = document.getElementById('postsList');
    const statusMessage = document.getElementById('statusMessage');
    const createPostBtn = document.getElementById('createPostBtn');
    const postStatusMessage = document.getElementById('postStatusMessage');

    const API_URL = 'https://jsonplaceholder.typicode.com';

    /**
     * Helper function to update status messages in the UI.
     * @param {HTMLElement} element - The HTML element to update.
     * @param {string} message - The message to display.
     * @param {string} type - 'loading', 'success', 'error', or empty for clear.
     */
    function updateStatus(element, message, type = '') {
        element.textContent = message;
        element.className = 'status-message'; // Reset classes
        if (type) {
            element.classList.add(type);
        }
    }

    /**
     * Fetches a list of posts from the API and displays them.
     */
    async function fetchPosts() {
        updateStatus(statusMessage, 'Loading posts...', 'loading');
        postsList.innerHTML = ''; // Clear previous posts

        try {
            // 1. Make the GET request
            // fetch() returns a Promise that resolves to the Response object
            const response = await fetch(`${API_URL}/posts?_limit=5`); // Limit to 5 for brevity

            // 2. Check if the request was successful (HTTP status 200-299)
            // Fetch API does NOT throw an error for HTTP error statuses (like 404, 500).
            // You must manually check `response.ok` or `response.status`.
            if (!response.ok) {
                // If not OK, throw an error to be caught by the catch block
                throw new Error(`HTTP error! status: ${response.status}`);
            }

            // 3. Parse the response body as JSON
            // .json() also returns a Promise
            const posts = await response.json();

            // 4. Display the fetched data
            if (posts.length === 0) {
                postsList.innerHTML = '<li>No posts found.</li>';
            } else {
                posts.forEach(post => {
                    const listItem = document.createElement('li');
                    listItem.innerHTML = `
                        <strong>${post.title}</strong>
                        <p>${post.body}</p>
                    `;
                    postsList.appendChild(listItem);
                });
            }
            updateStatus(statusMessage, 'Posts loaded successfully!', 'success');

        } catch (error) {
            // This catches network errors (e.g., no internet) or errors thrown by us (response.ok check)
            console.error('There was a problem with the fetch operation:', error);
            updateStatus(statusMessage, `Failed to load posts: ${error.message}`, 'error');
        }
    }

    /**
     * Clears the displayed posts and status message.
     */
    function clearPosts() {
        postsList.innerHTML = '';
        updateStatus(statusMessage, ''); // Clear status message
        console.log('Posts data cleared.');
    }

    /**
     * Creates a new post using a POST request.
     */
    async function createPost() {
        updateStatus(postStatusMessage, 'Creating new post...', 'loading');

        const newPost = {
            title: 'My New Awesome Post',
            body: 'This is the body of my newly created post using Fetch API.',
            userId: 1,
        };

        try {
            // 1. Make the POST request
            const response = await fetch(`${API_URL}/posts`, {
                method: 'POST', // Specify the HTTP method
                headers: {
                    'Content-Type': 'application/json; charset=UTF-8', // Inform the server about the content type
                },
                body: JSON.stringify(newPost), // Convert the JavaScript object to a JSON string
            });

            if (!response.ok) {
                throw new Error(`HTTP error! status: ${response.status}`);
            }

            // 2. Parse the response (server usually returns the created resource)
            const createdPost = await response.json();

            // 3. Display success message with the ID of the created post
            updateStatus(postStatusMessage, `Post created successfully! ID: ${createdPost.id}`, 'success');
            console.log('Created Post:', createdPost);

        } catch (error) {
            console.error('There was a problem creating the post:', error);
            updateStatus(postStatusMessage, `Failed to create post: ${error.message}`, 'error');
        }
    }

    // Event Listeners
    fetchPostsBtn.addEventListener('click', fetchPosts);
    clearDataBtn.addEventListener('click', clearPosts);
    createPostBtn.addEventListener('click', createPost);
});
This script connects all the pieces. It listens for clicks on our button. When clicked, it reaches out to an external quote API. Then, it updates the HTML dynamically. This is the heart of our interactive application. We are bringing static elements to life!
How It All Works Together: Unpacking the Magic
Let’s break down the process. You’ve built the HTML structure. You’ve applied the CSS styling. Now, the JavaScript ties it all together. It’s like assembling a puzzle. Each piece has a vital role. We will explore each step in detail. This ensures you understand every bit of our project.
The HTML Foundation
Our HTML provides the basic layout. It sets up placeholders for the quote. We use specific IDs like quote-display and author-display. These are crucial for JavaScript. They allow our script to find and update these elements. The button also has an ID: new-quote-btn. This makes it easy for our JavaScript to listen for clicks. Without these IDs, our script would be lost! It’s the blueprint for our interactive content.
Styling with CSS
CSS makes our generator visually appealing. It centers the main quote box. It adds padding and margin. The text becomes readable and attractive. We also give our button a friendly look. This ensures a good user experience. A well-styled app is more enjoyable. Therefore, CSS is more than just pretty colors. It enhances usability significantly.
Pro Tip: Always use semantic HTML elements when possible. This helps with accessibility and SEO. For example, using a
<button>for actions is better than a generic<div>with click handlers.
The Power of JavaScript Fetch API
Here’s the cool part: our JavaScript! The JavaScript Fetch API is central to our project. It’s a modern browser feature. It lets web pages make HTTP requests. This means we can ask for data from other websites. In our case, it’s a quote API. The Fetch API returns a Promise. This helps us manage asynchronous operations gracefully. You can learn more about handling async data in JavaScript Fetch API Tutorial | Master Async Data. It’s a game-changer for dynamic content.
Fetching the Quote
When you click the button, our fetchQuote() function runs. Inside, we use fetch('https://api.quotable.io/random'). This line sends a request to the quote API. We use async/await syntax. This makes asynchronous code look synchronous. You can learn more about fetch on MDN Web Docs. It’s much easier to read and manage. First, we await the response. Then, we parse it as JSON using response.json(). This converts the raw data into a JavaScript object. This object contains our quote and its author. Remember, await pauses execution. It waits until the promise settles. It’s powerful for complex operations.
Sometimes, things go wrong. What if the internet disconnects? Or the API is down? Our try...catch block handles these errors. If fetching fails, an error message shows. This prevents our app from breaking. It provides a better user experience. Therefore, robust error handling is vital. It makes your applications more resilient. Consider adding more detailed error messages for users.
Displaying the Quote
Once we have the quote data, we update the HTML. We select our quote-display and author-display elements. We use document.getElementById() for this. Then, we set their textContent property. We assign the new quote and author. This instantly updates what you see on the screen. It’s a direct manipulation of the Document Object Model (DOM). This process is very efficient. It ensures a smooth user experience. Your page feels alive and interactive.
Heads Up! APIs can sometimes be a bit slow. Consider adding a “Loading…” message. This can appear while your quote is fetching. It improves the user’s perception of speed. Also, it tells them something is happening!
Event Listener for Interactivity
Finally, we need to respond to user actions. Our button needs to do something. We attach an event listener to it. This listener waits for a ‘click’ event. When a click occurs, our fetchQuote() function executes. It’s like telling the browser, “Hey, if someone taps this button, run this code!” This simple mechanism brings our entire project to life. It’s the core of most interactive web applications. Understanding event listeners is fundamental. It opens up a world of possibilities for user interaction. You can use similar patterns with React Hooks to build even more complex interfaces.
Tips to Customise It: Make It Your Own!
You’ve built a solid quote generator. Now, let’s make it truly unique! Here are some ideas. You can extend its functionality. Personalize it to reflect your style. The possibilities are endless!
- Try a Different API: There are many free APIs out there! You could fetch facts, jokes, or even cat pictures. Just swap out the API endpoint. You will then adjust how you access the data.
- Add Social Share Buttons: Allow users to share their favorite quotes! You can add buttons for Twitter or Facebook. Learn how to dynamically construct share links. This increases user engagement greatly.
- Category Filtering: Imagine quotes only about “motivation” or “love.” Some APIs support categories. You could add a dropdown menu. Users could then choose their preferred quote type. This adds another layer of interaction.
- Local Storage for Favorites: Let users save their top quotes. Use browser
localStoragefor this. They can then revisit them later. It’s a great way to add persistent data. You can see React Task Manager with Local Storage – JSX & Hooks Tutorial for ideas on using local storage.
These are just a few starting points. Feel free to get creative! Experiment with different features. This is how you truly master web development skills.
Conclusion: You Did It!
Wow, you just built a dynamic random quote generator! You harnessed the power of the JavaScript Fetch API. You combined HTML for structure. You used CSS for style. You truly made an interactive web application. This is a huge step in your coding journey. Give yourself a big pat on the back. You earned it!
This project taught you modern data fetching. It also covered DOM manipulation. You now understand async/await. These are essential skills for any web developer. Keep building, keep learning, and keep experimenting. Share your awesome creation with the world. We can’t wait to see what you build next!