Flask To-Do App Tutorial: Build a Simple Python Backend
Hey there, fellow coder! Have you wanted to build a simple web application but felt overwhelmed? You’re in the right place! We’re diving into creating a functional Flask To-Do App today. This project is perfect for understanding how to combine Python with web technologies. You will build something real and useful, and that’s incredibly cool!
What We Are Building: Your Very Own Task Manager!
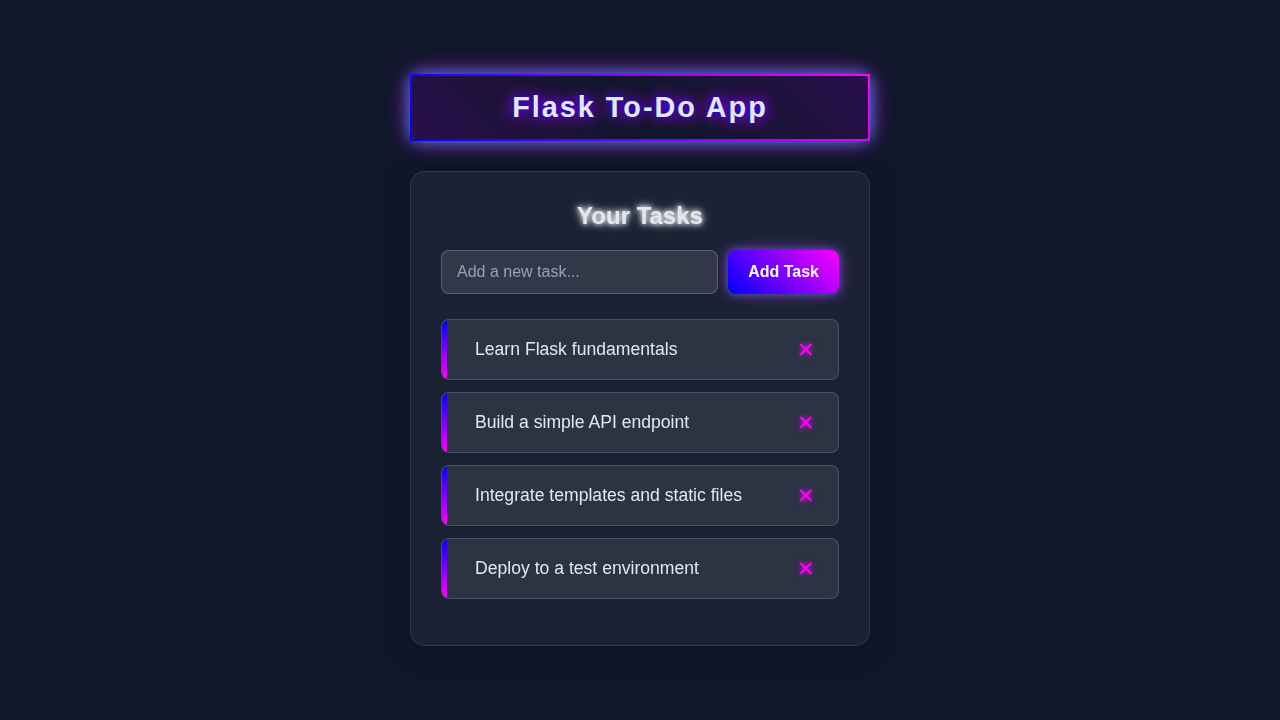
Imagine a neat little web page. It lets you add new tasks to a list. Furthermore, you can mark tasks as complete. And if a task is no longer needed, you can delete it with a click. That’s exactly what we’re going to build! This app will live right in your browser. It uses Python for the backend logic and a small database to save your tasks. This makes it a great step into full-stack development.
HTML Structure: The Bones of Our Flask To-Do App
First, we need the basic layout for our To-Do app. This HTML file will provide all the elements your users will see. It includes an input field for new tasks and a list to display them. Don’t worry, we’ll keep it clean and simple! It’s the foundation for our entire project. We will use a form for adding tasks, and buttons for managing them.
templates/index.html
<!DOCTYPE html>
<html lang="en">
<head>
    <meta charset="UTF-8">
    <meta name="viewport" content="width=device-width, initial-scale=1.0">
    <title>Flask To-Do App</title>
    <!-- Link to the stylesheet. Flask's url_for for static files is used. -->
    <link rel="stylesheet" href="{{ url_for('static', filename='styles.css') }}">
</head>
<body>
    <div class="container">
        <h1>My Flask To-Do List</h1>

        <!-- Form to add new tasks -->
        <form action="{{ url_for('add_task') }}" method="post" class="task-form">
            <input type="text" name="description" placeholder="Add a new task..." required class="task-input">
            <button type="submit" class="add-button">Add Task</button>
        </form>

        <!-- List to display current tasks -->
        <ul class="task-list">
            {% if tasks %}
                {% for task in tasks %}
                    <li class="task-item">
                        <span class="task-description">{{ task.description }}</span>
                        <!-- Link to delete a task. Uses Flask's url_for to generate the URL. -->
                        <a href="{{ url_for('delete_task', task_id=task.id) }}" class="delete-button">Delete</a>
                    </li>
                {% endfor %}
            {% else %}
                <li class="no-tasks">No tasks yet! Add one above.</li>
            {% endif %}
        </ul>
    </div>
</body>
</html>
CSS Styling: Making It Look Good
Next, let’s make our To-Do app visually appealing. We’ll add some CSS to give it a clean, modern look. Good styling improves user experience dramatically. Also, it makes your app much more pleasant to use. We’ll use simple styles to center content and make buttons stand out. This part is all about making your work shine!
Pro Tip: Responsive design is crucial! Consider how your app looks on different screen sizes. Media queries in CSS help with this, ensuring your app works well everywhere. Learn more about media queries on MDN.
static/styles.css
/* static/styles.css */

/* Basic Reset & Box-sizing */
*, *::before, *::after {
    box-sizing: border-box;
    margin: 0;
    padding: 0;
}

body {
    font-family: Arial, Helvetica, sans-serif; /* Safe fonts */
    background-color: #f4f7f6; /* Light background */
    color: #333;
    line-height: 1.6;
    display: flex;
    justify-content: center;
    align-items: flex-start; /* Align to top for better content flow */
    min-height: 100vh;
    padding: 20px;
}

.container {
    background-color: #ffffff;
    padding: 30px;
    border-radius: 10px;
    box-shadow: 0 4px 15px rgba(0, 0, 0, 0.1);
    width: 100%;
    max-width: 600px;
    margin-top: 50px; /* Space from the top */
    overflow: hidden; /* Prevent content overflow */
}

h1 {
    text-align: center;
    color: #2c3e50;
    margin-bottom: 30px;
    font-size: 2.2em;
}

.task-form {
    display: flex;
    gap: 10px;
    margin-bottom: 25px;
}

.task-input {
    flex-grow: 1;
    padding: 12px 15px;
    border: 2px solid #ddd;
    border-radius: 8px;
    font-size: 1em;
    outline: none;
    transition: border-color 0.3s ease, box-shadow 0.3s ease;
}

.task-input:focus {
    border-color: #007bff;
    box-shadow: 0 0 0 3px rgba(0, 123, 255, 0.25);
}

.add-button {
    background-color: #007bff;
    color: white;
    border: none;
    padding: 12px 20px;
    border-radius: 8px;
    cursor: pointer;
    font-size: 1em;
    font-weight: bold;
    transition: background-color 0.3s ease, transform 0.2s ease;
}

.add-button:hover {
    background-color: #0056b3;
    transform: translateY(-1px);
}

.task-list {
    list-style: none;
    padding: 0;
}

.task-item {
    display: flex;
    justify-content: space-between;
    align-items: center;
    background-color: #f9f9f9;
    border: 1px solid #eee;
    padding: 12px 15px;
    margin-bottom: 10px;
    border-radius: 8px;
    transition: background-color 0.3s ease, box-shadow 0.3s ease;
}

.task-item:hover {
    background-color: #f0f0f0;
    box-shadow: 0 2px 8px rgba(0, 0, 0, 0.05);
}

.task-description {
    flex-grow: 1;
    font-size: 1.1em;
    color: #444;
}

.delete-button {
    background-color: #dc3545;
    color: white;
    border: none;
    padding: 8px 12px;
    border-radius: 5px;
    cursor: pointer;
    font-size: 0.9em;
    text-decoration: none; /* Remove underline for links acting as buttons */
    transition: background-color 0.3s ease, transform 0.2s ease;
}

.delete-button:hover {
    background-color: #c82333;
    transform: translateY(-1px);
}

.no-tasks {
    text-align: center;
    color: #6c757d;
    font-style: italic;
    padding: 20px;
    border: 1px dashed #ced4da;
    border-radius: 8px;
    margin-top: 20px;
}

/* Responsive adjustments */
@media (max-width: 600px) {
    .container {
        padding: 20px;
        margin-top: 20px;
    }
    h1 {
        font-size: 1.8em;
    }
    .task-form {
        flex-direction: column;
    }
    .add-button {
        width: 100%;
    }
    .task-item {
        flex-direction: column;
        align-items: flex-start;
        gap: 10px;
    }
    .delete-button {
        width: 100%;
        text-align: center;
    }
}
JavaScript for Interactivity: Bringing It to Life
Our To-Do app needs some client-side magic. JavaScript will handle actions like marking tasks as complete without a full page reload. It makes the app feel snappier and more responsive. We’ll use it to send requests to our Flask backend. This creates a much smoother user experience. For instance, when you click a ‘delete’ button, JavaScript will talk to the server.
app.py
# app.py
from flask import Flask, render_template, request, redirect, url_for

app = Flask(__name__)

# In-memory storage for tasks. In a real application, you'd use a database.
# Each task is a dictionary with 'id' and 'description'.
tasks = []
next_task_id = 1

@app.route('/')
def index():
    """
    Renders the main To-Do list page.
    Displays all current tasks.
    """
    return render_template('index.html', tasks=tasks)

@app.route('/add', methods=['POST'])
def add_task():
    """
    Handles adding a new task.
    Expects 'description' from a form submission.
    Redirects back to the main page after adding.
    """
    global next_task_id
    task_description = request.form.get('description')
    if task_description:
        tasks.append({'id': next_task_id, 'description': task_description})
        next_task_id += 1
    return redirect(url_for('index'))

@app.route('/delete/<int:task_id>')
def delete_task(task_id):
    """
    Handles deleting a task by its ID.
    Finds and removes the task from the list.
    Redirects back to the main page after deleting.
    """
    global tasks
    tasks = [task for task in tasks if task['id'] != task_id]
    return redirect(url_for('index'))

if __name__ == '__main__':
    # Ensure templates and static folders exist relative to app.py
    # Project structure:
    # my_flask_todo_app/
    # ├── app.py
    # ├── templates/
    # │   └── index.html
    # └── static/
    #     └── styles.css
    app.run(debug=True) # debug=True enables auto-reloading and helpful error pages
How It All Works Together: The Python Flask Backend
Now, for the really exciting part: the Python backend! This is where Flask comes into play. Flask is a micro web framework. It handles web requests, talks to our database, and serves our HTML. We will set up routes to manage our tasks. Also, we will use SQLite for data storage. SQLite is a lightweight, file-based database. It’s perfect for small projects like this one.
Setting Up Flask and SQLite
First, you need to install Flask. Open your terminal and type pip install Flask. Then, create a file named app.py. This file will contain all our Python code. We’ll start by importing Flask and the SQLite module. Our database will be a simple file called tasks.db. We need a function to connect to it. Moreover, we will create a table to store our tasks if it doesn’t exist. Each task will have an ID, a description, and a completion status. It’s quite straightforward.
The Main App Route
When someone visits our app’s homepage, Flask needs to know what to do. This is handled by a route, usually /. Our main route will fetch all tasks from the database. It then passes these tasks to our HTML template. Flask’s render_template function makes this easy. It stitches together our Python data and HTML. This is how the list of tasks appears on your screen. You can learn more about building web apps with Flask in our Flask CRUD Tutorial: Building a Basic Web App with Python.
Adding New Tasks
When you type a task and hit ‘Add’, the browser sends a POST request. Our Flask app needs a route to handle this. This route will grab the task description from the form. Then, it inserts the new task into our SQLite database. It defaults to ‘not complete’. After adding, the user is redirected back to the main page. This refreshes the task list. Thus, you see your new task instantly.
Marking Tasks Complete
Each task will have a checkbox or a button to mark it done. When clicked, our JavaScript sends a request to a Flask route. This route will take the task’s ID. It then updates the ‘complete’ status in the database. This is a crucial interaction. The database remembers your changes. So, the task stays marked even after you close your browser. It’s very handy!
Deleting Tasks
Similarly, we’ll have a delete button for each task. When you click it, JavaScript sends another request. This request goes to a Flask route designed for deletion. The route uses the task ID to find and remove it from the database. Remember, deleting is permanent! A confirmation might be a good idea for real-world apps. CSS-Tricks has a great article on JavaScript confirmations.
Heads Up! Error handling is super important for robust applications. What happens if the database connection fails? Always consider edge cases and implement proper error messages. This makes your app much more user-friendly and stable.
The Flask App Code
Here’s what our Python app.py file looks like. It brings all the backend logic together. We handle database connections and various web requests. You’ll see routes for viewing, adding, updating, and deleting tasks. Pay attention to how the database interaction works for each function. We are also building a simple API for task management. For more advanced web interactions, you might explore libraries like Python Requests. It helps with making HTTP requests from your Python scripts. You can check out our guide on Python Requests Library Explained: HTTP for Humans, Simplified.
Speaking of data, if you ever need to get data from websites, Python Web Scraping Tutorial: Data Extraction with Beautiful Soup could be your next adventure. It’s a different way to interact with web content!
[INJECT_PYTHON_CODE]
Tips to Customise Your Flask To-Do App
You’ve built a functional app, that’s awesome! But why stop there? Here are some ideas to make it even better:
- Add Due Dates: Modify the database and HTML to include a due date for each task. You could even sort tasks by urgency.
- User Authentication: Implement user logins so each user has their own private To-Do list. This adds a whole new layer of complexity and learning!
- Categorize Tasks: Allow users to assign categories (e.g., ‘Work’, ‘Personal’, ‘Shopping’) to their tasks. Then, let them filter the list by category.
- Improved UI/UX: Explore more advanced CSS frameworks like Bootstrap. This can give your app a more polished look. Add animations or drag-and-drop functionality for tasks.
Conclusion: You Did It!
Wow, you just built a complete Flask To-Do App from scratch! Give yourself a huge pat on the back. You’ve learned about HTML, CSS, JavaScript, and, most importantly, Python Flask with SQLite. This project truly showcases your growing skills. It’s a fantastic foundation for future web development endeavors. Now, go show off your awesome new app! Share it with friends, or even deploy it online. The web is your oyster!