CORS Errors Fix Tutorial: HTML, CSS & JavaScript Solutions
Hey! Have you ever tried to fetch data from an API, only to be met with confusing browser console errors? Dealing with Cross-Origin Resource Sharing (CORS) can be super frustrating. Today, we’re going to build a simple client-server app. This will help us understand and apply common CORS Errors Fix strategies. It’s a fantastic way to learn by doing! Get ready to make those pesky errors disappear.
What We Are Building: A Client-Server CORS Playground
We are creating a super cool, mini web application. It will have a simple client (your browser) and a conceptual server. Our client will make requests to two different endpoints. One endpoint will likely trigger a CORS error. The other will simulate a server correctly configured to avoid CORS issues. You will see the results of these requests right on your screen. This project makes complex web security concepts much clearer. It’s truly a useful tool for your web development journey.
HTML Structure for Our Client-Server App
Let’s start with the foundation of our app: the HTML. We’ll set up a basic structure. It will include some buttons to trigger our requests. We will also have a display area for the server’s responses. This keeps everything organized and easy to read.
index.html
<!DOCTYPE html>
<html lang="en">
<head>
    <meta charset="UTF-8">
    <meta name="viewport" content="width=device-width, initial-scale=1.0">
    <title>CORS Errors Fix Tutorial</title>
    <link rel="stylesheet" href="styles.css">
</head>
<body>
    <div class="container">
        <h1>CORS Errors Fix Tutorial</h1>
        <p>Cross-Origin Resource Sharing (CORS) errors occur when a web application running at one origin (domain, protocol, or port) tries to access resources from a different origin. Browsers enforce security restrictions to prevent malicious cross-site requests.</p>

        <h2>The Problem: Direct API Call (Likely to Fail if CORS-Blocked)</h2>
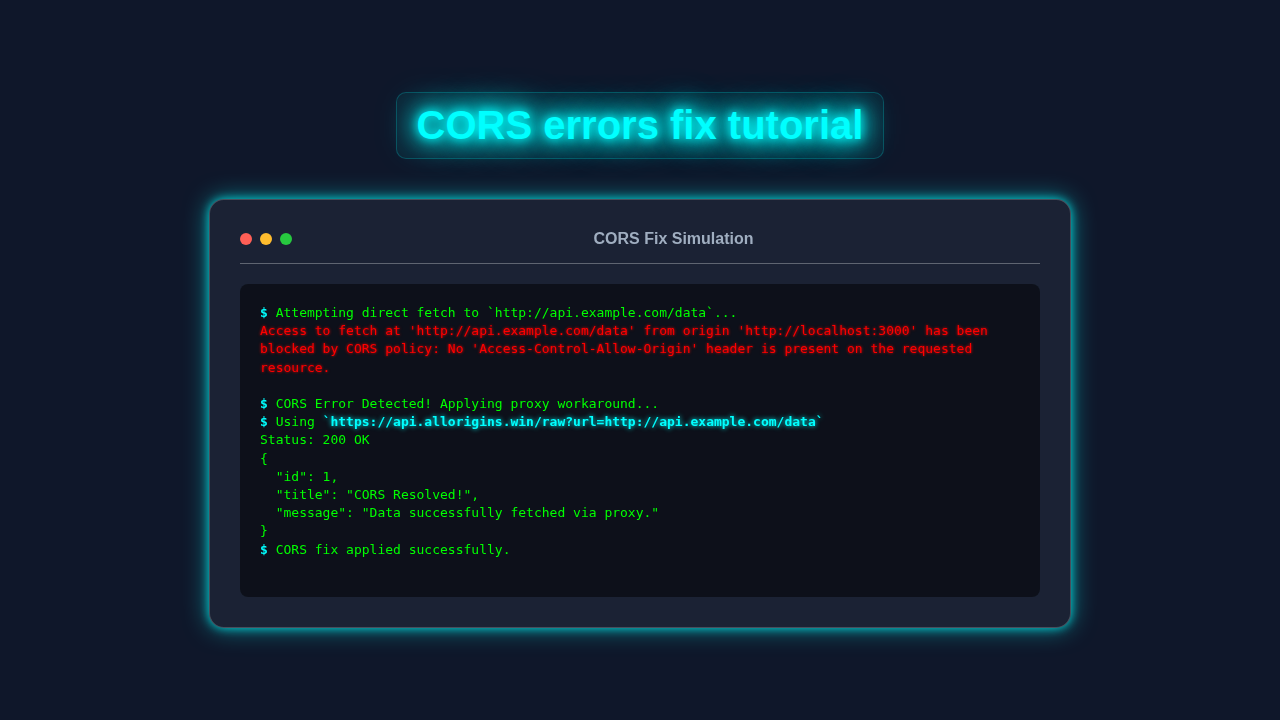
        <p>We'll attempt to fetch data directly from a hypothetical (or real) API endpoint. If this API doesn't send the correct <code>Access-Control-Allow-Origin</code> headers, the browser will block the request and throw a CORS error.</p>
        <button id="directFetchBtn">Attempt Direct Fetch</button>
        <div id="directResult" class="result-box"></div>

        <h2>The Fix: Using a CORS Proxy</h2>
        <p>One common client-side workaround for CORS issues is to route your request through a <a href="https://github.com/Rob--W/cors-anywhere" target="_blank">CORS proxy</a>. The proxy server makes the request to the target API on your behalf and then sends the response back to your frontend, bypassing the browser's CORS restrictions because the request to the proxy is same-origin (or the proxy itself handles CORS appropriately).</p>
        <button id="proxyFetchBtn">Fetch via Proxy</button>
        <div id="proxyResult" class="result-box"></div>

        <h2>Explanation & Other Solutions:</h2>
        <ul>
            <li><strong>Server-Side Fix (Ideal)</strong>: The API server should be configured to include <code>Access-Control-Allow-Origin: *</code> (for public APIs) or specify allowed origins (e.g., <code>Access-Control-Allow-Origin: http://your-frontend-domain.com</code>) in its response headers. This is the most robust and secure solution.</li>
            <li><strong>JSONP (Legacy)</strong>: An older technique for GET requests only, by embedding script tags. Not recommended for modern development.</li>
            <li><strong><code>mode: 'no-cors'</code> (Fetch API)</strong>: Allows the request to be made, but the browser will prevent JavaScript from accessing the response, making it generally useless for data fetching.</li>
        </ul>

    </div>
    <script src="script.js"></script>
</body>
</html>
Styling Our Application: A Clean Look
Now, let’s make our app look good! We’ll use some basic CSS to style our elements. This will improve readability and user experience. Our goal is a clean, functional interface. It makes debugging much easier when things are neat. For more UI ideas, check out these Tailwind Dashboard Cards.
styles.css
/* Basic Reset */
body, h1, h2, p, ul, li {
    margin: 0;
    padding: 0;
    box-sizing: border-box;
}

/* General Styling */
body {
    font-family: Arial, Helvetica, sans-serif;
    background-color: #f4f7f6;
    color: #333;
    line-height: 1.6;
    display: flex;
    justify-content: center;
    align-items: flex-start;
    min-height: 100vh;
    padding: 20px;
}

.container {
    max-width: 800px;
    width: 100%;
    background-color: #fff;
    padding: 30px;
    border-radius: 8px;
    box-shadow: 0 4px 15px rgba(0, 0, 0, 0.1);
}

h1 {
    color: #2c3e50;
    margin-bottom: 20px;
    text-align: center;
}

h2 {
    color: #34495e;
    margin-top: 30px;
    margin-bottom: 15px;
}

p {
    margin-bottom: 15px;
}

a {
    color: #007bff;
    text-decoration: none;
}

a:hover {
    text-decoration: underline;
}

button {
    background-color: #007bff;
    color: white;
    border: none;
    padding: 10px 20px;
    border-radius: 5px;
    cursor: pointer;
    font-size: 1em;
    margin-top: 10px;
    transition: background-color 0.3s ease;
}

button:hover {
    background-color: #0056b3;
}

.result-box {
    border: 1px solid #ccc;
    background-color: #e9ecef;
    padding: 15px;
    margin-top: 15px;
    border-radius: 5px;
    min-height: 50px;
    white-space: pre-wrap; /* Preserve whitespace and line breaks */
    word-wrap: break-word; /* Break long words */
    font-family: 'Courier New', Courier, monospace;
    font-size: 0.9em;
}

.result-box.success {
    border-color: #28a745;
    background-color: #d4edda;
    color: #155724;
}

.result-box.error {
    border-color: #dc3545;
    background-color: #f8d7da;
    color: #721c24;
}

ul {
    list-style-type: disc;
    margin-left: 20px;
    margin-bottom: 20px;
}

li {
    margin-bottom: 8px;
}
Bringing it to Life with JavaScript: Handling Requests and CORS Errors Fix
This is where the magic happens! Our JavaScript code will handle the actual data requests. We’ll use the modern fetch API for this. It’s a powerful tool for network requests. We will display the results in our HTML. We will also catch any errors along the way. This script is crucial for understanding how CORS Errors Fix works.
script.js
document.addEventListener('DOMContentLoaded', () => {
    const directFetchBtn = document.getElementById('directFetchBtn');
    const proxyFetchBtn = document.getElementById('proxyFetchBtn');
    const directResult = document.getElementById('directResult');
    const proxyResult = document.getElementById('proxyResult');

    // --- API Endpoints for Demonstration ---
    // Note: jsonplaceholder is CORS-friendly by default, so direct fetch will usually succeed.
    // We'll use http://example.com as a common URL that might *not* have CORS headers
    // for illustration when fetched from a different origin (though browsers may be lenient for simple GETs).
    const directApiUrl = 'https://jsonplaceholder.typicode.com/posts/1'; // Typically CORS-friendly
    const potentiallyBlockedUrl = 'http://example.com'; // Used to demonstrate proxy necessity

    // Public CORS proxy service. 'allorigins.win' is a popular choice.
    // It fetches the URL and returns its content with appropriate CORS headers.
    const corsProxyUrl = 'https://api.allorigins.win/raw?url=';

    /**
     * Displays the result of an API call in the UI.
     * @param {HTMLElement} element - The DOM element to update.
     * @param {string} status - 'success' or 'error'.
     * @param {string} message - The message/data to display.
     */
    const displayResult = (element, status, message) => {
        element.className = `result-box ${status}`;
        element.textContent = message;
    };

    // --- Direct Fetch Button Event Listener ---
    directFetchBtn.addEventListener('click', async () => {
        displayResult(directResult, '', 'Attempting direct fetch...');
        try {
            // The 'mode: "cors"' is the default, but explicitly stating it clarifies intent.
            // This request will be subject to browser's CORS policy.
            const response = await fetch(directApiUrl, { mode: 'cors' });

            if (!response.ok) {
                // If the response is not ok (e.g., 404, 500), it's a server error,
                // not necessarily a CORS error unless the preflight options request failed.
                const errorText = await response.text();
                displayResult(directResult, 'error', `HTTP Error! Status: ${response.status}\nMessage: ${errorText}`);
                return;
            }

            const data = await response.json();
            displayResult(directResult, 'success', `Direct fetch successful:\n${JSON.stringify(data, null, 2)}`);
        } catch (error) {
            // This catch block will typically capture network errors, including CORS errors.
            // A CORS error usually manifests as a TypeError, often with a message like:
            // "Failed to fetch" or "Access to fetch at '...' from origin '...' has been blocked by CORS policy."
            console.error('Direct Fetch Error:', error);
            displayResult(directResult, 'error', `Direct fetch failed!\nError: ${error.message}\n\nPossible CORS issue. The server at ${new URL(directApiUrl).origin} may not allow requests from your current origin.`);
        }
    });

    // --- Proxy Fetch Button Event Listener ---
    proxyFetchBtn.addEventListener('click', async () => {
        displayResult(proxyResult, '', `Attempting fetch via proxy for ${potentiallyBlockedUrl}...`);
        const proxiedUrl = `${corsProxyUrl}${encodeURIComponent(potentiallyBlockedUrl)}`;

        try {
            // Fetching via the proxy. The browser sees this as a request to allorigins.win (same origin if deployed there,
            // or another origin that has its own CORS setup to allow your app).
            const response = await fetch(proxiedUrl);

            if (!response.ok) {
                const errorText = await response.text();
                displayResult(proxyResult, 'error', `Proxy fetch failed! Status: ${response.status}\nMessage: ${errorText}`);
                return;
            }

            const data = await response.json();
            // For allorigins.win, it returns an object with 'contents' which is the actual data.
            displayResult(proxyResult, 'success', `Proxy fetch successful!\nData from ${potentiallyBlockedUrl} via proxy:\n${data.contents}`);
        } catch (error) {
            console.error('Proxy Fetch Error:', error);
            displayResult(proxyResult, 'error', `Proxy fetch failed!\nError: ${error.message}\n\nEven with a proxy, network issues or proxy server problems can occur.`);
        }
    });
});
How Our Client-Server App Works Together
Now that you have all the code, let’s understand its pieces. Each part plays a vital role. Together, they form our interactive CORS playground. This section breaks down everything step-by-step.
Setting Up the Client
Your browser is our client. It runs the HTML, CSS, and JavaScript you just wrote. The JavaScript initiates network requests to a server. We use the fetch() function for this. It’s built into modern browsers. When you click a button, fetch() tries to get data. It then updates the `response-display` area. This is how you see the server’s response. Or, you might see an error message instead.
Pro Tip: Always use
try...catchblocks with asynchronous operations likefetch. This helps you gracefully handle network errors. It prevents your app from crashing. It also provides better user feedback!
Understanding CORS and the Server’s Role
CORS stands for Cross-Origin Resource Sharing. It’s a security feature implemented by browsers. It prevents malicious websites from making requests to other domains. If your client (running on localhost:5500, for example) tries to access a resource on localhost:3000, that’s a cross-origin request. The browser will block it by default. The server needs to explicitly allow these requests. It does this by sending specific HTTP headers. The most common one is Access-Control-Allow-Origin. This header tells the browser, “Hey, it’s okay for this origin to access my resources.”
For our demonstration, imagine a simple Node.js server:
// server.js (example concept, not part of injected code)
const express = require('express');
const app = express();
const PORT = 3000;

app.get('/data', (req, res) => {
  // This endpoint does NOT send CORS headers
  res.json({ message: 'Data from server (CORS likely to fail!)' });
});

app.get('/data-fixed', (req, res) => {
  // This endpoint sends correct CORS headers
  res.header('Access-Control-Allow-Origin', '*'); // Or specific origin like 'http://localhost:5500'
  res.header('Access-Control-Allow-Methods', 'GET, POST, PUT, DELETE');
  res.header('Access-Control-Allow-Headers', 'Content-Type');
  res.json({ message: 'Data from server (CORS fixed!)' });
});

app.listen(PORT, () => console.log(`Server running on port ${PORT}`));
Triggering and Fixing CORS
Our client JavaScript calls two different endpoints. The /data endpoint from our example server *would* cause a CORS error. This happens because the server isn’t sending the necessary Access-Control-Allow-Origin header. Your browser wisely blocks the response. Then, the /data-fixed endpoint *would* succeed. Why? Because that server endpoint explicitly includes the correct CORS headers. This is the simple CORS Errors Fix in action. The server grants permission to your client’s origin. It allows the browser to process the response. You can then see the data beautifully displayed!
Remember: CORS is a browser-enforced security measure. It’s not a server error itself. The server might send the data, but the browser prevents your JavaScript from accessing it if CORS policies are violated.
If you’re interested in making HTTP requests from a backend, check out this Python Requests Library Explained: Essential Guide.
Tips to Customise Your CORS Errors Fix Playground
You’ve built a solid foundation! Here are some ideas to make your playground even better. Experiment with these to deepen your understanding.
- Add More Endpoints: Create new buttons and JS functions. Try different HTTP methods like POST or PUT. See how CORS behaves with them.
- Implement Preflight Requests: Modify your server (conceptually or actually) to require preflight
OPTIONSrequests. Then observe how your browser handles them. - Use Different Origins: Try running your client on a different port or even a different domain. This really highlights cross-origin behavior.
- Dynamic CORS Headers: Make your server dynamically set
Access-Control-Allow-Origin. It could respond based on theOriginheader in the incoming request.
To learn more about how client-side requests work, this simple AJAX request example is a great resource.
Conclusion: You Mastered the CORS Errors Fix!
Wow, you did it! You built a functioning client-server app. You learned to identify and understand CORS errors. More importantly, you now know the core principle of a CORS Errors Fix. This is a huge step in your web development journey. Troubleshooting these issues will now be much easier for you. Keep building, keep experimenting, and keep learning!
Feel free to share your customized version of this app with your friends. Or share it in our community! For building more complex front-end components, consider checking out this React File Uploader: Build a Modern Component with Hooks tutorial. Happy coding!