Hey there, awesome coder! If you’ve been wanting to build a cool Tailwind Music Player but felt a bit lost, you are absolutely in the right place. Today, we’re going to create a beautiful and fully responsive music player UI. This project will truly boost your front-end skills. You’ll use modern HTML, the amazing Tailwind CSS, and a sprinkle of plain JavaScript. Let’s make some noise!
What We Are Building: Your Responsive Tailwind Music Player
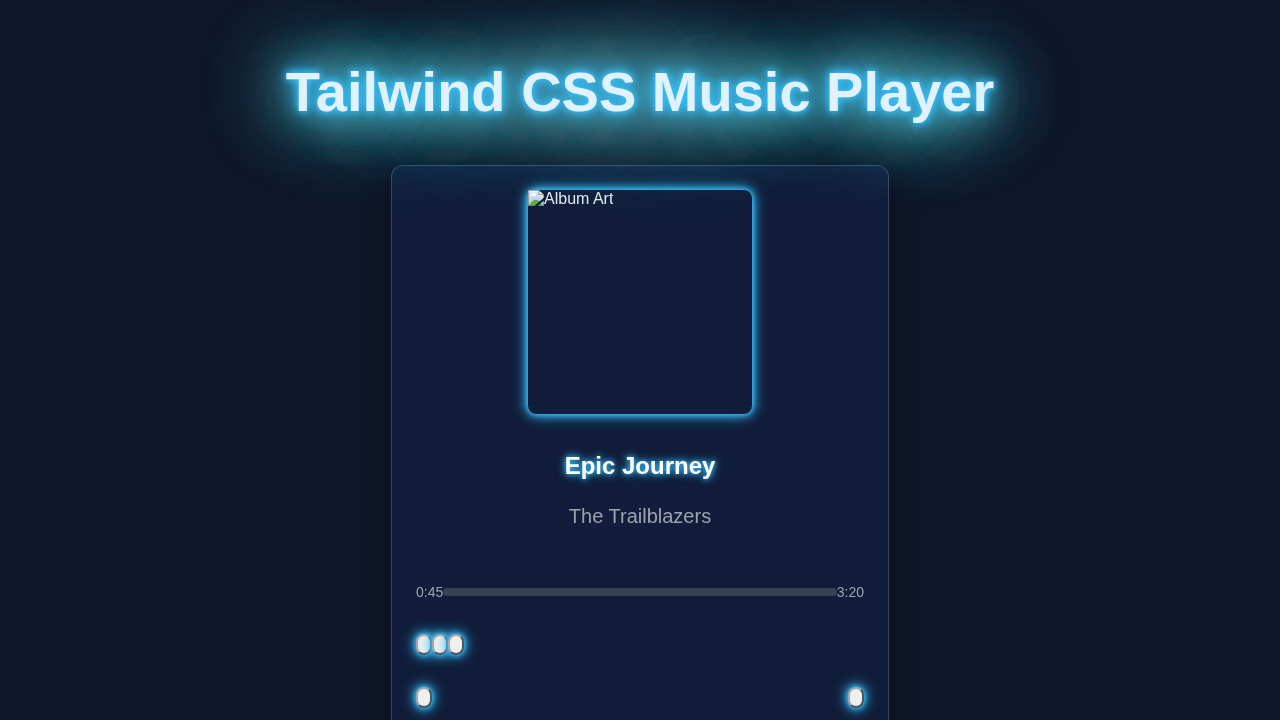
We’re crafting a sleek, modern music player interface. This isn’t just any player, though. It will adapt perfectly to any screen size. That means it looks great on a phone or a desktop. We’ll include controls like play, pause, next, and previous. Furthermore, a progress bar will show song advancement. This project is a fantastic way to showcase your UI/UX skills. You’ll build something genuinely interactive and useful!
HTML Structure: The Blueprint for Our Player
First, we need a solid foundation for our music player. This HTML will define all the main elements. Think of it as the skeleton of our application. We’ll have containers for the album art, song info, and control buttons. Moreover, a progress bar will be included. Don’t worry about the styling just yet; Tailwind will handle that soon!
index.html
<!DOCTYPE html>
<html lang="en">
<head>
    <meta charset="UTF-8">
    <meta name="viewport" content="width=device-width, initial-scale=1.0">
    <title>Tailwind CSS Music Player</title>
    <!--
        Tailwind CSS CDN for quick development.
        For production, it's recommended to install Tailwind CSS
        and build your CSS bundle to optimize file size.
        See: https://tailwindcss.com/docs/installation
    -->
    <script src="https://cdn.tailwindcss.com"></script>
    <!-- Custom styles for non-utility patterns like glassmorphism and neon glows -->
    <link rel="stylesheet" href="styles.css">
</head>
<body class="bg-slate-900 flex items-center justify-center min-h-screen text-slate-200 p-4 font-sans">

    <!-- Music Player Container -->
    <div class="glass-bg rounded-xl p-6 max-w-md w-full flex flex-col items-center gap-4 shadow-lg transition-all duration-300 transform hover:scale-[1.01] glowing-shadow-sky">

        <!-- Album Art -->
        <div class="w-56 h-56 rounded-lg overflow-hidden relative border border-solid border-slate-400/30 glowing-shadow-sky">
            <img src="https://via.placeholder.com/224x224/0f172a/a5f3fc?text=Album+Art" alt="Album Art" class="w-full h-full object-cover">
            <!-- Play icon overlay for visual effect -->
            <div class="absolute inset-0 flex items-center justify-center bg-black bg-opacity-30 opacity-0 hover:opacity-100 transition-opacity duration-300 cursor-pointer">
                <svg class="w-16 h-16 text-white text-opacity-80 drop-shadow-lg" fill="currentColor" viewBox="0 0 24 24">
                    <path d="M8 5v14l11-7z"/>
                </svg>
                <span class="sr-only">Play Overlay</span>
            </div>
        </div>

        <!-- Song Info -->
        <div class="text-center">
            <h2 class="text-2xl font-bold text-sky-200 glowing-text-sky">Epic Journey</h2>
            <p class="text-slate-400 text-xl">The Trailblazers</p>
        </div>

        <!-- Progress Bar -->
        <div class="w-full mt-4 flex items-center gap-3">
            <span class="text-sm text-slate-400">0:45</span>
            <div class="w-full h-2 bg-slate-700 rounded-full relative cursor-pointer group">
                <div class="h-full bg-sky-500 rounded-full absolute left-0 top-0 w-[40%]"></div>
                <!-- Progress scrubber/handle -->
                <div class="absolute w-4 h-4 -mt-1 -ml-2 bg-sky-500 rounded-full left-[40%] top-1/2 -translate-y-1/2 shadow-lg glowing-shadow-sky group-hover:scale-125 transition-transform duration-200"></div>
                <span class="sr-only">Progress Bar</span>
            </div>
            <span class="text-sm text-slate-400">3:20</span>
        </div>

        <!-- Main Controls (Prev, Play/Pause, Next) -->
        <div class="w-full flex justify-around items-center mt-4">
            <button class="p-3 rounded-full hover:bg-slate-700 transition-colors glowing-shadow-sky">
                <svg class="w-7 h-7 text-slate-300 hover:text-sky-400 transition-colors" fill="currentColor" viewBox="0 0 24 24">
                    <path d="M6 6h2v12H6zm3.5 6l8.5 6V6z"/>
                </svg>
                <span class="sr-only">Previous Song</span>
            </button>
            <button class="p-4 rounded-full bg-sky-600 hover:bg-sky-700 transition-colors glowing-shadow-sky">
                <svg class="w-9 h-9 text-white" fill="currentColor" viewBox="0 0 24 24">
                    <path d="M8 5v14l11-7z"/>
                </svg>
                <span class="sr-only">Play Song</span>
            </button>
            <button class="p-3 rounded-full hover:bg-slate-700 transition-colors glowing-shadow-sky">
                <svg class="w-7 h-7 text-slate-300 hover:text-sky-400 transition-colors" fill="currentColor" viewBox="0 0 24 24">
                    <path d="M6 18l8.5-6L6 6v12zM16 6h2v12h-2z"/>
                </svg>
                <span class="sr-only">Next Song</span>
            </button>
        </div>

        <!-- Volume and Other Controls (Shuffle, Repeat) -->
        <div class="w-full flex justify-between items-center mt-4 text-slate-400">
            <button class="p-2 rounded-full hover:bg-slate-700 transition-colors hover:text-sky-400 glowing-shadow-sky">
                <svg class="w-6 h-6" fill="currentColor" viewBox="0 0 24 24">
                    <path d="M14.83 13.41l-1.33-1.33L16.21 10H10V8h6.21l-2.71-2.71 1.41-1.41L20 9l-5.17 5.17zm-9.3 0L4 12.24l-1.41 1.41 4.24 4.24L11 12.9l-1.41-1.41-4.14-4.14L18.38 22l1.41-1.41L2.81 2.81z"/>
                </svg>
                <span class="sr-only">Toggle Shuffle</span>
            </button>
            <div class="flex items-center gap-2 w-1/3">
                <svg class="w-6 h-6" fill="currentColor" viewBox="0 0 24 24">
                    <path d="M3 9v6h4l5 5V4L7 9H3zm13.5 3c0-1.77-1-3.29-2.5-4.03v8.05c1.5-.73 2.5-2.25 2.5-4.02zM14 3.23v2.06c2.89.81 5 3.54 5 6.71s-2.11 5.9-5 6.71v2.06c4.01-.98 7-4.47 7-8.77s-2.99-7.79-7-8.77z"/>
                </svg>
                <div class="w-full h-1 bg-slate-700 rounded-full relative cursor-pointer group">
                    <div class="h-full bg-sky-500 rounded-full absolute left-0 top-0 w-[70%]"></div>
                    <!-- Volume scrubber/handle -->
                    <div class="absolute w-3 h-3 -mt-1 -ml-1.5 bg-sky-500 rounded-full left-[70%] top-1/2 -translate-y-1/2 shadow-lg glowing-shadow-sky group-hover:scale-125 transition-transform duration-200"></div>
                </div>
                <span class="sr-only">Volume Control</span>
            </div>
            <button class="p-2 rounded-full hover:bg-slate-700 transition-colors hover:text-sky-400 glowing-shadow-sky">
                <svg class="w-6 h-6" fill="currentColor" viewBox="0 0 24 24">
                    <path d="M7 7h10v3l4-4-4-4v3H5v6h2V7zm10 10H7v-3l-4 4 4 4v-3h12v-6h-2v4z"/>
                </svg>
                <span class="sr-only">Toggle Repeat</span>
            </button>
        </div>
    </div>

</body>
</html>
CSS Styling: Bringing It to Life with Tailwind CSS
Now, for the really fun part! We’re using Tailwind CSS to style our player. Tailwind is a utility-first framework. This means we apply classes directly in our HTML. It lets us build custom designs super fast. We’ll use classes for layout, colors, sizing, and responsiveness. Therefore, our player will look polished and professional.
styles.css
/*
    Custom styles for the Tailwind CSS Music Player.
    These styles enhance the design with specific effects
    like glassmorphism and neon glows that aren't
    directly achievable with single Tailwind utility classes.
*/

/* Ensure all elements consider padding and border in their total width/height. */
*, *::before, *::after {
    box-sizing: border-box;
}

/* Set a default font-family for the body. */
body {
    font-family: Arial, Helvetica, sans-serif;
    /* Prevent horizontal scroll, important for full-width layouts on mobile */
    overflow-x: hidden;
}

/* Glassmorphism effect for the player's background */
.glass-bg {
    background-color: rgba(30, 41, 59, 0.4); /* slate-800 with 40% opacity */
    backdrop-filter: blur(20px) saturate(180%);
    -webkit-backdrop-filter: blur(20px) saturate(180%); /* For Safari support */
    border: 1px solid rgba(148, 163, 184, 0.3); /* slate-400 with 30% opacity for a subtle border */
}

/* Glowing text effect for primary titles/highlights */
.glowing-text-sky {
    color: #a5f3fc; /* cyan-200 for base color */
    text-shadow:
        0 0 7px rgba(56, 189, 248, 0.7),   /* sky-400, 70% opacity */
        0 0 10px rgba(56, 189, 248, 0.7),
        0 0 21px rgba(56, 189, 248, 0.7);
}

/* Glowing box shadow effect for interactive elements and containers */
.glowing-shadow-sky {
    box-shadow:
        0 0 5px rgba(56, 189, 248, 0.8),   /* sky-400, 80% opacity */
        0 0 10px rgba(56, 189, 248, 0.6),
        0 0 15px rgba(56, 189, 248, 0.4);
    transition: all 0.2s ease-in-out; /* Smooth transition for hover effects */
}

/* Hover effect for the glowing box shadow */
.glowing-shadow-sky:hover {
     box-shadow:
        0 0 10px rgba(103, 232, 249, 0.8), /* cyan-300, 80% opacity */
        0 0 20px rgba(103, 232, 249, 0.6),
        0 0 30px rgba(103, 232, 249, 0.4);
}
JavaScript: Adding Interactivity to Our Music Player
Our player needs to do more than just look good. JavaScript will give it life. We’ll use plain JavaScript for all the player’s core functions. This includes playing and pausing songs. Also, we’ll handle song progression and updates. You’ll learn how to interact with the DOM dynamically. It’s truly exciting to see it all come together!
How It All Works Together: The Harmony of Code
Let’s dive deeper into how these pieces create a fantastic music player experience. Each part plays a vital role. Understanding this synergy is key. You’ll see how HTML provides the structure. Then, Tailwind CSS beautifies everything. Finally, JavaScript adds dynamic behavior. This combination is incredibly powerful for web development.
Building the Player Container
Our main container uses Tailwind classes. For example, max-w-md centers our player. mx-auto ensures it stays centered. A shadow and rounded corners make it visually appealing. We also add padding and a background color. This creates a distinct card-like appearance for the player. It’s a great starting point.
Pro Tip: Tailwind’s responsive prefixes (like
md:orlg:) let you apply different styles at various breakpoints. This is how we ensure our player looks great on any device!
Designing the Album Art and Song Info
Inside the container, we have the album artwork. An <img> tag holds our cover image. Tailwind classes like w-full and h-full ensure it fits. We give it a nice rounded-lg for soft edges. Below that, we display the song title and artist. Classes like font-bold and text-xl make them stand out. It’s important for clear readability.
Furthermore, this section demonstrates how easy it is to manage content with Tailwind. No more writing custom CSS for every text element. You apply the classes directly. This speeds up development greatly. Also, it keeps your codebase clean.
Crafting the Playback Controls
The control buttons are essential for any music player. We use <button> elements for play/pause, next, and previous. Tailwind’s flex and justify-center classes align them perfectly. Icons (perhaps from Heroicons or Font Awesome) will represent each action. We add padding and hover effects too. This makes them feel interactive and user-friendly. These small details improve the overall experience immensely. Remember, great UI is all about user interaction.
Implementing the Progress Bar and Time Display
A crucial element is the progress bar. It visually shows the song’s progress. We’ll use a <div> for the track. Another inner <div> will represent the filled progress. JavaScript will update its width. This creates the animation. We also display current time and total duration. This gives the user full control and information. It’s important for a smooth playback experience.
JavaScript’s Role in Dynamism
Our JavaScript truly connects everything. It listens for clicks on buttons. For instance, when you click play, JS changes the button icon. It also starts the audio playback. It updates the progress bar continuously. Furthermore, it manages song transitions. When a song ends, it loads the next one. We grab elements using document.querySelector. Then, we add event listeners. This brings our static HTML to life. It makes the player truly functional.
Heads Up: Mastering event listeners and DOM manipulation is a superpower for front-end developers. Explore MDN Web Docs for deeper insights!
Every element works together seamlessly. This creates a rich user interface. You’ve built a genuinely responsive and interactive component. This project highlights the power of modern web technologies. And you did it all with plain HTML, Tailwind CSS, and vanilla JavaScript!
Tips to Customise Your Tailwind Music Player
You’ve built an amazing foundation! Now, make it uniquely yours. Here are some ideas to extend this project. Personalisation is a key part of learning. Also, it makes your portfolio stand out.
- Add a Playlist Feature: Create an array of songs. Let users select from a list. This would add significant functionality. You could even implement shuffle!
- Volume Control: Integrate a slider for volume. JavaScript can easily control audio volume. This enhances user experience greatly.
- Theming Options: Implement dark mode or different color schemes. Tailwind’s JIT mode makes this quite easy. It adds a professional touch.
- Dynamic Backgrounds: Change the player’s background based on the album art. This creates a truly immersive experience. It’s a fun challenge!
- Integration with an API: Fetch song data from a public API. This could include lyrics or artist information. It would be a step towards a real-world application. Imagine building something like a dynamic user profile card for artists!
Conclusion: You Just Built a Tailwind Music Player!
Wow, you did it! You successfully built a responsive Tailwind Music Player UI. This project combines HTML for structure, Tailwind CSS for beautiful styling, and JavaScript for engaging interactivity. You learned so much about modern web development techniques. Furthermore, you now have a fantastic project for your portfolio. Share your creation with the world! Keep experimenting and building. The web development journey is truly exciting. Happy coding!