Python Requests Library Explained: Quick & Easy Guide
Hey there, fellow self-taught coder! Ever stared at a website, wondering how your Python script could grab some information from it? Or maybe you’ve heard whispers about APIs, and how programs talk to each other across the internet.
You’re not alone if it feels a bit like magic. But don’t worry! We’re about to pull back the curtain on one of Python’s most powerful, yet user-friendly, tools. This is all about the Python Requests Library Explained: Code & API Guide, and how it simplifies web interactions for you.
Many beginners find dealing with web requests intimidating. It involves understanding HTTP, different methods, and handling various responses. Frankly, it can get messy really fast. But here’s the thing: Python’s Requests library changes all that. It wraps up all the complex network communication into simple, intuitive functions. You gain the power to interact with almost any web service out there.
Imagine you’re sending a letter. The old way means you’d fold the paper, find an envelope, write the address perfectly, and then figure out the postal system. The Requests library, conversely, is like having a super-efficient assistant. You just tell them what you want to send and where. They handle all the nitty-gritty details. This makes the Python Requests Library Explained concepts much easier to grasp.
Unpacking the Python Requests Library Explained
So, how does this incredible library actually work? Let’s break it down into easy, bite-sized tips. You’ll soon see how powerful and straightforward web interactions can be.
-
The Core Idea: Sending HTTP Messages
At its heart, the Requests library helps your Python program send HTTP messages. HTTP, or Hypertext Transfer Protocol, is simply the language web browsers and servers use to talk. Think of it like ordering food at a restaurant. Your program is the customer, the Requests library is the waiter, and the website’s server is the kitchen. You make a request, and the server sends back a response.
For example, when you type “procoder09.com” into your browser, you’re sending an HTTP request. The server replies with the website’s content. The Requests library lets your Python script do the exact same thing!
-
Making GET Requests: Fetching Information
The most common type of HTTP request is a GET request. You use GET when you want to retrieve data from a web server. It’s like asking a librarian for a specific book. You’re not changing anything; you just want to read it.
With Requests, you’d tell it to “GET” a URL. The library then goes to that address, fetches the information, and brings it back to your script. Maybe you want to grab the latest stock prices or fetch a weather forecast. A GET request is your go-to method for pulling down public information. You can even use it for Python Web Scraping Tutorial: Extract Data with Beautiful Soup later on.
-
Handling Responses: What You Get Back
After you send a request, the server always sends something back. This is called a response. It contains the data you asked for, or sometimes, an error message. Imagine your waiter coming back with your food, or perhaps telling you they’re out of that dish.
The Requests library helps you easily inspect this response. You can check its status code, which tells you if the request was successful (like a “200 OK”). You can also access the actual content, often in text or JSON format. This response object is packed with useful information for your program.
Remember: A successful request isn’t always a 200. Always check the status code to truly understand the server’s reply!
Digging Deeper: Python Requests Library Explained in Action
Now that you understand the basics, let’s explore more advanced features. The Python Requests Library Explained makes even complex interactions feel manageable.
-
POST, PUT, DELETE: Changing Data on the Server
GET requests are for reading, but what if you need to send data to the server or change something? That’s where POST, PUT, and DELETE come in. A POST request is like submitting a form on a website – you’re sending new information, say, creating a new user account.
PUT is for updating existing data, like editing your profile information. DELETE, as you might guess, removes data. These methods allow your script to truly interact and modify resources on the web, not just passively read them. You’re no longer just browsing; you’re participating.
-
Parameters and Headers: Customizing Your Request
Sometimes, your request needs extra details. You might want to filter results or include authentication tokens. This is where parameters and headers are vital. Parameters are bits of information added to the URL itself, often for filtering data. Think of telling the librarian, “I need a book about Python, published in 2022.” “Python” and “2022” are your parameters.
Headers, however, are extra metadata sent along with your request. They describe the request itself. This could include your browser type, the language you prefer, or security tokens. The Requests library makes adding these easy. You just provide a simple dictionary of key-value pairs, and it handles the rest. Learn more about HTTP headers on MDN Web Docs for a deeper dive.
-
Error Handling: Gracefully Managing Problems
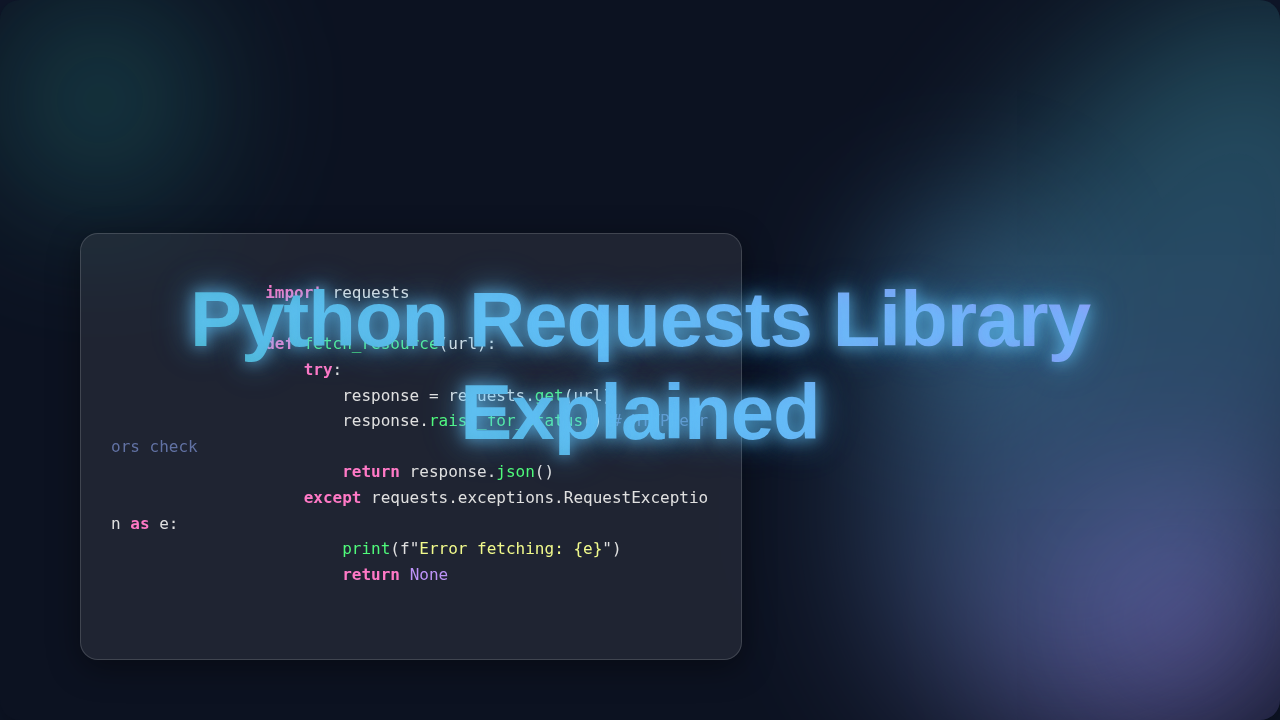
The internet isn’t perfect. Sometimes, requests fail. The server might be down, or you might send incorrect data. The Requests library doesn’t just crash when this happens. It gives you tools to handle these issues gracefully. You can check the status code of the response. For example, a “404 Not Found” means the resource isn’t there, and a “500 Internal Server Error” points to a problem on the server’s side.
You can also use built-in methods to raise an exception for bad status codes. This helps your program react intelligently. Instead of breaking, it can try again or inform you of the problem. Your script becomes much more robust and user-friendly.
-
Sessions: Keeping Connections Alive
Imagine logging into a website. You stay logged in as you navigate different pages. This is thanks to sessions. An HTTP session keeps track of certain states between multiple requests. Without it, you’d have to log in every single time you clicked a link!
The Requests library lets you create `Session` objects. These objects automatically persist certain parameters, like cookies and headers, across all requests made through that session. This is incredibly useful for interacting with APIs that require authentication or for Blog Thumbnail: Flask Python Web Framework – UI/UX Design based web applications.
Pro Tip: Use sessions when making multiple requests to the same host. It’s more efficient and helps maintain state!
Bonus Tip: Always Be Respectful!
When you’re interacting with websites and APIs, remember you’re using someone else’s resources. Don’t spam them with too many requests too quickly. Read their API documentation for rate limits and terms of service. Be a good internet citizen. You want to make sure your scripts play nicely with their servers. If you act responsibly, you will have a much better experience yourself. Plus, you avoid getting your IP address blocked, which is a major headache!
Your Next Steps with the Python Requests Library
There you have it! The Python Requests Library might seem like a complex beast at first glance, but it’s actually incredibly approachable. You now understand its core mechanics: sending requests, handling responses, and mastering various HTTP methods. You’ve also learned about crucial features like parameters, headers, error handling, and sessions.
You have the fundamental knowledge to start making your Python scripts interact with the vast world of the web. This opens up so many possibilities for automation, data collection, and building powerful applications. Keep experimenting, keep building, and you’ll be a web interaction wizard in no time. You got this!