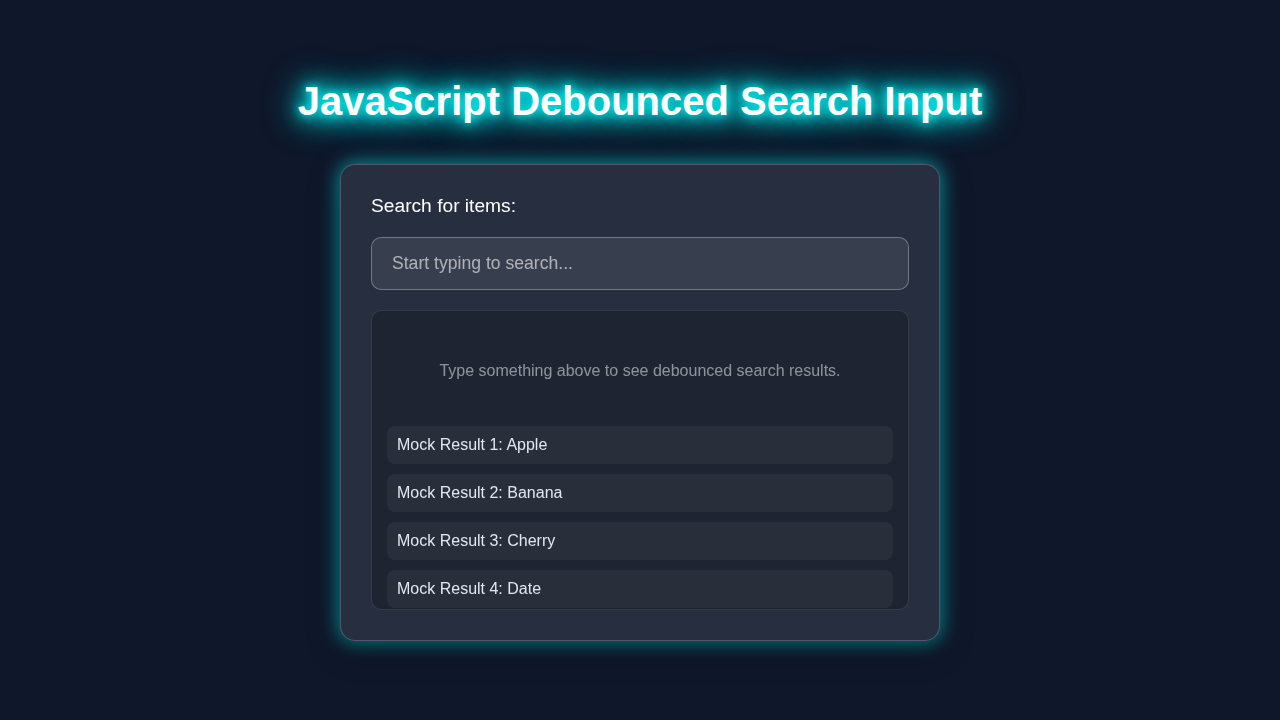
Hey there, awesome coder! If you’ve ever wanted to build a super smooth Debounced Search Input but felt a bit lost, you are in the perfect spot. Today, we’re going to create something really useful. It will make your web applications feel much faster. We will build a live search feature. It gives users immediate feedback. And it does so without overwhelming your server!
This tutorial will guide you step by step. You’ll use plain HTML, CSS, and vanilla JavaScript. Get ready to level up your front-end skills!
What We Are Building
Imagine a search bar on a website. As you type, results pop up below it. Sounds cool, right? But here’s the magic twist. We are building a search input that waits for you to pause typing. Only then does it fetch new results. This is called “debouncing.”
It’s incredibly useful! Instead of sending a request for every single keystroke, it waits. So, if you type “javascript” quickly, it only sends one request. This makes your app more efficient. Your users will love the responsive feel. Plus, your server will thank you too!
HTML Structure
First, let’s set up our basic HTML. This will be super simple. We need an input field for typing. And we need a div to display our search results. It’s the skeleton of our awesome project!
index.html
<!DOCTYPE html>
<html lang="en">
<head>
    <meta charset="UTF-8">
    <meta name="viewport" content="width=device-width, initial-scale=1.0">
    <title>Debounced Search Input</title>
    <link rel="stylesheet" href="styles.css">
</head>
<body>
    <div class="container">
        <h1>Debounced Search Input</h1>
        <p>This example demonstrates how to debounce a search input to prevent excessive API calls.</p>

        <div class="search-wrapper">
            <label for="search-input" class="sr-only">Search</label>
            <input type="text" id="search-input" class="search-input" placeholder="Type to search...">
        </div>

        <div class="results-container">
            <h2>Search Results</h2>
            <ul id="results-list">
                <!-- Search results will be loaded here -->
                <li class="placeholder">Start typing to see results...</li>
            </ul>
        </div>
    </div>

    <script src="script.js" defer></script>
</body>
</html>
CSS Styling
Next, we’ll add some CSS to make our search bar look presentable. We’ll give it a clean, modern look. Don’t worry, we are keeping it basic and easy to understand. These styles will make our component user-friendly.
styles.css
/* Universal box-sizing for easier layout management */
*, *::before, *::after {
    box-sizing: border-box;
}

/* Basic body styling */
body {
    font-family: Arial, Helvetica, sans-serif; /* Safe system font stack */
    margin: 0;
    padding: 20px;
    background-color: #f4f7f6; /* Light background */
    color: #333;
    display: flex;
    justify-content: center;
    align-items: flex-start; /* Align to top for longer content */
    min-height: 100vh;
}

.container {
    background-color: #fff;
    padding: 30px;
    border-radius: 8px;
    box-shadow: 0 4px 15px rgba(0, 0, 0, 0.1);
    width: 100%;
    max-width: 700px;
    overflow: hidden; /* Ensure no overflow */
}

h1 {
    color: #2c3e50;
    margin-top: 0;
    text-align: center;
}

p {
    text-align: center;
    margin-bottom: 25px;
    color: #555;
}

.search-wrapper {
    margin-bottom: 25px;
    position: relative;
}

.search-input {
    width: 100%;
    padding: 12px 15px;
    border: 1px solid #ccc;
    border-radius: 5px;
    font-size: 1.1em;
    color: #333;
    transition: border-color 0.3s ease, box-shadow 0.3s ease;
    outline: none; /* Remove default focus outline */
}

.search-input:focus {
    border-color: #007bff;
    box-shadow: 0 0 8px rgba(0, 123, 255, 0.2);
}

/* Visually hidden label for accessibility */
.sr-only {
    position: absolute;
    width: 1px;
    height: 1px;
    padding: 0;
    margin: -1px;
    overflow: hidden;
    clip: rect(0, 0, 0, 0);
    white-space: nowrap;
    border: 0;
}

.results-container {
    margin-top: 20px;
    border-top: 1px solid #eee;
    padding-top: 20px;
}

.results-container h2 {
    color: #2c3e50;
    font-size: 1.3em;
    margin-bottom: 15px;
}

#results-list {
    list-style: none;
    padding: 0;
    margin: 0;
    max-height: 300px; /* Limit height for scrollable results */
    overflow-y: auto; /* Enable vertical scrolling */
    border: 1px solid #e0e0e0;
    border-radius: 5px;
    background-color: #fdfdfd;
}

#results-list li {
    padding: 12px 15px;
    border-bottom: 1px solid #eee;
    transition: background-color 0.2s ease;
    color: #333;
}

#results-list li:last-child {
    border-bottom: none;
}

#results-list li:hover {
    background-color: #f0f8ff; /* Light hover effect */
}

#results-list .placeholder {
    color: #777;
    font-style: italic;
    text-align: center;
    padding: 20px;
}
JavaScript
Now for the fun part: JavaScript! This is where we bring our Debounced Search Input to life. We’ll write a function that handles the search logic. Then, we’ll wrap it in our special debounce function. This ensures it only runs when needed. It’s a game-changer for performance.
script.js
/**
 * script.js
 * Implements a debounced search input for efficient API calls.
 */

document.addEventListener('DOMContentLoaded', () => {
    const searchInput = document.getElementById('search-input');
    const resultsList = document.getElementById('results-list');

    // Simulated data for search results
    const allItems = [
        "Apple", "Banana", "Cherry", "Date", "Elderberry",
        "Fig", "Grape", "Honeydew", "Indian Fig", "Jujube",
        "Kiwi", "Lemon", "Mango", "Nectarine", "Orange",
        "Papaya", "Quince", "Raspberry", "Strawberry", "Tangerine",
        "Ugli Fruit", "Vanilla Bean", "Watermelon", "Xigua", "Yellow Passion Fruit", "Zucchini"
    ];

    /**
     * Debounce function: Delays execution of a function until after a certain
     * amount of time has passed without any further invocations.
     * @param {function} func The function to debounce.
     * @param {number} delay The delay in milliseconds.
     * @returns {function} A new function that is debounced.
     */
    const debounce = (func, delay) => {
        let timeoutId;
        return (...args) => {
            clearTimeout(timeoutId);
            timeoutId = setTimeout(() => {
                func.apply(this, args);
            }, delay);
        };
    };

    /**
     * Simulates fetching search results from an API.
     * This function would typically make an actual network request.
     * @param {string} query The search query.
     * @returns {Promise<string[]>} A promise that resolves with an array of matching items.
     */
    const fetchSearchResults = (query) => {
        console.log(`Fetching results for: "${query}"...`);
        // Simulate network delay
        return new Promise(resolve => {
            setTimeout(() => {
                const filteredItems = allItems.filter(item =>
                    item.toLowerCase().includes(query.toLowerCase())
                );
                resolve(filteredItems);
            }, 300); // Simulate 300ms API response time
        });
    };

    /**
     * Renders the search results in the UI.
     * @param {string[]} results An array of result strings.
     */
    const renderResults = (results) => {
        resultsList.innerHTML = ''; // Clear previous results

        if (results.length === 0) {
            const noResultsItem = document.createElement('li');
            noResultsItem.textContent = "No items found.";
            noResultsItem.classList.add('placeholder');
            resultsList.appendChild(noResultsItem);
            return;
        }

        results.forEach(item => {
            const listItem = document.createElement('li');
            listItem.textContent = item;
            resultsList.appendChild(listItem);
        });
    };

    /**
     * The main search handler function, which will be debounced.
     * @param {Event} event The input event object.
     */
    const handleSearch = async (event) => {
        const query = event.target.value.trim();

        if (query === '') {
            resultsList.innerHTML = '<li class="placeholder">Start typing to see results...</li>';
            return;
        }

        // Display a loading indicator if desired
        resultsList.innerHTML = '<li class="placeholder">Searching...</li>';

        try {
            const results = await fetchSearchResults(query);
            renderResults(results);
        } catch (error) {
            console.error("Error fetching search results:", error);
            resultsList.innerHTML = '<li class="placeholder">Error fetching results.</li>';
        }
    };

    // Create a debounced version of the handleSearch function
    // Delay of 500ms means the search will only run if the user stops typing for 0.5 seconds.
    const debouncedSearch = debounce(handleSearch, 500);

    // Attach the debounced function to the input event
    // The 'input' event is generally preferred over 'keyup' as it fires on paste, drag-and-drop, etc.
    searchInput.addEventListener('input', debouncedSearch);

    // Initial state: Display placeholder text
    renderResults([]); // Call with empty array to show "Start typing..."
});
How It All Works Together
Alright, you’ve got the code. Let’s break down each piece. We’ll see how everything connects. It’s like putting together a puzzle. Soon you will see the full picture!
Setting Up Our Elements
First, our JavaScript connects to the HTML. We grab references to our input and results container. We use document.getElementById() for this. It’s how our script knows what to interact with. These are our starting points for all the magic.
Then we have some sample data. This simulates a real database or API response. In a real app, this data would come from a server. But for our tutorial, it helps us test quickly.
Understanding Debouncing
This is the core concept here. What is debouncing? Imagine you’re frantically pressing an elevator button. Debouncing means the elevator doesn’t react to every single press. It waits for a moment of calm. Only then does it close the doors. Our search input works the same way.
Pro Tip: Debouncing is perfect for events that fire rapidly. Think resizing windows, scrolling, or user input. It saves resources and makes your app smoother.
Our debounce function creates a delay. When you type, it sets a timer. If you type again before the timer finishes, it resets the timer. The actual search function only runs if you stop typing for that set delay. This prevents countless unnecessary requests. It’s a huge performance boost!
The Search Logic
The fetchResults function is our simulated backend. It takes your search query. Then it filters our sample data. It finds items that include your query. We added a small setTimeout here. This mimics a network delay. It makes our example more realistic. When results are found, they get displayed. If nothing matches, it shows a “No results” message. This keeps the user informed. You can learn more about handling different outcomes with a JavaScript Error Handling Guide.
Putting it All Together
The final step is connecting the input event. We listen for the 'input' event on our search field. Every time you type, this event fires. But instead of directly calling fetchResults, we call its debounced version. Like this: debouncedSearch(event.target.value).
This ensures our fetchResults function respects the debounce delay. It’s a very elegant solution. It makes our search incredibly efficient. You have built a truly responsive component! Understanding how to manage user input like this is crucial. It prepares you for handling more complex data flows. For example, when you move to frameworks, handling React Forms Handling Tutorial: Mastering Inputs & State in JSX becomes much clearer with this foundation.
Encouragement: You’ve just mastered a powerful pattern! Debouncing is a common technique in professional web development. Give yourself a pat on the back!
If you want to dive deeper into event handling and timing, check out the MDN documentation on setTimeout. It’s a fantastic resource.
Tips to Customise It
You’ve built a solid foundation. Now, how can you make it even better?
- Connect to a Real API: Replace our sample data with a fetch request to a real API endpoint. This would bring your search to life with actual data.
- Add a Loading State: Display a “Loading…” message while results are being fetched. This improves user experience. It tells users something is happening.
- Clear Search on Blur/Empty: Clear the search results when the input is empty. Or, clear them when the input loses focus. This creates a cleaner interface.
- Keyboard Navigation: Implement keyboard navigation for results. Let users use arrow keys to select items. This is great for accessibility!
- More Complex Forms: Explore how similar debouncing principles apply to larger forms. Check out resources like React Form Actions: useActionState & useFormStatus Hooks Tutorial for ideas in modern frameworks.
Conclusion
Amazing job! You’ve successfully built a Debounced Search Input using pure JavaScript. You’ve learned about HTML structure, basic CSS styling, and critical JavaScript logic. More importantly, you now understand the power of debouncing. It’s a key technique for building performant and user-friendly web applications.
Go ahead and share your creation! Show it off to your friends. Keep experimenting and building. The web development journey is all about practice. What will you build next? Happy coding!