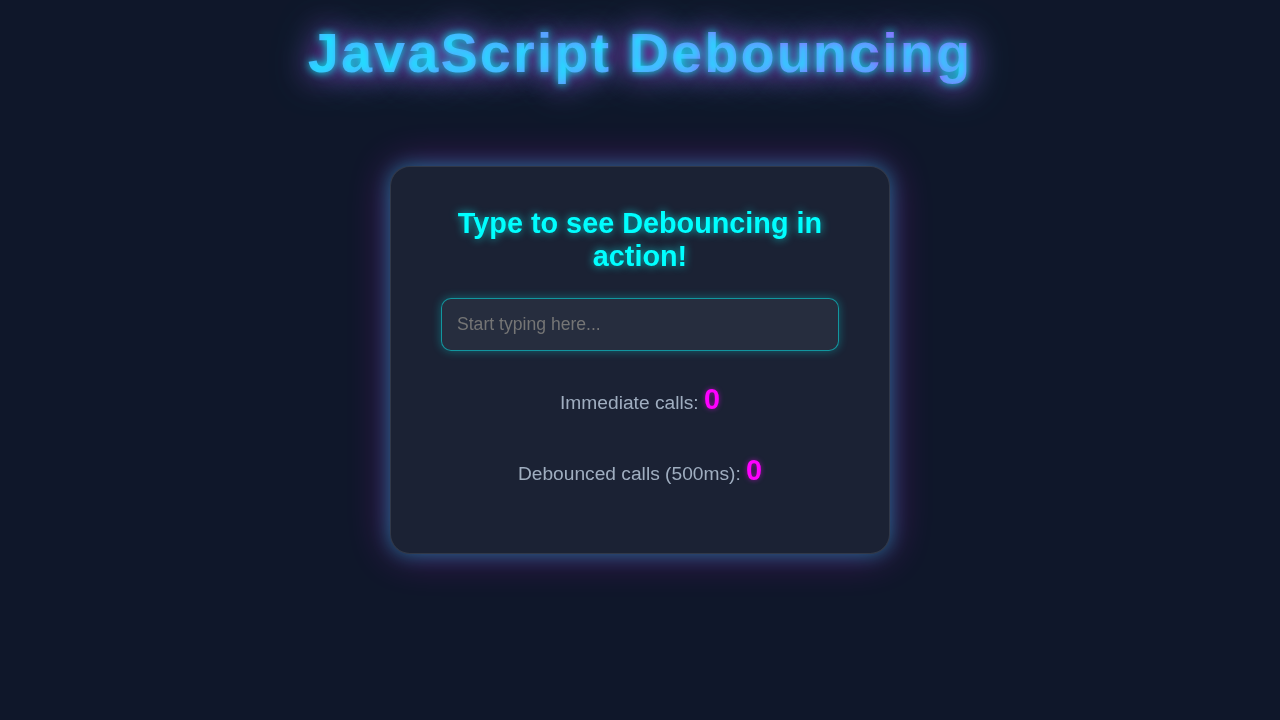
Hey there, pro coder! If you’ve ever wanted to build a super-responsive search input but weren’t sure how to optimize its performance, you’re in the right place. Today, we’re diving deep into JavaScript Debouncing. This technique is a game-changer. It helps us build smoother web applications. We will craft a simple search input together. This input will use debouncing to perform better. Get ready to make your UIs truly shine!
What We Are Building: A Smart Search Input
We’re going to build a dynamic search input! Imagine a search bar that waits for you to stop typing. Only then does it fetch results. This prevents our app from firing too many requests. It makes for a much smoother user experience. No more freezing UI! This project will teach you a powerful optimization pattern. It’s truly a must-have skill.
HTML Structure: The Foundation
First, let’s lay down our basic HTML. This is the skeleton of our search application. We’ll need an input field. We also need a place to display messages. This structure is very straightforward. Don’t worry, it’s just a few lines!
index.html
<!DOCTYPE html>
<html lang="en">
<head>
    <meta charset="UTF-8">
    <meta name="viewport" content="width=device-width, initial-scale=1.0">
    <title>JavaScript Debouncing Tutorial</title>
    <link rel="stylesheet" href="styles.css">
</head>
<body>
    <div class="container">
        <h1>JavaScript Debouncing</h1>
        <p>Debouncing is a programming practice used to ensure that time-consuming tasks do not fire so often that they cripple performance. In web development, it's commonly used for events like window resizing, scrolling, or user input, preventing excessive function calls.</p>

        <h2>Type into the input below:</h2>
        <div class="input-section">
            <input type="text" id="myInput" placeholder="Start typing here...">
            <div class="feedback">
                <p>Immediate calls: <span id="immediateCount">0</span></p>
                <p>Debounced calls (500ms delay): <span id="debouncedCount">0</span></p>
            </div>
        </div>

        <h3>How it works:</h3>
        <ul>
            <li>Every key press or input change triggers an "immediate call".</li>
            <li>The "debounced call" only happens after a <strong>500ms pause</strong> in typing.</li>
            <li>If you keep typing, the debounced timer resets with each new input, delaying the execution until you stop.</li>
        </ul>

        <h3>When to use Debouncing:</h3>
        <ul>
            <li><strong>Search bar suggestions:</strong> Only fetch suggestions after the user pauses typing.</li>
            <li><strong>Window resize handling:</strong> Prevent continuous layout recalculations during resizing.</li>
            <li><strong>Saving input data:</strong> Only send data to the server after a period of inactivity.</li>
            <li><strong>Autosave functionality:</strong> Save changes only when the user stops making modifications.</li>
        </ul>
    </div>

    <script src="script.js"></script>
</body>
</html>
CSS Styling: Making It Look Good
Next, we’ll add some CSS magic. This will make our search input look good. We want it to be clean and inviting. A little styling goes a long way. It improves the user experience greatly. Our CSS will be minimal but effective!
styles.css
body {
    font-family: Arial, Helvetica, sans-serif;
    margin: 0;
    padding: 20px;
    background-color: #f4f7fa; /* Light background for main tutorial */
    color: #333;
    line-height: 1.6;
    display: flex;
    justify-content: center;
    align-items: flex-start; /* Align at the start for a tutorial page flow */
    min-height: 100vh;
    box-sizing: border-box;
}

.container {
    background-color: #fff;
    padding: 30px 40px;
    border-radius: 8px;
    box-shadow: 0 4px 15px rgba(0, 0, 0, 0.1);
    max-width: 800px;
    width: 100%;
    margin-top: 30px; /* Space from the top of the viewport */
    box-sizing: border-box;
}

h1 {
    color: #2c3e50;
    font-size: 2.5em;
    margin-bottom: 20px;
    text-align: center;
}

h2 {
    color: #34495e;
    font-size: 1.8em;
    margin-top: 30px;
    margin-bottom: 15px;
}

h3 {
    color: #34495e;
    font-size: 1.4em;
    margin-top: 30px;
    margin-bottom: 10px;
}

p {
    margin-bottom: 15px;
    color: #555;
}

.input-section {
    background-color: #f9f9f9;
    border: 1px solid #ddd;
    border-radius: 5px;
    padding: 20px;
    margin-top: 20px;
    text-align: center;
    box-sizing: border-box;
}

input[type="text"] {
    width: calc(100% - 40px); /* Account for padding */
    padding: 12px 18px;
    margin-bottom: 20px;
    border: 1px solid #ccc;
    border-radius: 5px;
    font-size: 1.1em;
    box-sizing: border-box; /* Crucial for width calculation */
}

input[type="text"]:focus {
    border-color: #007bff;
    outline: none;
    box-shadow: 0 0 5px rgba(0, 123, 255, 0.3);
}

.feedback p {
    margin: 10px 0;
    font-size: 1.1em;
    color: #444;
}

.feedback span {
    font-weight: bold;
    color: #007bff;
}

ul {
    list-style-type: disc;
    margin-left: 20px;
    padding-left: 0;
    margin-top: 20px;
}

li {
    margin-bottom: 8px;
    color: #555;
}
JavaScript: The Brains Behind Debouncing
Now for the fun part: JavaScript! This is where the real power lies. We’ll wire up our input. More importantly, we’ll implement JavaScript Debouncing. This technique is crucial for performance. It will make our search feel snappy. Let’s dive into the code!
script.js
/**
 * Debounce Function
 *
 * This function returns a new function that, when invoked, will wait until
 * a certain amount of time has passed without being called again before
 * executing the original function. Useful for limiting the rate at which
 * a function fires (e.g., on user input, window resize, scroll events).
 *
 * @param {Function} func The function to debounce.
 * @param {number} delay The delay in milliseconds before the function is executed.
 * @returns {Function} The debounced version of the original function.
 */
const debounce = (func, delay) => {
    let timeoutId; // This variable will hold the ID of the timer.

    return function(...args) {
        const context = this; // Capture the 'this' context of the call.

        // Clear any existing timeout. If this function is called again before
        // the 'delay' has passed, the previous timer is cancelled. This prevents
        // 'func' from being executed prematurely.
        clearTimeout(timeoutId);

        // Set a new timeout. The 'func' will be executed only if no new calls
        // occur within the 'delay' period from this point onwards.
        timeoutId = setTimeout(() => {
            // Apply the captured context and arguments to the original function.
            func.apply(context, args);
        }, delay);
    };
};

// --- DOM Elements --- (Get references to the HTML elements we'll interact with)
const myInput = document.getElementById('myInput');
const immediateCountSpan = document.getElementById('immediateCount');
const debouncedCountSpan = document.getElementById('debouncedCount');

// --- Counters for demonstration --- (Keep track of how many times each function is called)
let immediateCallCount = 0;
let debouncedCallCount = 0;

/**
 * Function executed immediately on every input event.
 * This helps visualize the difference between immediate and debounced calls.
 */
const handleImmediateInput = () => {
    immediateCallCount++;
    immediateCountSpan.textContent = immediateCallCount;
    // console.log('Immediate call. Current value:', myInput.value);
};

/**
 * Function that will be debounced.
 * In a real application, this would be a potentially "expensive" operation
 * like an API call, a complex search filter, or a UI update.
 */
const processDebouncedInput = () => {
    debouncedCallCount++;
    debouncedCountSpan.textContent = debouncedCallCount;
    // console.log('Debounced call. Final value:', myInput.value);
    // Example of an expensive operation: fetching data from a server
    // fetch(`/api/search?q=${myInput.value}`).then(response => response.json()).then(data => console.log(data));
};

// --- Create a debounced version of processDebouncedInput ---
// This means `processDebouncedInput` will only run 500ms after the last `input` event.
const debouncedProcessInput = debounce(processDebouncedInput, 500); // 500ms delay

// --- Event Listener --- (Attach the listeners to our input field)
myInput.addEventListener('input', () => {
    handleImmediateInput(); // This function runs on every single input event
    debouncedProcessInput(); // This function is debounced, only runs after a pause
});

// Initialize the display counts when the script loads
immediateCountSpan.textContent = immediateCallCount;
debouncedCountSpan.textContent = debouncedCallCount;
How It All Works Together: Understanding JavaScript Debouncing for Performance
Alright, you’ve got the code! Now, let me walk you through the real magic. This is where the power of JavaScript Debouncing shines. We’re tackling a very common performance bottleneck in web applications. Imagine a typical search bar. Every single character you type often triggers an event. If we’re making an API call on every keystroke, that’s a lot of unnecessary requests! Your browser would be overwhelmed. Your server might even get angry. Debouncing solves this elegantly. It helps us save resources. It also provides a much smoother experience for your users. Let’s break down how.
The Problem: Too Many Events
Many user interactions generate events rapidly. Think about typing into an input. Every key press is an input event. Or resizing your browser window. Dragging something across the screen also fires many events. Without careful handling, these events can quickly overload your system. They trigger functions that might be expensive. These functions could involve complex calculations. They might even make network requests. This leads to a sluggish, unresponsive user interface. Your app might freeze! This is exactly what we want to avoid. We need a way to throttle these rapid calls.
What is Debouncing? A Simple Explanation
Simply put, debouncing is a clever technique. It delays the execution of a function. The function runs only after a specific period of inactivity. Think of it like an elevator door. The door waits for a few seconds. If no one else enters, it closes. If someone steps in, the timer resets. It waits again. Our debouncing function works similarly. It ensures that a function is called only once. This happens after the user has completely finished their action. It’s a smart way to manage event bursts. This prevents our web page from getting bogged down. For example, resizing a window can trigger many events. Debouncing ensures our resize handler runs only once. It fires after the user stops resizing. This is super efficient. If you want to dive deeper into event handling, check out the MDN docs on addEventListener.
Dissecting Our JavaScript Debounce Function
Let’s closely examine our debounce utility function. It’s a higher-order function. It takes two key arguments. First, the func you want to optimize. This is the actual logic that should run. Second, a delay in milliseconds. This delay determines how long to wait. We declare a timeoutId variable inside. This variable will hold our timer reference. Whenever the debounced function is invoked, the first thing it does is clearTimeout(timeoutId). This stops any previously set timers. Then, it sets a new timer using setTimeout. The original func will execute. But only after the delay has passed. And critically, only if no new calls to the debounced function occurred during that delay. It’s like pressing a reset button on the timer with every new keystroke. This pattern is incredibly powerful. It gives us precise control over function execution. This makes our applications feel much more fluid and responsive.
Integrating Debouncing with Our Search Input
We then connect our debounce function to the search input. We attach it to the input event. This event fires every time the value of an <input> or <textarea> element is changed. Instead of directly calling handleSearch, we wrap it. We create a debouncedSearch function. This is debounce(handleSearch, 500). Here, 500 is our delay in milliseconds. So, when you type ‘hello’ quickly, handleSearch won’t fire five times. Each keystroke clears the previous timer. It then starts a new 500ms countdown. The handleSearch function only runs once. It waits for 500ms of no further typing. This dramatically reduces the number of function calls. It makes our application much more efficient. Plus, it improves the overall user experience significantly. This is a core part of building modern, performant UIs. It’s truly a game-changer for interactivity.
Pro Tip: Debouncing is perfect for events like
input,scroll, andresize. It prevents a flood of events from impacting your app’s performance!
For other ways to build responsive layouts, check out our guide on Responsive Landing Page with Tailwind CSS.
Simulating Results and Real-World Applications
In our current example, the handleSearch function simulates an action. It simply updates the resultDiv with your input and a timestamp. This clear visual helps us understand debouncing in action. You can observe the delay directly. In a real-world scenario, this is where your actual search logic would live. You would likely make an asynchronous API call here. This call would fetch data from a server. For instance, you might query a product database. Or perhaps fetch user suggestions. Using a backend framework like Flask Python Web Framework could power such an API. The crucial point is that debouncing ensures this potentially expensive network request only fires when necessary. It’s an essential pattern for any interactive application. You’re building robust and user-friendly interfaces with this technique. Curious about other performance techniques? Explore more optimization patterns on CSS-Tricks.
Tips to Customise It: Make It Your Own!
Now you’ve built the core! Here are some ideas to make it even cooler.
- Add Real API Integration: Instead of just displaying text, connect it to a public API. Think about a movie search API or a dictionary.
- Loading Indicator: Show a ‘Loading…’ message while the debounced function is waiting. This gives users feedback.
- Minimum Input Length: Only trigger the search if the input has, say, 3 or more characters. This saves more resources.
- Error Handling: Implement
try-catchblocks for your API calls. Show a user-friendly message if something goes wrong. - Add a Clear Button: A small ‘x’ button to quickly clear the input field. It’s a nice UI touch.
Conclusion: You’ve Mastered JavaScript Debouncing!
Wow, you did it! You just built a performance-optimized search input. You mastered the essential concept of JavaScript Debouncing. This isn’t just about search bars. This powerful pattern applies to many interactive elements. You’ve made your UI more responsive. You’ve learned to prevent unnecessary function calls. That’s a huge step in your web development journey! Feel proud of this accomplishment. Share your creations with us! We can’t wait to see what you build next. Keep coding, pro coder!
Keep learning, keep building! Every line of code brings you closer to becoming a true web development wizard. You’ve got this!
For more advanced JavaScript patterns, check out our guide on React Form Actions.