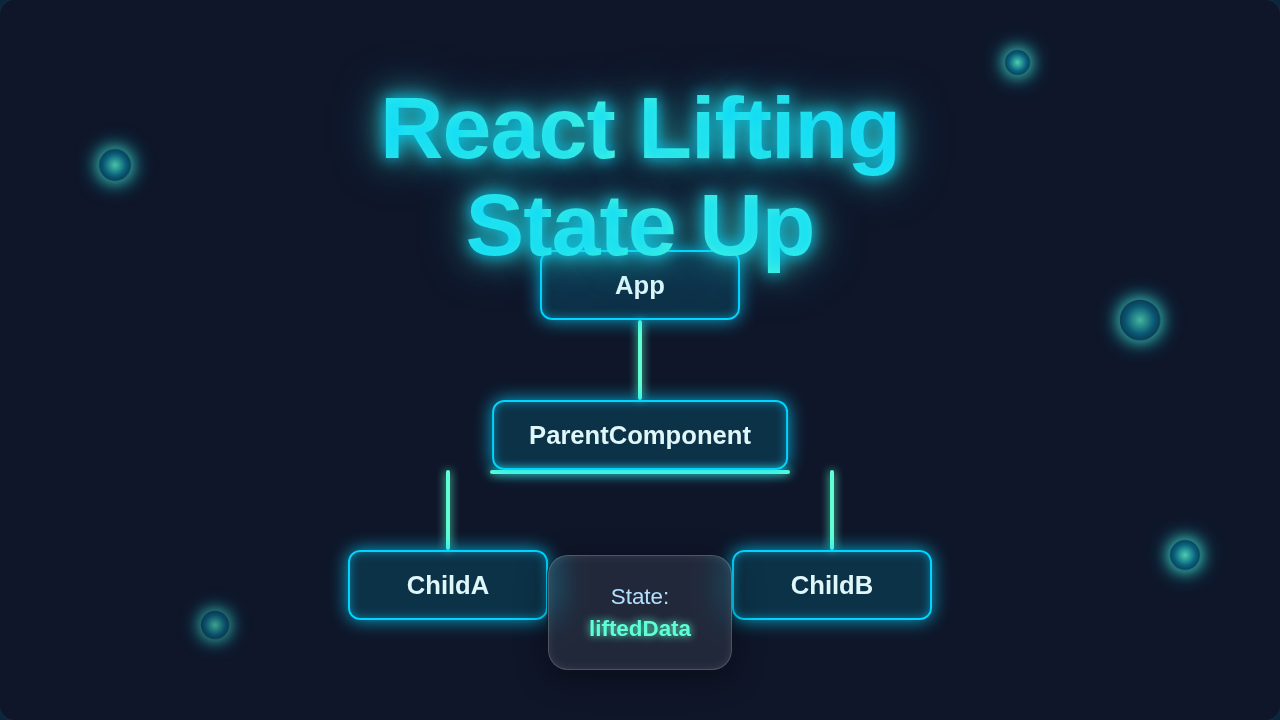
React Lifting State Up: Neon Component Tree Flow
Hey there, fellow self-taught coder! Ever felt like your React components are playing a frustrating game of ‘telephone’ with vital information? You build a cool feature. Then, another component needs to know what’s happening in the first one. Sound familiar? You try to pass data sideways, or maybe even up a level, and it just doesn’t seem to work naturally. You’re not alone! This common headache often leads beginners to wonder: “How do I get my components to share data?” The answer, my friend, is a fundamental pattern called React Lifting State Up.
You’ve likely encountered this barrier. You have two sibling components, sitting side-by-side. One component updates, and the other absolutely needs to react to that change. But they can’t just magically communicate. Why is that? Let’s dig in.
The Data Flow Dilemma: Why Your Components Can’t Just Chat
React, by design, has a very specific way that information flows. It’s called unidirectional data flow. This means data typically flows in one direction: from parent components down to their child components. You pass information using something called ‘props’. Think of it like a strict library system. A librarian (your parent component) can hand books (props) to a reader (your child component). The reader gets the book. They can use it. They can read it. But here’s the catch.
A reader cannot directly hand a book to another reader. They also can’t just create a new book and hand it back to the librarian without permission. This strict rule keeps things predictable. It helps you understand where data is coming from. However, it can feel incredibly limiting when you need components to share insights. You might have a shopping cart component. You also have a product display component. When you click “Add to Cart” in the product display, your cart needs to update. But they’re often siblings in the component tree. How do you bridge that gap?
This is where the frustration builds. You want your app to feel dynamic. You need components to collaborate. Without a clear path, your application quickly becomes hard to manage. It’s tough to keep track of changes. You start questioning your whole approach. Don’t worry, a clear solution exists. It’s elegant and powerful.
Neon Component Tree Flow: The Lightbulb Moment with React Lifting State Up
So, if components can’t talk sideways, what do they do? They go up! That’s the core idea behind React Lifting State Up. When two or more components need to share the same piece of information, you “lift” that shared information, or “state,” to their closest common parent. This parent component then becomes the single source of truth for that specific data.
Imagine a family of robots. Two robot siblings need to know what color light the other is flashing. Instead of trying to send signals directly, they both report their light color to their robot parent. The parent then relays that information back down to the other sibling. The parent component holds the master switch for their light colors. The parent then tells each child robot what color to display. This way, everyone is always in sync. The parent component now owns the state. It manages any changes to that state. Then, it passes that state down as props to all child components that need it.
This pattern ensures that changes made in one component can seamlessly affect another. The parent handles the logic. The children simply receive instructions. They also report back any user interactions. This creates a clear and predictable flow of information.
Pro Tip: When you need to share state, always look for the nearest common ancestor component. That’s where your state should live, enabling a clear data pipeline for its descendants.
How to Think About React Lifting State Up: The Central Control Panel
Consider a large building. Each room has smart lights. Initially, each light has its own individual switch. This is like local state in a single component. But what if you want all the lights on a specific floor to dim at the same time? You wouldn’t run around to each room. Instead, you’d use a central control panel for that floor. This control panel is your common ancestor component.
The control panel holds the “dimness state” for the floor. When you adjust the master dimmer, the control panel updates its state. Then, it sends new instructions (props) to all the individual lights. Each light component simply receives its brightness level from the panel. It doesn’t decide its own brightness. The ancestor component is the one in charge. It owns the shared data. It provides functions to update that data. This centralized approach makes debugging much easier. You always know where the data lives. You know who is responsible for changing it. It creates a robust structure.
When a child component needs to change this shared state, it doesn’t do so directly. Instead, the parent passes a function down as a prop. The child calls this function, passing any necessary data. The parent then executes the function. It updates its own state. This change then ripples down. All relevant children re-render with the new information. This might sound complex, but it becomes second nature with practice. Understanding how functions act as callbacks is key (learn more about event listener callbacks). You’re essentially giving your child components a way to “request” a change from their parent.
Practical Steps: What to Do When Data Needs a Lift
Okay, you understand the concept. Now, how do you actually implement React Lifting State Up in your projects? It’s a straightforward process, once you break it down.
-
Identify Shared State: First, pinpoint which piece of information needs to be accessed or modified by multiple components. For example, maybe it’s a user’s search query or the selected item in a list.
-
Find the Common Ancestor: Trace up your component tree. Locate the closest parent component that includes all the components needing this shared state. This is your new home for the state.
-
Move (or Create) the State: Take the state from its original child component. Or, if it didn’t exist yet, create it in this common ancestor. You’ll typically use the `useState` Hook for this.
-
Pass State Down as Props: The ancestor now owns the state. Pass this state down as props to any child component that needs to display it. For example, a `searchQuery` prop for a search results component.
-
Pass Functions Down as Props: Create a function in the ancestor component. This function will be responsible for updating the shared state. Pass this update function down as a prop to any child component that needs to *change* the state. For instance, an `onSearchChange` prop for an input field.
This pattern is incredibly useful for persistent data. You might want to save user preferences, just like we explored with the React useLocalStorage Hook: Persist State in React JSX Apps. Or maybe you’re building a simple app where tasks need to be added and displayed across different sections, similar to the concepts in our React Todo Local Storage App Tutorial – JSX & Hooks.
Benefits Beyond the Basics: Why It’s Worth the Effort
Embracing the “Lifting State Up” pattern brings several significant advantages to your React applications. You’re not just moving code around. You’re adopting a robust architectural approach. It makes your apps more predictable.
-
Single Source of Truth: With state lifted to a common ancestor, you have one definitive place where that data lives. This means fewer bugs. It makes your application behavior more consistent. No more guessing which component is actually holding the correct value.
-
Enhanced Readability: The data flow becomes very clear. You can visually trace how data moves down your component tree. You can also see how user interactions trigger updates back up to the parent. This makes your code easier to understand.
-
Improved Maintainability: When changes are needed, you know exactly where to make them. You modify the state and its update logic in one place. All affected children will automatically react. This simplifies future updates and feature additions.
-
Easier Debugging: If something goes wrong, you have a concentrated area to investigate. You’re not chasing data across unrelated components. This saves you valuable time and frustration. It allows you to fix issues faster.
Understanding how props work is essential for this pattern. They are the backbone of data communication in React. CSS-Tricks offers a great dive into props, which will strengthen your foundation here. This pattern isn’t just for simple data. It applies to complex scenarios, like the controlled inputs you’d find in a search feature, similar to what we built in our React Debounced Search Input with Hooks – JSX Tutorial.
Key Takeaway: React Lifting State Up establishes a single source of truth for shared data. This leads to more predictable behavior and easier debugging in your applications.
Your Journey Forward
Mastering React Lifting State Up is a massive step. It unlocks a whole new level of control. You gain control over your component interactions. It empowers you to build more sophisticated and manageable applications. This isn’t just a React trick. It’s a fundamental principle. It will serve you well in many front-end frameworks.
Don’t be discouraged if it doesn’t click instantly. Keep practicing. Try implementing this pattern in your own small projects. You’ll soon find yourself instinctively reaching for it. You’ll be creating applications with clear, maintainable data flow. You’ve got this!