Have you ever wanted to gather information from a website but found no convenient API? That’s where Web Scraping JavaScript comes to the rescue! It’s a powerful skill for developers looking to unlock data from the vast expanse of the internet. In this tutorial, we’ll dive deep into using JavaScript to programmatically extract the data you need. We’ll explore the tools, techniques, and best practices to get you started on your data collection journey.
What We Are Building
Imagine a dynamic dashboard displaying the latest job postings from a popular tech job board. We’re going to simulate building a simple version of this, focusing on the core scraping mechanics. Our goal isn’t to create a live, constantly updated job board (that’s a project for another day!), but rather to show you how to fetch data, parse it, and then display it in a structured way.
The concept of programmatically extracting data is incredibly powerful. Businesses use it for market research, price comparisons, and lead generation. Developers leverage it to feed data into applications, create custom alerts, or even build personal data analysis tools. Learning this skill opens up a world of possibilities for automating data collection tasks and enriching your projects.
HTML Structure for Our Data Display
Our HTML will be straightforward. It will mainly consist of a container where our scraped job listings will be dynamically injected by JavaScript. Think of it as a blank canvas ready to receive our extracted data.
index.html
<!DOCTYPE html> <html lang="en"> <head> <meta charset="UTF-8"> <meta name="viewport" content="width=device-width, initial-scale=1.0"> <title>Web Scraping JavaScript Tutorial</title> <link rel="stylesheet" href="styles.css"> </head> <body> <div class="tutorial-wrapper"> <header class="tutorial-header"> <h1>Web Scraping JavaScript: Data Extraction Tutorial</h1> <p>Unlock the power of data by learning to extract information from websites using Node.js, <code>node-fetch</code>, and <code>cheerio</code>.</p> </header> <main class="tutorial-content"> <section class="step"> <h2>Step 1: Project Setup</h2> <p>Start by creating a new directory for your project and initializing it with npm:</p> <pre><code class="language-bash">mkdir web-scraper-js cd web-scraper-js npm init -y</code></pre> </section> <section class="step"> <h2>Step 2: Install Dependencies</h2> <p>We'll use <code>node-fetch</code> for making HTTP requests and <code>cheerio</code> for parsing the HTML. Install them:</p> <pre><code class="language-bash">npm install node-fetch cheerio</code></pre> </section> <section class="step"> <h2>Step 3: Create Your Scraper Script</h2> <p>Create a file named <code>scrape.js</code> in your project directory. The content of this file is provided below:</p> <div class="code-snippet-placeholder"> <p><em>(See the <code>scrape.js</code> file provided separately for the code)</em></p> </div> <p><strong>Important:</strong> To use the <code>import</code> syntax in Node.js, add <code>"type": "module"</code> to your <code>package.json</code> file.</p> </section> <section class="step"> <h2>Step 4: Run the Scraper</h2> <p>Execute your script from the terminal to see the extracted data:</p> <pre><code class="language-bash">node scrape.js</code></pre> <p>Remember to replace <code>'https://example.com'</code> in <code>scrape.js</code> with the actual URL you wish to scrape. Always respect website terms of service and <code>robots.txt</code>.</p> </section> <section class="step"> <h2>Next Steps</h2> <p>Explore more advanced topics like handling pagination, dynamic content with Puppeteer/Playwright, error handling, and data storage (e.g., CSV, JSON).</p> </section> </main> <footer class="tutorial-footer"> <p>Made with ♥ for data enthusiasts.</p> </footer> </div> </body> </html>scrape.js
// scrape.js // // Before running: // 1. Ensure you have Node.js installed. // 2. In your project directory, run: // npm init -y // npm install node-fetch cheerio // 3. To enable ES module syntax (import/export), add `"type": "module"` to your package.json: // { // "name": "web-scraper-js", // "version": "1.0.0", // "description": "", // "main": "index.js", // "type": "module", // <--- ADD THIS LINE // "scripts": { "test": "echo \"Error: no test specified\" && exit 1" }, // "keywords": [], // "author": "", // "license": "ISC" // } // // Then, you can run the script: // node scrape.js import fetch from 'node-fetch'; import * as cheerio from 'cheerio'; // Use * as cheerio for ES module compatibility const targetUrl = 'https://example.com'; // IMPORTANT: Replace with the actual URL you want to scrape // Note: Scraping 'example.com' is safe, but for other sites, ensure you respect their robots.txt and terms of service. // Avoid excessive requests to prevent IP blocking or server overload. async function scrapeWebsite() { try { console.log(`Attempting to scrape: ${targetUrl}`); const response = await fetch(targetUrl); if (!response.ok) { throw new Error(`HTTP error! status: ${response.status} for ${targetUrl}`); } const html = await response.text(); const $ = cheerio.load(html); console.log('\n--- Extracted Data ---'); // Example 1: Extract the page title const pageTitle = $('title').text(); console.log('Page Title:', pageTitle); // Example 2: Extract all paragraph texts const paragraphs = []; $('p').each((index, element) => { const text = $(element).text().trim(); if (text) { // Only add non-empty paragraphs paragraphs.push(text); } }); console.log('\nParagraphs Found (first 5):'); paragraphs.slice(0, 5).forEach((p, i) => console.log(`- P${i + 1}: ${p.substring(0, Math.min(p.length, 100))}...`)); // Log first 100 chars if (paragraphs.length > 5) console.log(`...and ${paragraphs.length - 5} more paragraphs.`); // Example 3: Extract a specific element's text (e.g., the main heading) const mainHeading = $('h1').first().text().trim(); if (mainHeading) { console.log('\nMain Heading (H1):', mainHeading); } else { console.log('\nNo main H1 heading found on example.com (this site often has no H1).'); } // Example 4: Extract all links and their href attributes const links = []; $('a').each((index, element) => { const href = $(element).attr('href'); const text = $(element).text().trim(); if (href && text) { links.push({ text, href }); } }); console.log('\nLinks Found (first 5):'); links.slice(0, 5).forEach((link, i) => console.log(`- Link ${i + 1}: ${link.text} -> ${link.href}`)); if (links.length > 5) console.log(`...and ${links.length - 5} more links.`); console.log('\n--- Scraping Complete ---'); } catch (error) { console.error('Error during web scraping:', error.message); console.error('Please ensure the target URL is correct and accessible.'); console.error('Also, check your network connection and respect website terms of service.'); } } scrapeWebsite();CSS Styling for a Sleek Look
We’ll add some basic CSS to make our displayed job listings presentable and easy to read. This isn’t about complex design, but about clear organization and a good user experience for the data we present.
styles.css
/* styles.css */ body { font-family: Arial, Helvetica, sans-serif; line-height: 1.6; color: #333; background-color: #f4f4f4; margin: 0; padding: 20px; box-sizing: border-box; overflow-x: hidden; } .tutorial-wrapper { max-width: 900px; margin: 20px auto; background: #fff; padding: 30px; border-radius: 8px; box-shadow: 0 2px 10px rgba(0, 0, 0, 0.1); box-sizing: border-box; overflow: hidden; } .tutorial-header { text-align: center; margin-bottom: 40px; border-bottom: 1px solid #eee; padding-bottom: 20px; } .tutorial-header h1 { font-size: 2.5em; color: #007bff; margin-bottom: 10px; } .tutorial-header p { font-size: 1.1em; color: #666; } .tutorial-content .step { margin-bottom: 30px; } .tutorial-content h2 { font-size: 1.8em; color: #007bff; margin-bottom: 15px; border-left: 4px solid #007bff; padding-left: 10px; } .tutorial-content p { margin-bottom: 15px; color: #555; } pre { background-color: #f8f8f8; border: 1px solid #ddd; border-radius: 5px; padding: 15px; overflow-x: auto; font-size: 0.9em; line-height: 1.4; max-width: 100%; box-sizing: border-box; white-space: pre-wrap; word-break: break-all; } code { font-family: 'Consolas', 'Monaco', 'Andale Mono', 'Ubuntu Mono', monospace; color: #c7254e; background-color: #f9f2f4; padding: 2px 4px; border-radius: 4px; } pre code { color: #333; background-color: transparent; padding: 0; border-radius: 0; } .tutorial-footer { text-align: center; margin-top: 40px; padding-top: 20px; border-top: 1px solid #eee; color: #777; font-size: 0.9em; } .code-snippet-placeholder { background-color: #e0f2f7; border: 1px dashed #007bff; padding: 20px; border-radius: 5px; text-align: center; margin-bottom: 20px; }Step-by-Step Breakdown: The Core of Web Scraping JavaScript
Now, let’s get into the exciting part: the JavaScript! Remember, direct client-side web scraping of external sites is limited by browser Same-Origin Policy. Therefore, for practical scraping, we’ll use Node.js on the server-side. This allows us to make requests to any website without cross-origin restrictions.
Setting Up Your Environment (Node.js)
First, ensure Node.js is installed on your machine. If not, head over to the official Node.js website and install it. Next, create a new project directory and initialize a Node.js project. Open your terminal in the project folder and run:
npm init -yWe’ll need a couple of libraries:
axiosfor making HTTP requests andcheeriofor parsing the HTML. Cheerio provides a jQuery-like syntax for navigating and manipulating the DOM server-side. Install them with:npm install axios cheerioFetching the Target Page
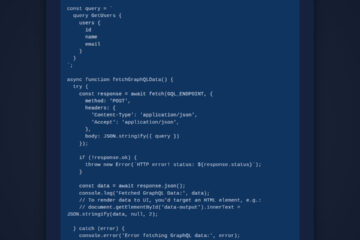
Our first step is to fetch the HTML content of the target website. We’ll use
axiosfor this. Consider a simple example where we want to scrape a list of blog posts from a hypothetical site. Here’s how you might fetch the page content:const axios = require('axios'); async function fetchHtml(url) { try { const { data } = await axios.get(url); return data; } catch (error) { console.error(`Error fetching HTML from ${url}:`, error.message); return null; } } // Example usage: // const html = await fetchHtml('https://example.com/blog'); // console.log(html.substring(0, 100)); // Log first 100 chars to verifyThis function takes a URL, makes a GET request, and returns the HTML as a string. Error handling is crucial here. We always want to gracefully manage situations where a page might not be accessible.
Parsing the HTML with Cheerio
Once we have the HTML string, Cheerio helps us treat it like a browser’s DOM. This is where the magic happens for efficient data extraction. You can select elements using CSS selectors, just like you would with jQuery.
const cheerio = require('cheerio'); function parseHtml(html) { return cheerio.load(html); } // Usage within our scraping script: // const $ = parseHtml(html); // console.log($('title').text()); // Get the page titleThe
$object returned bycheerio.load()is your gateway to querying the HTML. This intuitive API design makes complex selections much simpler.Extracting Specific Data
With Cheerio, pinpointing the exact data points becomes surprisingly easy. Let’s say we’re targeting job titles and company names. You’ll need to inspect the target website’s HTML to find the correct CSS selectors.
async function scrapeJobPostings(url) { const html = await fetchHtml(url); if (!html) return []; const $ = parseHtml(html); const jobPostings = []; $('.job-listing').each((index, element) => { const title = $(element).find('.job-title').text().trim(); const company = $(element).find('.company-name').text().trim(); const location = $(element).find('.job-location').text().trim(); // You might need to refine regex patterns for cleaner data // For example, to clean up location strings. // More on this here: Regex Patterns: JS Explained – Quick Guide if (title && company) { jobPostings.push({ title, company, location }); } }); return jobPostings; } // Run the scraper // (async () => { // const jobs = await scrapeJobPostings('https://example.com/jobs'); // console.log(jobs); // })();“Web scraping is about understanding a website’s structure and creatively using selectors to extract valuable information. It’s a puzzle, and JavaScript provides the pieces.”
This snippet demonstrates iterating over elements with a specific class (
.job-listing) and then drilling down to find child elements like the title and company. Remember to always.trim()the text to remove leading/trailing whitespace.Handling Advanced Scenarios: Pagination & Dynamic Content
Real-world scraping often involves more complexity. You might encounter pagination, requiring you to visit multiple pages to collect all data. This means looping through URLs. For dynamically loaded content (often powered by JavaScript),
axiosandcheerioalone might not suffice. Here, tools like Puppeteer, a headless browser, become indispensable. Puppeteer can interact with pages like a real user, rendering JavaScript and simulating clicks, which is perfect for single-page applications (SPAs). It’s a more resource-intensive but powerful option.Making It Responsive for All Devices
While the scraping itself happens server-side, if you’re displaying the results in a front-end application, responsiveness is key. Modern web design demands layouts that adapt seamlessly to various screen sizes. We achieve this using CSS media queries.
@media (max-width: 768px) { .job-listing { flex-direction: column; align-items: flex-start; } .job-title { font-size: 1.1em; } } @media (max-width: 480px) { .job-listing { padding: 10px; } .company-name { font-size: 0.9em; } }By applying these rules, our job list will reflow and adjust its presentation, ensuring a good experience whether viewed on a desktop, tablet, or mobile phone. Good UI/UX always makes data more consumable, regardless of its source.
Final Output: Visualizing Our Scraped Data
After successfully running our Web Scraping JavaScript code, we would see a clean, organized list of job postings rendered on our page. Each listing would typically show the job title, company name, and location, neatly styled. The visual elements would clearly distinguish between different data points, making it easy for users to digest the information quickly. Imagine a card-like layout for each job, with clear typography and spacing.
Conclusion: Harnessing Web Scraping JavaScript for Your Projects
You’ve just taken a significant step into the world of web scraping with JavaScript. From setting up your environment with Node.js to fetching and parsing HTML with Cheerio, you now understand the fundamental process. Web scraping is a valuable skill in a data-driven world, enabling you to gather information that might otherwise be locked away in web pages. It empowers you to build smarter, data-rich applications.
However, always remember the ethical and legal considerations. Respect
robots.txtfiles, avoid overwhelming servers with too many requests, and be aware of terms of service. For complex applications, maintaining clean and testable JavaScript code is crucial. You can find more insights into ensuring your code is robust by exploring topics like JavaScript Code Review: Best Practices for Developers. With these tools and a responsible approach, the web is your oyster!