
Have you ever needed to communicate between different parts of your JavaScript application without coupling them too tightly? Enter CustomEvents JS! This powerful feature in vanilla JavaScript allows you to create, dispatch, and listen for your own unique events, promoting a more modular and maintainable codebase. Today, we’ll dive deep into how you can harness Custom Events to build dynamic and interactive web interfaces, making your components truly independent.
Building Interactive UI with Custom Events
Imagine a scenario where a user action in one component needs to trigger an update in another, completely separate component. Perhaps a “purchase complete” event from a shopping cart needs to update a user’s loyalty points display or clear a product recommendation list. This is where the magic of custom events shines! They provide a robust, event-driven pattern for inter-component communication.
We’re going to build a simple web page where clicking a button dispatches a custom event. Multiple independent display areas will then react to this event, showcasing the power of a decoupled architecture. Think of it as a central broadcast system: one action sends out a signal, and any interested party can pick it up and respond accordingly. This pattern is incredibly useful for large applications, complex UIs, and even for integrating third-party widgets cleanly.
The design inspiration comes from modern dashboard widgets where different panels update based on shared application state or user interactions. This approach prevents the messy “prop-drilling” or global state management complexities often seen when components are deeply nested or widely separated. It’s a clean way to manage side effects and synchronize UI elements, enhancing user experience.
HTML Structure for Our Demo
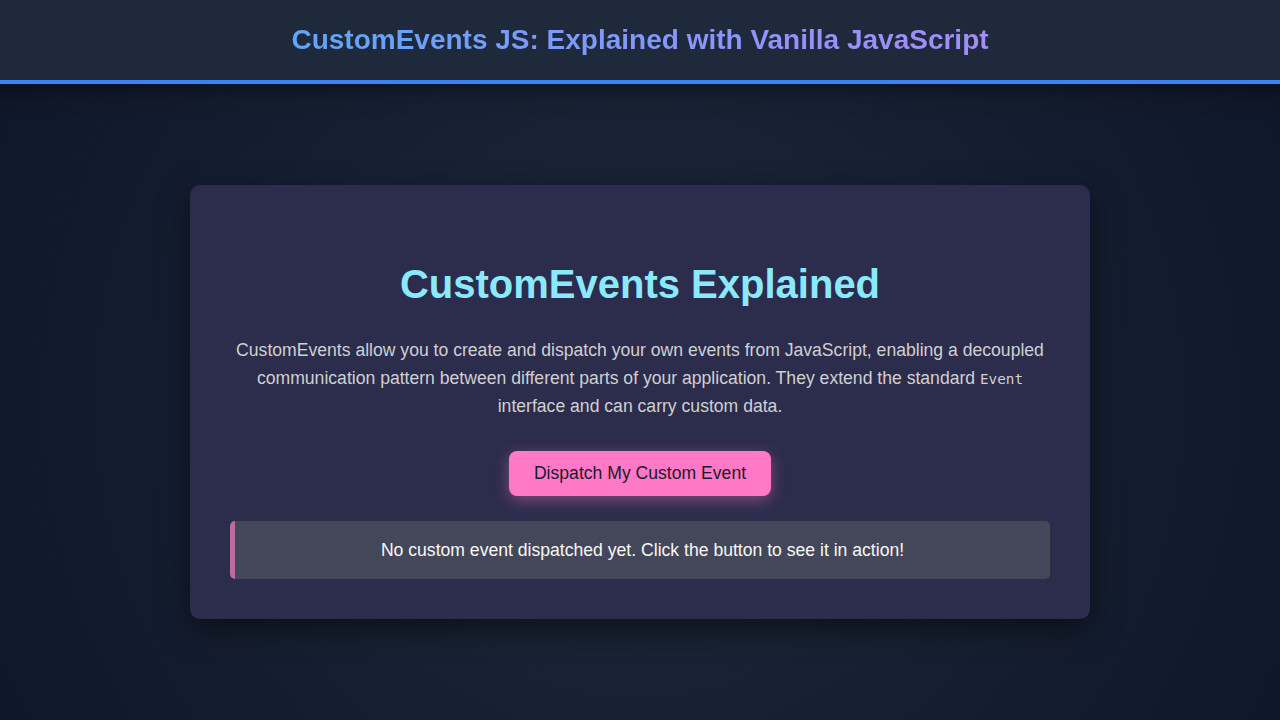
Our HTML will be minimal yet effective. We’ll set up a div to contain our application, a button to trigger our custom event, and two separate div elements to act as independent listeners, displaying information received from the event.
<div class="container">
    <h1>Custom Events Demo</h1>
    <button id="dispatchBtn">Dispatch Custom Event</button>
    <div id="output">
        <p>No event data yet.</p>
    </div>
    <div id="anotherOutput">
        <p>Another listener here.</p>
    </div>
</div>
CSS Styling to Make it Pop
To ensure our demo looks clean and user-friendly, we’ll apply some basic CSS. This styling will center our content, give the containers a modern card-like appearance, and make the button visually appealing.
body {
    font-family: 'Segoe UI', Tahoma, Geneva, Verdana, sans-serif;
    display: flex;
    justify-content: center;
    align-items: center;
    min-height: 100vh;
    margin: 0;
    background-color: #f4f7f6;
    color: #333;
    line-height: 1.6;
}

.container {
    background-color: #ffffff;
    padding: 30px;
    border-radius: 12px;
    box-shadow: 0 8px 25px rgba(0, 0, 0, 0.1);
    text-align: center;
    width: 90%;
    max-width: 600px;
    border-left: 5px solid #007bff;
}

h1 {
    color: #007bff;
    margin-bottom: 25px;
    font-size: 2.2em;
}

button {
    background-color: #28a745;
    color: white;
    border: none;
    padding: 12px 25px;
    border-radius: 8px;
    font-size: 1.1em;
    cursor: pointer;
    transition: background-color 0.3s ease, transform 0.2s ease;
    margin-bottom: 25px;
    box-shadow: 0 4px 10px rgba(0, 0, 0, 0.1);
}

button:hover {
    background-color: #218838;
    transform: translateY(-2px);
}

button:active {
    transform: translateY(0);
}

#output, #anotherOutput {
    background-color: #e9ecef;
    border: 1px solid #ced4da;
    border-radius: 8px;
    padding: 15px;
    margin-top: 15px;
    text-align: left;
    min-height: 60px;
    display: flex;
    align-items: center;
    justify-content: center;
    font-family: 'Consolas', 'Monaco', monospace;
    color: #495057;
    font-size: 0.95em;
    overflow-x: auto;
}

#output p, #anotherOutput p {
    margin: 0;
}

/* Responsive adjustments */
@media (max-width: 768px) {
    .container {
        padding: 20px;
        width: 95%;
    }
    h1 {
        font-size: 1.8em;
    }
    button {
        padding: 10px 20px;
        font-size: 1em;
    }
}
Demystifying CustomEvents JS: A Deep Dive
Now, let’s get into the heart of the matter: the JavaScript. We will walk through the process of defining, dispatching, and listening for our custom events, breaking down each concept into digestible steps.
Creating Your First CustomEvent
The CustomEvent constructor is your gateway to crafting unique events. It takes two arguments: the event type (a string) and an optional options object. The options object is crucial because it allows you to pass data with your event via its detail property. This detail property can hold any data type — numbers, strings, objects, or even arrays — making your events incredibly flexible. For instance, we might want to send a user ID, a timestamp, or a message.
// script.js
const dispatchButton = document.getElementById('dispatchBtn');
const outputDisplay = document.getElementById('output');
const anotherOutputDisplay = document.getElementById('anotherOutput');

// Counter to show dynamic data
let eventCount = 0;

// Create a custom event
function createMyCustomEvent(data) {
    eventCount++;
    return new CustomEvent('myCustomAction', {
        detail: {
            message: data.message,
            timestamp: new Date().toLocaleTimeString(),
            count: eventCount,
            source: 'dispatchButton'
        },
        bubbles: true, // Allows the event to bubble up the DOM tree
        cancelable: true // Allows event to be cancelled
    });
}
In this example, myCustomAction is our event type. The detail object is where we package all relevant information. Notice the bubbles: true and cancelable: true properties. bubbles determines if the event will propagate up through the DOM tree, allowing parent elements to also listen. cancelable indicates whether the event can have its default action prevented (though custom events typically don’t have default actions in the same way native events do, it’s good practice for consistency).
Dispatching the CustomEvent
Once an event is created, you need to “dispatch” it from an element in the DOM. The dispatchEvent() method, available on any HTMLElement, is what makes this happen. When you call dispatchEvent(), the event immediately starts its journey, potentially bubbling up or targeting listeners directly. We’ll attach an event listener to our button, and when clicked, it will create and dispatch our custom event.
// ... (previous code)

// Dispatch the custom event when the button is clicked
dispatchButton.addEventListener('click', () => {
    const customEvt = createMyCustomEvent({ message: 'A new action just happened!' });
    outputDisplay.dispatchEvent(customEvt); // Dispatch from outputDisplay as a demo
    console.log('Custom event "myCustomAction" dispatched!');
});
Here, we’re dispatching customEvt from outputDisplay. This means outputDisplay will be the initial target of the event. Because we set bubbles: true, this event will then travel up the DOM tree, potentially notifying any ancestor elements that are also listening for myCustomAction. This is a crucial concept for understanding how events propagate through your application.
“Custom events are a fantastic tool for decoupling your components. Instead of direct method calls or prop-drilling, you can use a publish-subscribe model, making your code significantly cleaner and more scalable.”
Listening for Custom Events
To react to your custom events, you use addEventListener() just as you would for native events like ‘click’ or ‘change’. The key is to specify your custom event type as the first argument. When the event fires, your callback function receives an Event object, from which you can access your custom detail data. This is where the magic happens; different parts of your application can subscribe to the same event without knowing anything about the event’s origin.
// ... (previous code)

// Listener 1: Updates the 'output' div
outputDisplay.addEventListener('myCustomAction', (event) => {
    const detail = event.detail;
    outputDisplay.innerHTML = `
        <p><strong>Event Received!</strong></p>
        <p>Message: ${detail.message}</p>
        <p>Timestamp: ${detail.timestamp}</p>
        <p>Count: ${detail.count}</p>
        <p>Source: ${detail.source}</p>
        <p>Dispatched from target: ${event.target.id}</p>
    `;
    console.log('Listener 1 reacted to myCustomAction:', detail);
});

// Listener 2: Updates the 'anotherOutput' div
anotherOutputDisplay.addEventListener('myCustomAction', (event) => {
    const detail = event.detail;
    anotherOutputDisplay.innerHTML = `
        <p><strong>Secondary Listener Active!</strong></p>
        <p>Another message: "${detail.message}"</p>
        <p>Event occurred at: ${detail.timestamp}</p>
        <p>Total dispatches: ${detail.count}</p>
    `;
    console.log('Listener 2 reacted to myCustomAction:', detail);
});
Notice how both outputDisplay and anotherOutputDisplay are listening for the same myCustomAction event. Even though the event was dispatched specifically from outputDisplay (via outputDisplay.dispatchEvent), anotherOutputDisplay can still pick it up if it’s an ancestor or if the event bubbles up to a common ancestor that both elements are within. Furthermore, the event’s detail property provides all the contextual data needed for the listeners to perform their specific updates. This is a robust mechanism for building scalable frontend applications. If you ever find your JavaScript code getting tangled, remember this pattern for better separation of concerns. Need to debug some tricky event flows? Check out techniques for JavaScript Debugging: Techniques Explained for Devs to pinpoint issues effectively.
Event Bubbling and Capturing
Understanding event bubbling is critical when working with CustomEvents JS. By default, most events bubble up the DOM tree from the target element to its ancestors. Our bubbles: true setting in CustomEvent ensures this behavior. Conversely, capture: true in addEventListener allows you to listen for events during the “capture” phase, as they travel down the DOM tree towards their target. Most of the time, bubbling is sufficient, but capturing can be useful for intercepting events before they reach their intended target. You can learn more about this on MDN Web Docs.
“The beauty of Custom Events lies in their simplicity and the powerful decoupling they offer. You define the contract (event name and detail structure), and anyone can subscribe or publish, completely unaware of the other party’s existence.”
Making Our Demo Responsive
Ensuring our user interface looks good across various devices is paramount in modern web development. For this simple demo, our responsiveness primarily involves adjusting padding, font sizes, and container widths to prevent overflow on smaller screens. We use a mobile-first approach, meaning we style for small screens first, then use media queries to apply larger adjustments for wider viewports.
Our CSS includes a media query for screens up to 768px. This targets typical tablet and mobile device sizes. Inside this query, we reduce the container’s padding and width, and slightly decrease heading and button font sizes. This ensures that the elements remain readable and well-proportioned, irrespective of the viewing device. For more advanced responsive design techniques, exploring modern CSS layouts like Flexbox and Grid is highly recommended. You can find excellent resources on CSS-Tricks’ guide to Flexbox. Furthermore, to make sure your responsive layouts work as intended across browsers, end-to-end testing with tools like Playwright E2E: End-to-End Testing with JavaScript can be invaluable. This ensures a consistent user experience.
Final Output: Observing Custom Event Magic
When you run the code, you’ll see a clean interface with a button and two output areas. Clicking the “Dispatch Custom Event” button will immediately update both output displays. The first display will show detailed information about the event, including its message, timestamp, and a running count. The second display, acting as an independent listener, will also update with relevant event data. This visual feedback perfectly illustrates how a single custom event can trigger multiple, separate reactions in different parts of your application, all without direct calls between the components. It’s a testament to the power of a well-implemented event-driven architecture. To verify everything works correctly, consider integrating Playwright E2E: Testing with JavaScript for Robust Apps into your development workflow for comprehensive automated tests.
Conclusion: Leveraging CustomEvents JS for Better Architecture
We’ve journeyed through the essentials of CustomEvents JS, learning how to define, dispatch, and listen for your own bespoke events in vanilla JavaScript. This pattern empowers you to build highly modular and maintainable web applications. By decoupling components through an event-driven model, you reduce dependencies and make your codebase easier to understand, extend, and debug.
Custom events are incredibly versatile. You can use them for inter-component communication in complex UIs, to notify analytics services of user actions, or to integrate with third-party libraries without tightly binding your code. They offer a powerful alternative to global state management or complex callback chains, promoting a cleaner, more scalable architecture. Start integrating custom events into your next project and experience the benefits of a truly decoupled JavaScript application. Your future self (and your team) will thank you!
Complete JavaScript Code
const dispatchButton = document.getElementById('dispatchBtn');
const outputDisplay = document.getElementById('output');
const anotherOutputDisplay = document.getElementById('anotherOutput');

let eventCount = 0;

function createMyCustomEvent(data) {
    eventCount++;
    return new CustomEvent('myCustomAction', {
        detail: {
            message: data.message,
            timestamp: new Date().toLocaleTimeString(),
            count: eventCount,
            source: 'dispatchButton'
        },
        bubbles: true,
        cancelable: true
    });
}

dispatchButton.addEventListener('click', () => {
    const customEvt = createMyCustomEvent({ message: 'A new action just happened!' });
    // Dispatch from outputDisplay to demonstrate target and bubbling
    outputDisplay.dispatchEvent(customEvt);
    console.log('Custom event "myCustomAction" dispatched!');
});

// Listener 1: Updates the 'output' div
outputDisplay.addEventListener('myCustomAction', (event) => {
    const detail = event.detail;
    outputDisplay.innerHTML = `
        <p><strong>Event Received!</strong></p>
        <p>Message: ${detail.message}</p>
        <p>Timestamp: ${detail.timestamp}</p>
        <p>Count: ${detail.count}</p>
        <p>Source: ${detail.source}</p>
        <p>Dispatched from target: ${event.target.id}</p>
    `;
    console.log('Listener 1 reacted to myCustomAction:', detail);
});

// Listener 2: Updates the 'anotherOutput' div
anotherOutputDisplay.addEventListener('myCustomAction', (event) => {
    const detail = event.detail;
    anotherOutputDisplay.innerHTML = `
        <p><strong>Secondary Listener Active!</strong></p>
        <p>Another message: "${detail.message}"</p>
        <p>Event occurred at: ${detail.timestamp}</p>
        <p>Total dispatches: ${detail.count}</p>
    `;
    console.log('Listener 2 reacted to myCustomAction:', detail);
});
hello world
hello world