Ever tried to fetch data for your awesome web app and BAM! A cryptic error message pops up. It says something about ‘CORS’? You’re not alone. This is a super common hurdle for web developers. It feels like your browser is just being difficult, right?
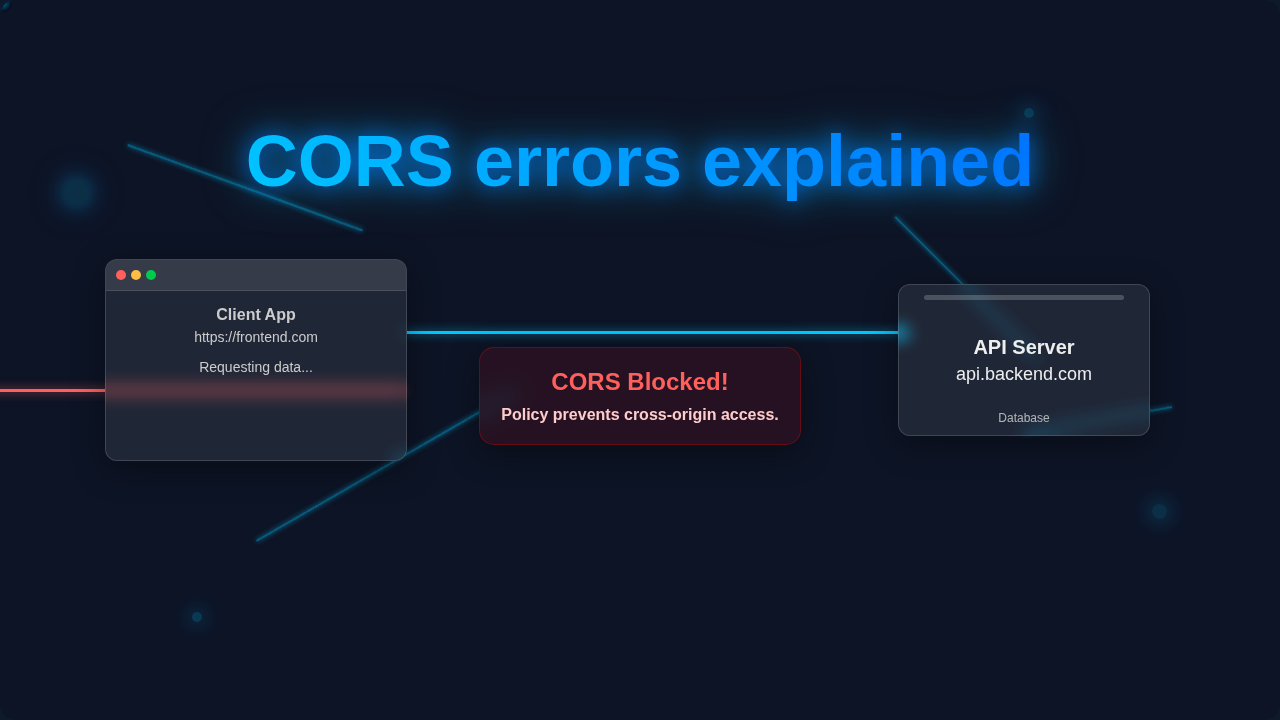
Well, there’s a good reason for it. Let’s get CORS errors explained so you can finally understand what’s going on. CORS stands for Cross-Origin Resource Sharing. It’s a security feature built into web browsers. It stops bad actors from doing tricky stuff with your data. Think of it like a bouncer at a club. This bouncer checks if the website requesting resources is allowed to enter.
When you build a web application, you often need to grab data from different places. Maybe your front-end code lives on one domain. Then, your backend API lives on another. This is where CORS comes into play. If the bouncer says ‘no,’ you get a CORS error. You might see messages like ‘blocked by CORS policy.’ Or ‘No Access-Control-Allow-Origin header is present.’ These errors are the browser protecting you. It’s keeping your users safe from potential security threats. But for you, the developer, it can feel like a headache. Don’t worry — it clicks eventually.
What Exactly Are CORS Errors Explained?
Understanding CORS errors means knowing why your browser acts as a strict security guard. Let’s dive into the core concepts and common solutions. These tips will help you unravel those mysterious web network issues.
-
1. The Same-Origin Policy: The Browser’s Golden Rule
The Same-Origin Policy (SOP) is the core security concept behind CORS. It’s a fundamental browser security measure. It dictates that a web page can only request resources from the exact same origin it came from. An origin means the same protocol (like HTTPS), same host (like procoder09.com), and same port (like 80 or 443). If any of these differ, it’s a ‘cross-origin’ request. The browser automatically blocks these requests unless specifically allowed. It’s a strict rule by default.
Imagine your website ‘mysite.com’ tries to load an image from ‘images.mysite.com’. This is usually fine because the domain is similar. But if ‘mysite.com’ tries to directly fetch data from ‘anothersite.com/api/data’, the browser says, “Hold on! That’s a different origin.” It immediately stops the request. This happens even before the request fully leaves your computer. Your browser acts as a vigilant gatekeeper.
-
2. Why Your Browser Blocks Legitimate Requests
When your front-end code makes a cross-origin request, the browser doesn’t just send it and hope. It first sends a ‘preflight’ request for complex requests. Or, it just checks the response headers for simpler ones. The browser acts as an intermediary. It doesn’t allow the raw response data to reach your JavaScript. Even if the server sends the data, your browser won’t let your code see it. That’s why you often see the error in your browser’s console. The network tab might even show a 200 OK status. This means the server successfully processed the request. But the browser still blocked your application from accessing the response.
You build a task list app on ‘todoapp.com’. You make an AJAX call to your API at ‘api.todoapp.net/tasks’. Your browser sees ‘todoapp.com’ versus ‘api.todoapp.net’. It recognizes these are different origins. The browser sends the request. The API might happily return all your tasks. But then, your browser sees that ‘api.todoapp.net’ didn’t send the proper CORS headers. It steps in. It prevents your ‘todoapp.com’ JavaScript from getting that task data. You’ll see an error in your console. The data is there, but locked away.
Your browser is like a strict librarian. It knows the books are on the shelves, but it won’t let you check them out if you don’t have the right membership card (CORS headers).
Solving CORS Errors: Key Strategies
-
3. The Magic Header: Access-Control-Allow-Origin
This is the magic header for solving most CORS issues. It’s a response header that your server sends back. It tells the browser, “Hey, ‘mysite.com’ is allowed to access this resource.” The server specifies which origins are permitted. It can be a specific domain like ‘https://www.yourfrontend.com’. Or, for development or public APIs, it can be an asterisk (*). This asterisk means “any origin is allowed.” The server holds the key to unlocking these cross-origin requests.
Your ‘api.widgets.com’ needs to serve data to your front-end at ‘app.widgets.com’. When ‘app.widgets.com’ requests data, ‘api.widgets.com’ responds. It includes a header: Access-Control-Allow-Origin: https://app.widgets.com. Your browser checks this header. It sees that ‘app.widgets.com’ is explicitly allowed. The data then flows freely to your front-end. If this header is missing or incorrect, the browser blocks the data. You can learn more about this crucial header and CORS on MDN Web Docs. It’s a key piece of the puzzle.
-
4. Understanding Preflight Requests (The OPTIONS Method)
Some HTTP requests are ‘simple.’ These are GET or HEAD requests. They don’t have custom headers. And they use specific content types. Other requests are ‘complex.’ These include PUT, DELETE, or POST requests with a Content-Type other than simple ones. Before making a complex cross-origin request, your browser sends a ‘preflight’ request. This is an OPTIONS request. It’s like your browser asking permission first. It asks the server, “Are you cool with PUT requests from ‘myfrontend.com’?” The server then responds with its CORS policies. If the server says “yes,” the actual request proceeds. If “no,” the browser blocks it immediately.
You have a user profile page on ‘profile.mywebapp.com’. You want to update a user’s avatar. This requires a PUT request to ‘api.mywebapp.com/users/123/avatar’. Before the PUT request even goes out, your browser sends an OPTIONS request to that URL. The OPTIONS request contains headers like Access-Control-Request-Method: PUT. It also includes Access-Control-Request-Headers: Content-Type. The server must respond to this OPTIONS request. It needs to include headers indicating that PUT is allowed. If the server doesn’t respond correctly, your browser stops the PUT request dead in its tracks. No avatar update for you!
-
5. Fixing CORS on Your Backend Server
The most robust solution for CORS is always on the server. You control the server that serves your API. So, you can add the necessary CORS headers. Most web frameworks have middleware or configuration options for this. You might add a few lines of code. This code tells your server to include the Access-Control-Allow-Origin header. It also handles preflight OPTIONS requests. Remember, it’s about giving your server explicit instructions. You’re telling it who gets to talk to it.
Let’s say you’re building a backend using Python and a framework like Flask or Django. You would typically add a CORS library. This library helps manage the headers. You configure it to allow requests from ‘https://your-frontend-app.com’. Or, maybe during development, you allow a local development address like http://localhost:3000. This ensures that your front-end can communicate. You’re giving your API permission to share its data. Without this server-side configuration, your front-end will keep seeing those pesky CORS errors explained messages. If you’re using something like the Python Requests Library Explained – Beginner Guide, you’ll be making requests, but your server needs to allow them.
-
6. Client-Side Workarounds: Proxies for Third-Party APIs
Sometimes, you don’t control the backend server. Maybe it’s a third-party API. Or you’re just developing locally. In these cases, you can use a ‘proxy.’ A proxy is an intermediary server. Your front-end requests data from your own proxy server. This proxy server then makes the actual request to the third-party API. Since the proxy is on the same origin as your front-end (or appears to be), the browser doesn’t block it. The proxy gets the data. Then, it sends it back to your front-end. The browser thinks it’s a ‘same-origin’ request. This is a common workaround.
You’re building a weather app. You want to use a public weather API like OpenWeatherMap. Their API might not have CORS headers set for everyone. Your local development front-end on http://localhost:3000 tries to call ‘api.openweathermap.org’. It gets a CORS error. Instead, you set up a simple Node.js server on http://localhost:3000/proxy. Your front-end calls http://localhost:3000/proxy/weather. Your proxy server then calls ‘api.openweathermap.org’. It fetches the data. Then, it sends the weather data back to your front-end. Your browser is happy because it only talked to http://localhost:3000. No CORS issues!
Think of a proxy like a secret messenger. Your app tells the messenger what it needs. The messenger goes to the locked-down API, gets the information, and brings it back to your app, all without your app ever directly touching the locked door.
-
7. Why Disabling Browser Security is Never a Real Fix
You might have heard of browser extensions or developer settings to ‘disable CORS.’ Here’s the thing: these are usually temporary. They are meant for development environments. They often bypass the browser’s security features. You absolutely should never tell users to disable CORS. It compromises their security. It makes them vulnerable to attacks. CORS is a fundamental security mechanism. It exists for good reason. Trying to circumvent it in production is asking for trouble. It’s like removing the locks from your house door. You wouldn’t do that, right?
You’re trying to quickly test an API locally. You open your browser’s dev tools. You see a setting or an extension that claims to “disable web security.” You turn it on. Suddenly, your app works! Your local development front-end can talk to your ‘another-api.com’ backend. But this is a false fix. It only works on your machine. It bypasses security. When you deploy your app, users will still face the same CORS errors. Because their browsers still have security enabled. The real solution involves configuring your server correctly. You might even want to check out how different CSS libraries like Tailwind CSS vs Plain CSS Blog Thumbnail Design help structure requests, though they don’t directly impact CORS. For more on browser security, see this CSS-Tricks article on Same-Origin Policy. The proper way to handle it is always server-side. Understanding React Lifting State Up: Component Tree & Neon Diagram is complex, but it’s simpler than trying to hack around browser security!
Beyond the Basics: Advanced CORS Tips
Bonus Tip: Tailoring CORS for Different Environments
Your production server needs tight security. Your development environment might need more flexibility. Often, you’ll configure CORS differently for each. In development, you might allow a local address like http://localhost:3000. In production, you’d only allow ‘https://your-live-app.com’. Never use an asterisk (*) (allow all origins) in a production environment. Unless you’re building a truly public API. This is a critical security practice. Be specific about who can access your resources.
When your app is live on ‘https://myawesomeapp.com’, your API server should set Access-Control-Allow-Origin: https://myawesomeapp.com. But when you’re developing locally, your front-end might be running on http://localhost:5173. You’d configure your backend to also allow http://localhost:5173. This lets you test. When you push to production, you remove the localhost rule. This keeps your live application secure. It’s all about matching the permissions to the environment.
CORS Errors Explained: Your Path to Resolution
So there you have it! CORS errors explained in detail. They might seem frustrating at first. But they are a vital part of web security. You’ve learned about the Same-Origin Policy. You know how browsers enforce it. And you understand the Access-Control-Allow-Origin header. Most importantly, you know how to solve them. Always start by checking your server-side configuration. That’s usually the fix. Remember, you’re not just debugging an error. You’re building a more secure web. Keep experimenting, keep building, and you’ll master these web network issues in no time. You’ve got this!