Hey there, fellow developers! Ever wondered how those slick, real-time web applications deliver instant updates without constantly refreshing the page? Today, we’re diving deep into the world of SSE JavaScript, exploring Server-Sent Events. This powerful, yet often overlooked, browser API empowers you to build dynamic experiences where your server pushes data directly to your client. It’s truly game-changing for interactive web UIs.
What We Are Building: Real-time Updates with SSE JavaScript
Imagine a live dashboard, a stock ticker, or a sports score updater. These applications demand immediate data delivery. Consequently, traditional HTTP polling can become inefficient and resource-intensive. Our project today embraces the elegance of Server-Sent Events to build a simple yet effective real-time notification system.
SSE is currently trending for its simplicity and efficiency when you need a unidirectional data flow from the server to the client. Unlike WebSockets, which offer full-duplex communication, SSE is perfect for scenarios where the client primarily consumes updates. For instance, think about a news feed, a monitoring system, or even simple chat notifications. Its ease of implementation, especially with a plain JavaScript frontend, makes it a favorite among developers looking for a lightweight real-time solution.
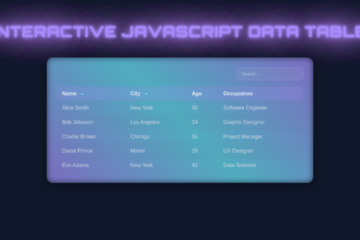
You can use SSE in various places, from displaying live analytics Analytics Chart: Interactive Design with HTML, CSS, JS to showing updates in a task management application. We’re creating a simple event log that updates as the server sends new messages. This will clearly demonstrate the core principles of SSE.
HTML Structure
Our HTML provides the basic layout for our real-time event log. We’ll set up a main container, a display area for incoming messages, and perhaps a simple header. This structure ensures our content is well-organized before we apply any styling.
index.html
<!DOCTYPE html> <html lang="en"> <head> <meta charset="UTF-8"> <meta name="viewport" content="width=device-width, initial-scale=1.0"> <title>Server-Sent Events Demo</title> <link rel="stylesheet" href="styles.css"> </head> <body> <div class="container"> <h1>Server-Sent Events Implementation</h1> <p class="description"> Connect to a server to receive real-time updates using Server-Sent Events (SSE). This demo showcases the client-side JavaScript implementation. (Requires a compatible server-side endpoint at <code>/events</code>) </p> <div class="status-section"> <div id="statusIndicator" class="status-indicator"></div> <span id="statusText" class="status-text">Disconnected</span> </div> <div class="controls"> <button id="connectBtn">Connect SSE</button> <button id="disconnectBtn" disabled>Disconnect SSE</button> </div> <div class="message-log" id="messageLog"> <p class="system-message"><strong>Log:</strong> Awaiting connection...</p> </div> </div> <script src="script.js"></script> </body> </html>script.js
document.addEventListener('DOMContentLoaded', () => { const statusIndicator = document.getElementById('statusIndicator'); const statusText = document.getElementById('statusText'); const connectBtn = document.getElementById('connectBtn'); const disconnectBtn = document.getElementById('disconnectBtn'); const messageLog = document.getElementById('messageLog'); let eventSource = null; let messageCounter = 0; /** * Appends a new message to the log display. * @param {string} message The content of the message. * @param {string} type Optional. 'info', 'error', or 'system'. Defaults to 'info'. */ function logMessage(message, type = 'info') { const p = document.createElement('p'); p.classList.add(`${type}-message`); let content = ''; switch (type) { case 'error': content = `<span class="error"><strong>Error:</strong> ${message}</span>`; break; case 'system': content = `<strong>System:</strong> ${message}`; break; default: content = `<strong>Event ${messageCounter++}:</strong> ${message}`; break; } p.innerHTML = content; messageLog.prepend(p); while (messageLog.children.length > 25) { messageLog.removeChild(messageLog.lastChild); } } /** * Updates the connection status in the UI. * @param {boolean} connected True if connected, false otherwise. */ function setStatus(connected) { if (connected) { statusIndicator.classList.add('connected'); statusText.textContent = 'Connected'; connectBtn.disabled = true; disconnectBtn.disabled = false; } else { statusIndicator.classList.remove('connected'); statusText.textContent = 'Disconnected'; connectBtn.disabled = false; disconnectBtn.disabled = true; } } /** * Establishes an EventSource connection to the server. */ function connectSSE() { if (eventSource && eventSource.readyState !== EventSource.CLOSED) { console.warn('EventSource is already open or connecting. Closing existing connection.'); eventSource.close(); } // The URL for the SSE endpoint on your server // Make sure your server is configured to serve events at this endpoint. eventSource = new EventSource('/events'); logMessage('Attempting to connect to SSE stream...', 'system'); eventSource.onopen = () => { setStatus(true); logMessage('Connection established successfully.', 'system'); messageCounter = 0; }; eventSource.onmessage = (event) => { // event.data contains the message sent from the server logMessage(event.data); }; eventSource.onerror = (error) => { console.error('EventSource failed:', error); setStatus(false); if (eventSource.readyState === EventSource.CONNECTING) { logMessage('Connection failed. Retrying...', 'error'); } else if (eventSource.readyState === EventSource.CLOSED) { logMessage('Connection closed by server or network error. Please reconnect.', 'error'); } else { logMessage('An unknown SSE error occurred.', 'error'); } eventSource.close(); eventSource = null; }; // You can also listen for custom events if your server sends them // For example: /* eventSource.addEventListener('priceUpdate', (event) => { logMessage(`Price update: ${event.data}`, 'info'); }); */ } /** * Closes the existing EventSource connection. */ function disconnectSSE() { if (eventSource) { eventSource.close(); eventSource = null; setStatus(false); logMessage('Disconnected from SSE stream.', 'system'); } else { logMessage('No active SSE connection to disconnect.', 'system'); } messageCounter = 0; } // Event Listeners for buttons connectBtn.addEventListener('click', connectSSE); disconnectBtn.addEventListener('click', disconnectSSE); // Initial UI setup setStatus(false); logMessage('Click "Connect SSE" to start receiving real-time events.', 'system'); });
CSS Styling
The CSS will make our application visually appealing and user-friendly. We’re aiming for a clean, modern look, ensuring readability and a pleasant user experience. Furthermore, we’ll focus on creating a responsive design that looks great on any device.
styles.css
body { font-family: Arial, Helvetica, sans-serif; background-color: #f0f2f5; color: #333; display: flex; justify-content: center; align-items: flex-start; min-height: 100vh; margin: 0; padding: 30px 20px; box-sizing: border-box; overflow-x: hidden; } .container { background-color: #ffffff; border-radius: 12px; box-shadow: 0 4px 20px rgba(0, 0, 0, 0.1); padding: 30px; width: 100%; max-width: 800px; border: 1px solid #e0e0e0; box-sizing: border-box; overflow: hidden; } h1 { color: #007bff; text-align: center; margin-bottom: 20px; font-size: 2.2em; } .description { text-align: center; color: #555; margin-bottom: 25px; line-height: 1.6; } .description code { background-color: #e9ecef; padding: 2px 6px; border-radius: 4px; font-family: 'Courier New', Courier, monospace; font-size: 0.9em; color: #c82c2c; } .status-section { display: flex; align-items: center; justify-content: center; margin-bottom: 20px; gap: 10px; } .status-indicator { width: 14px; height: 14px; border-radius: 50%; background-color: #dc3545; transition: background-color 0.3s ease; border: 1px solid rgba(0,0,0,0.1); } .status-indicator.connected { background-color: #28a745; } .status-text { font-size: 1.1em; font-weight: bold; color: #6c757d; } .status-indicator.connected + .status-text { color: #28a745; } .controls { display: flex; justify-content: center; gap: 15px; margin-bottom: 25px; } button { background-color: #007bff; color: #ffffff; border: none; padding: 12px 28px; border-radius: 8px; cursor: pointer; font-size: 1em; font-weight: 500; transition: background-color 0.3s ease, transform 0.2s ease; box-shadow: 0 2px 10px rgba(0, 0, 0, 0.1); } button:hover { background-color: #0056b3; transform: translateY(-1px); } button:active { transform: translateY(0); box-shadow: 0 1px 5px rgba(0, 0, 0, 0.1); } button:disabled { background-color: #cccccc; color: #888888; cursor: not-allowed; opacity: 0.8; box-shadow: none; } .message-log { background-color: #f8f9fa; border: 1px solid #dee2e6; border-radius: 8px; padding: 15px; max-height: 300px; overflow-y: auto; color: #495057; font-size: 0.9em; line-height: 1.6; font-family: 'Consolas', 'Monaco', monospace; } .message-log p { margin: 0 0 10px 0; padding-bottom: 8px; border-bottom: 1px dashed #e9ecef; } .message-log p:last-child { margin-bottom: 0; border-bottom: none; } .message-log strong { color: #007bff; } .message-log span.error { color: #dc3545; } .message-log .system-message { color: #6c757d; }
Step-by-Step Breakdown: Understanding Your SSE JavaScript Code
Now, let’s dive into the core of our application: the JavaScript. This is where the magic of Server-Sent Events happens. We’ll meticulously walk through each part, from establishing the connection to processing and displaying incoming data. Prepare to unlock real-time capabilities! If you’re wondering how to simulate the server-side part for testing, you might find API Mocking: JavaScript Tutorial for Dev & Test incredibly useful.
Initializing the EventSource
To begin with, the first step in using SSE is creating an
EventSourceobject. This object opens a persistent connection to an HTTP server, allowing the server to push events to the client. It handles reconnections automatically, which is a massive convenience for developers.The
EventSourceinterface is used to receive server-sent events. It connects to a server over HTTP and receives events, eliminating the need for polling.const eventSource = new EventSource('/events'); // Replace '/events' with your actual SSE endpoint const eventLog = document.getElementById('event-log'); // Optional: You can configure EventSource with credentials if needed // const eventSource = new EventSource('/events', { withCredentials: true });Here, we’re pointing our
EventSourceto an endpoint called/events. On the server side, this endpoint will be configured to send streams of data. TheeventLogvariable simply references the DOM element where we’ll display our incoming messages. Consequently, this setup makes our client ready to listen for updates.Handling Incoming Messages
Once the
EventSourceis initialized, we need to listen for incoming messages. The most common event isonmessage, which fires whenever the server sends a message without a specific event type. The data from the server arrives as a string, usually needing JSON parsing.eventSource.onmessage = function(event) { console.log('Received raw event:', event.data); try { const data = JSON.parse(event.data); addEventToLog(data); } catch (e) { console.error('Failed to parse JSON:', e); // Handle non-JSON messages or malformed data gracefully addEventToLog({ timestamp: new Date().toLocaleTimeString(), message: event.data, type: 'text' }); } };In this block, we attach a function to the
onmessageevent. Theeventobject contains the server’s data in itsdataproperty. We try to parse it as JSON, assuming our server sends structured data. However, if parsing fails, we gracefully handle it by logging the raw data. This robust approach prevents your application from crashing due to unexpected data formats. Furthermore, this method keeps our UI fluid.Displaying Real-time Data
After receiving and parsing the data, the next logical step is to display it on our web page. This involves dynamically creating new DOM elements and appending them to our event log container. We aim for a clear, readable presentation of each event.
function addEventToLog(eventData) { const eventItem = document.createElement('div'); eventItem.classList.add('event-item', `event-${eventData.type || 'info'}`); const timestampSpan = document.createElement('span'); timestampSpan.classList.add('timestamp'); timestampSpan.textContent = eventData.timestamp; const messageSpan = document.createElement('span'); messageSpan.classList.add('message'); messageSpan.textContent = eventData.message; eventItem.appendChild(timestampSpan); eventItem.appendChild(messageSpan); eventLog.prepend(eventItem); // Add new events to the top // Optional: Limit the number of displayed events if (eventLog.children.length > 50) { eventLog.removeChild(eventLog.lastChild); } }The
addEventToLogfunction does the heavy lifting here. It creates a newdivfor each event, adds appropriate CSS classes for styling, and injects the timestamp and message. We useprependto show the newest events at the top, mimicking a typical activity feed. Moreover, we include a simple check to limit the number of displayed events, preventing the log from becoming excessively long. If you’re looking for advanced rendering techniques for code blocks within your messages, consider exploring Syntax Highlighting: HTML, CSS & JS Code Blocks.Error Handling and Connection Management
Robust applications anticipate issues. SSE provides an
onerrorevent listener, allowing you to react to connection problems. This is crucial for user experience, informing users if the real-time feed is disrupted.eventSource.onerror = function(error) { console.error('EventSource failed:', error); let errorMessage = 'Connection to event server lost.'; if (eventSource.readyState === EventSource.CLOSED) { errorMessage = 'Connection closed. Attempting to reconnect...'; } else if (eventSource.readyState === EventSource.CONNECTING) { errorMessage = 'Attempting to establish connection...'; } addEventToLog({ timestamp: new Date().toLocaleTimeString(), message: errorMessage, type: 'error' }); }; // You can also listen for a successful open event eventSource.onopen = function() { console.log('EventSource connection opened!'); addEventToLog({ timestamp: new Date().toLocaleTimeString(), message: 'Connected to event stream.', type: 'success' }); };The
onerrorhandler checks theeventSource.readyStateto provide more specific feedback. States likeCLOSEDorCONNECTINGgive us context. We also add anonopenlistener to confirm successful connections. MDN Web Docs offer comprehensive documentation on the EventSource API, which is an excellent resource for deeper understanding.Making It Responsive
A truly modern web application must look good on all devices. Therefore, we’ll implement media queries in our CSS to ensure our event log is fully responsive. This means adjusting font sizes, padding, and column layouts as the screen size changes.
For smaller screens, we might stack elements or reduce visual clutter. For instance, a mobile-first approach often proves most effective. We design for the smallest screen first, then progressively enhance for larger displays. This strategy ensures a solid user experience across the board.
Responsive design is not just about making things smaller; it’s about optimizing the user experience for every screen and interaction context.
You can find more advanced techniques and best practices for responsive design on CSS-Tricks.
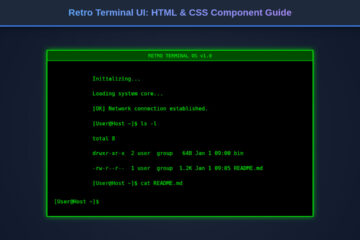
Final Output
After bringing all these pieces together – the HTML structure, the elegant CSS, and the powerful SSE JavaScript – you will have a fully functional real-time event log. New messages will appear instantly, flowing down (or up, depending on your prepend/append choice) the screen without any manual refreshes. It creates a dynamic, engaging user interface that truly feels alive.
The key visual elements will include clearly separated event items, distinct timestamps, and messages. Error states will be visually different, providing immediate feedback to the user. This setup provides a robust and aesthetically pleasing solution for real-time data display.
Conclusion
Implementing Server-Sent Events with plain JavaScript offers a wonderfully efficient way to add real-time capabilities to your web applications. You’ve learned how to establish an
EventSourceconnection, handle incoming data, dynamically update the DOM, and manage connection states. This knowledge empowers you to build highly interactive and responsive user experiences.SSE shines in scenarios requiring one-way communication from server to client, like live notifications, activity feeds, and dashboards. Its simplicity compared to WebSockets, coupled with automatic reconnection, makes it an attractive choice for many projects. So go ahead, experiment, and integrate SSE into your next big idea. Your users will certainly appreciate the instantaneous updates!