
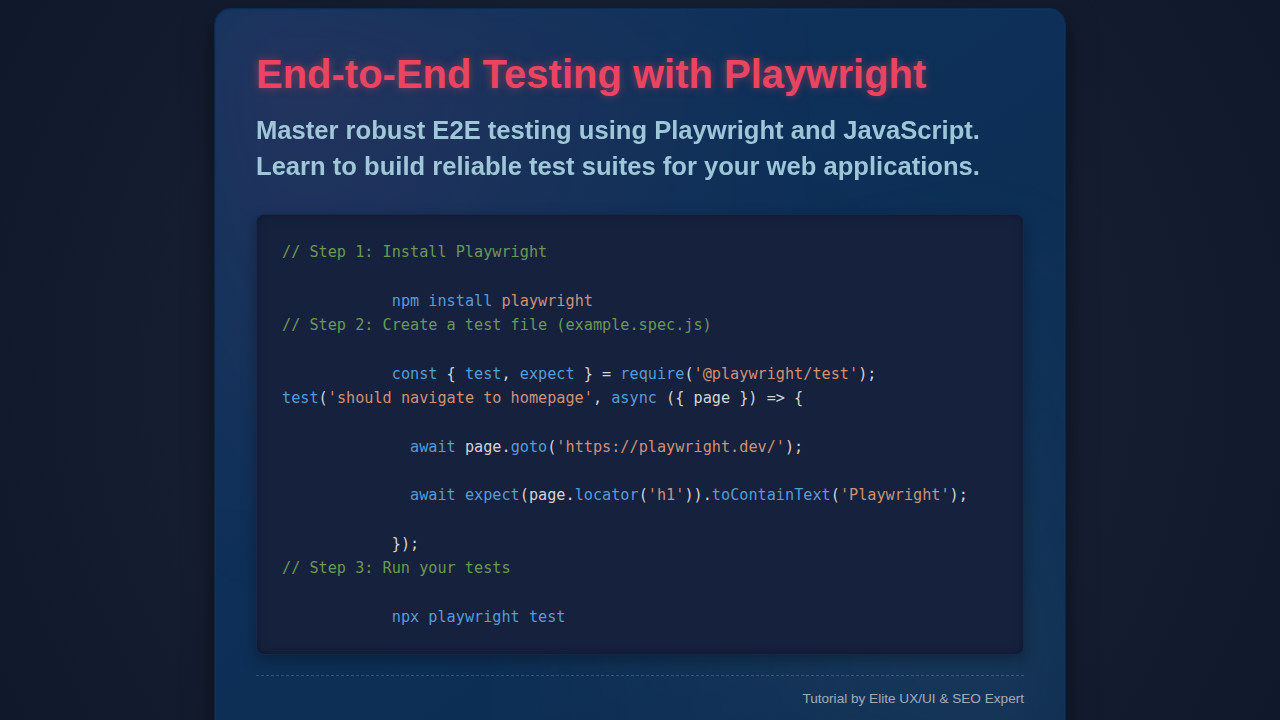
Hey fellow developers! Ever felt the thrill of deploying a new feature, only to be hit by a bug report shortly after? We’ve all been there. That’s why mastering Playwright E2E testing is absolutely crucial for building robust, reliable web applications that stand the test of time.
This powerful framework allows us to simulate real user interactions, catching those sneaky regressions before they ever reach your users. Furthermore, it gives us confidence to deploy quickly and often. Let’s dive in and elevate our testing game!
What We Are Building: Why Playwright E2E Shines
For this journey, we’ll imagine building a simple yet functional To-Do list application. This kind of application, while seemingly basic, involves crucial user interactions: adding tasks, marking them as complete, and deleting them. Consequently, it provides an excellent canvas for demonstrating the power of end-to-end testing.
Why choose Playwright for such a task? Playwright has rapidly gained popularity because of its speed, reliability, and cross-browser capabilities. It handles modern web complexities with ease, making it perfect for ensuring your application behaves as expected across different browsers and devices. Its auto-wait capabilities drastically reduce flakiness often associated with E2E tests, offering more stable results.
The skills you’ll gain here are universally applicable. Whether you’re working on single-page applications (SPAs), complex forms, or even sophisticated e-commerce platforms, the principles of robust testing using Playwright remain the same. Indeed, investing in E2E tests provides peace of mind for any web project.
HTML Structure
For our demonstration, we’ll imagine a straightforward To-Do list interface. This basic HTML skeleton provides all the interactive elements we’ll later target with our Playwright tests, including an input field, an add button, and areas to display tasks.
index.html
<!DOCTYPE html>
<html lang="en">
<head>
    <meta charset="UTF-8">
    <meta name="viewport" content="width=device-width, initial-scale=1.0">
    <title>End-to-End Testing with Playwright Using JavaScript</title>
    <link rel="stylesheet" href="styles.css">
</head>
<body>
    <div class="tutorial-container">
        <header class="tutorial-header">
            <h1>End-to-End Testing with Playwright</h1>
            <p class="subtitle">A Comprehensive Guide Using JavaScript</p>
        </header>

        <section class="tutorial-content">
            <p>Playwright is a powerful tool for reliable end-to-end testing of modern web apps. This tutorial will walk you through setting up and writing your first tests using JavaScript.</p>

            <h2>1. Installation</h2>
            <div class="code-block">
                <pre><code>npm install --save-dev @playwright/test</code></pre>
            </div>

            <h2>2. Creating Your First Test</h2>
            <p>After installation, create a new file, for example, <code>example.spec.js</code>, and add the following code:</p>
            <div class="code-block">
                <pre><code>// example.spec.js
import { test, expect } from '@playwright/test';

test('has title', async ({ page }) => {
  await page.goto('https://playwright.dev/');

  // Expect a title "to contain" a substring.
  await expect(page).toHaveTitle(/Playwright/);
});

test('get started link', async ({ page }) => {
  await page.goto('https://playwright.dev/');

  // Click the get started link.
  await page.getByRole('link', { name: 'Get started' }).click();

  // Expects page to have a heading with the name of Playwright.
  await expect(page.getByRole('heading', { name: 'Installation' })).toBeVisible();
});
</code></pre>
            </div>

            <h2>3. Running Your Tests</h2>
            <p>Execute your tests from the command line:</p>
            <div class="code-block">
                <pre><code>npx playwright test</code></pre>
            </div>

            <p>This will launch browsers and run your defined tests, providing a report in your terminal.</p>
        </section>

        <footer class="tutorial-footer">
            <p>© 2023 Playwright Tutorials. All rights reserved.</p>
        </footer>
    </div>
</body>
</html>
CSS Styling
To make our To-Do application visually appealing and usable, we’ll apply some simple CSS. These styles ensure our elements are clearly distinguishable and responsive, making our testing journey smoother. We will ensure tasks can be clearly seen and interacted with.
styles.css
/* General Reset */
*, *::before, *::after {
    box-sizing: border-box; /* Rule: box-sizing:border-box */
    margin: 0;
    padding: 0;
}

body {
    font-family: Arial, Helvetica, sans-serif; /* Rule: Safe fonts */
    line-height: 1.6;
    color: #333;
    background-color: #f4f4f4;
    padding: 20px;
    overflow-x: hidden; /* Rule: overflow:hidden - Prevent horizontal scroll */
}

.tutorial-container {
    max-width: 960px; /* Max width for content, ensures responsiveness */
    margin: 0 auto;
    background: #fff;
    padding: 30px;
    border-radius: 8px;
    box-shadow: 0 2px 10px rgba(0, 0, 0, 0.1);
    overflow: hidden; /* Rule: overflow:hidden - Prevents child elements from breaking layout */
}

.tutorial-header {
    text-align: center;
    margin-bottom: 40px;
    padding-bottom: 20px;
    border-bottom: 1px solid #eee;
}

.tutorial-header h1 {
    font-size: 2.8em;
    color: #2c3e50;
    margin-bottom: 10px;
}

.tutorial-header .subtitle {
    font-size: 1.2em;
    color: #7f8c8d;
}

.tutorial-content h2 {
    font-size: 1.8em;
    color: #34495e;
    margin-top: 30px;
    margin-bottom: 15px;
    border-bottom: 2px solid #ecf0f1;
    padding-bottom: 5px;
}

.tutorial-content p {
    margin-bottom: 15px;
    color: #555;
}

.code-block {
    background-color: #2d2d2d;
    color: #f8f8f2;
    padding: 15px;
    border-radius: 6px;
    margin-bottom: 20px;
    overflow-x: auto; /* Allow horizontal scrolling for wide code lines */
    max-width: 100%; /* Rule: max-width:100% - Ensure code block fits container */
    font-family: 'Consolas', 'Monaco', 'Lucida Console', monospace; /* Safe monospace font */
    font-size: 0.9em;
    line-height: 1.4;
    white-space: pre-wrap; /* Preserve whitespace and wrap long lines */
    word-break: break-all; /* Allow words to break to prevent overflow */
}

.code-block pre {
    margin: 0;
    padding: 0;
}

.code-block code {
    display: block; /* Ensures code block takes full width */
}

.tutorial-footer {
    text-align: center;
    margin-top: 40px;
    padding-top: 20px;
    border-top: 1px solid #eee;
    color: #7f8c8d;
    font-size: 0.9em;
}
Step-by-Step Breakdown: Mastering Playwright E2E Tests
Now, let’s get to the heart of the matter: writing our tests! This section will guide you through setting up Playwright and crafting effective tests for our To-Do application. We’ll cover everything from initial setup to interacting with dynamic content, demonstrating how Playwright can mimic real user behavior.
Setting Up Your Playwright Environment
First things first, you need to get Playwright installed. Open your terminal and run the following command to install Playwright and its browser binaries:
npm init playwright@latest
This command not only installs Playwright but also sets up a basic project structure and a configuration file (playwright.config.js). The default configuration is generally sufficient to get started, supporting Chromium, Firefox, and WebKit out of the box. You might want to explore customizing options like the base URL or global setup/teardown in this file.
Once installed, create a new file, perhaps tests/todo.spec.js. This is where our testing magic will happen. If you encounter any unexpected issues during setup or while running tests, remember that solid JavaScript Debugging: Techniques Explained for Devs can save you a lot of time. Effectively using browser developer tools or Playwright’s own trace viewer will illuminate problems swiftly.
“Effective end-to-end tests are not just about finding bugs; they’re about validating user journeys and building confidence in your application’s core functionality.”
Writing Your First Test: Adding a To-Do Item
Let’s start with a fundamental user interaction: adding a new To-Do item. We’ll simulate typing into an input field and clicking an ‘Add’ button. Below is the basic structure of a test file.
import { test, expect } from '@playwright/test';

test.describe('To-Do App', () => {
  test.beforeEach(async ({ page }) => {
    await page.goto('http://localhost:3000'); // Assuming your app runs on port 3000
  });

  test('should allow me to add new todo items', async ({ page }) => {
    // Locate the input field and fill it
    await page.fill('.new-todo-input', 'Learn Playwright E2E');
    // Click the add button
    await page.click('.add-todo-button');

    // Assert that the new item is visible
    await expect(page.locator('.todo-item-text')).toHaveText('Learn Playwright E2E');
  });
});
In this snippet, page.goto() navigates to your application’s URL. Then, page.fill() targets an input element using its CSS class and types text into it. Subsequently, page.click() simulates a mouse click on the ‘Add’ button. Finally, expect(page.locator()).toHaveText() verifies that the newly added To-Do item appears on the page with the correct text. Playwright’s locators are incredibly powerful, allowing you to target elements precisely, even with complex selectors. Learning to use MDN’s guide on query selectors can significantly improve your locator strategies.
Interacting with Elements: Completing and Deleting To-Dos
Our To-Do list isn’t complete without the ability to mark tasks as done and remove them. Let’s add tests for these functionalities.
// ... (previous code)

test('should allow me to complete a todo item', async ({ page }) => {
  await page.fill('.new-todo-input', 'Buy groceries');
  await page.click('.add-todo-button');

  // Locate the checkbox for the first todo item and click it
  await page.locator('.todo-item-checkbox').first().check();

  // Assert that the item has a 'completed' class or style
  await expect(page.locator('.todo-item').first()).toHaveClass(/completed/);
});

test('should allow me to delete a todo item', async ({ page }) => {
  await page.fill('.new-todo-input', 'Read Playwright docs');
  await page.click('.add-todo-button');

  // Locate the delete button for the first todo item and click it
  await page.locator('.delete-todo-button').first().click();

  // Assert that the item is no longer visible
  await expect(page.locator('.todo-item')).toHaveCount(0);
});
Here, we introduce .first().check() to interact with a checkbox, ensuring we target the correct one if multiple exist. The .toHaveClass(/completed/) assertion checks for the presence of a CSS class, which is a common way to visually indicate a completed task. For deletion, we use .first().click() on the delete button. Subsequently, .toHaveCount(0) verifies that no To-Do items remain, confirming the deletion was successful. These interactions demonstrate how Playwright can precisely control user input and actions within your application.
Handling Dynamic Content and Assertions
Web applications often involve dynamic content. Playwright excels at waiting for elements to appear or become actionable automatically. However, you might need more specific assertions. Consider a scenario where you want to ensure the number of pending tasks updates correctly.
// ... (previous code)

test('should update the pending tasks count correctly', async ({ page }) => {
  await page.fill('.new-todo-input', 'Task 1');
  await page.click('.add-todo-button');
  await page.fill('.new-todo-input', 'Task 2');
  await page.click('.add-todo-button');

  await expect(page.locator('.pending-tasks-count')).toHaveText('2 pending');

  await page.locator('.todo-item-checkbox').first().check();

  await expect(page.locator('.pending-tasks-count')).toHaveText('1 pending');
});
This test adds two tasks, asserts the count, then completes one and re-asserts the count. This rigorous approach confirms that the application’s internal logic is correctly reflected in the UI. For larger, more complex applications with intricate data displays, like a Dashboard Design: Analytics UI in HTML, CSS & JavaScript, such dynamic assertions become absolutely indispensable. They guarantee that all user-facing information remains accurate and up-to-date, reflecting the true state of your application.
Making It Responsive
In today’s multi-device world, responsiveness isn’t a luxury; it’s a necessity. Your Playwright E2E tests should also cover how your application behaves on different screen sizes. Fortunately, Playwright makes this incredibly straightforward.
You can configure the viewport for your tests directly within your playwright.config.js or on a per-test basis using browser.newContext(). This allows you to simulate mobile, tablet, and desktop environments effortlessly. For instance, to test a mobile view, you might set a specific viewport size and even a user agent string to mimic a mobile browser. For example, testing how tasks are displayed or if the ‘Add’ button is still accessible on a small screen is vital. You should ensure your CSS media queries are working as intended by running tests in various viewport configurations.
Final Output
Upon successfully running your comprehensive suite of Playwright tests, the final output isn’t merely a green checkmark in your terminal. It’s the profound confidence you gain in your application’s stability and functionality. These tests ensure that critical user flows, from adding items to managing them, work flawlessly across various browsers. Ultimately, this leads to a more robust application, fewer bug reports, and a smoother development lifecycle.
Conclusion
Adopting Playwright E2E testing with JavaScript is a game-changer for any web developer committed to building high-quality, dependable applications. We’ve explored setting up your environment, writing tests for fundamental interactions like adding, completing, and deleting tasks, and even touched upon ensuring responsiveness.
Playwright’s intuitive API, combined with its speed and reliability, empowers you to catch regressions early and ensure a stellar user experience. Begin integrating these testing practices into your workflow today; the payoff in terms of reduced bugs and increased confidence is immense. For developers working on larger projects, understanding concepts like the Singleton Pattern Explained in JavaScript can further enhance the maintainability and testability of their application architecture, creating more robust systems overall. Happy testing!
AI linkbuilding tool with chatgpt