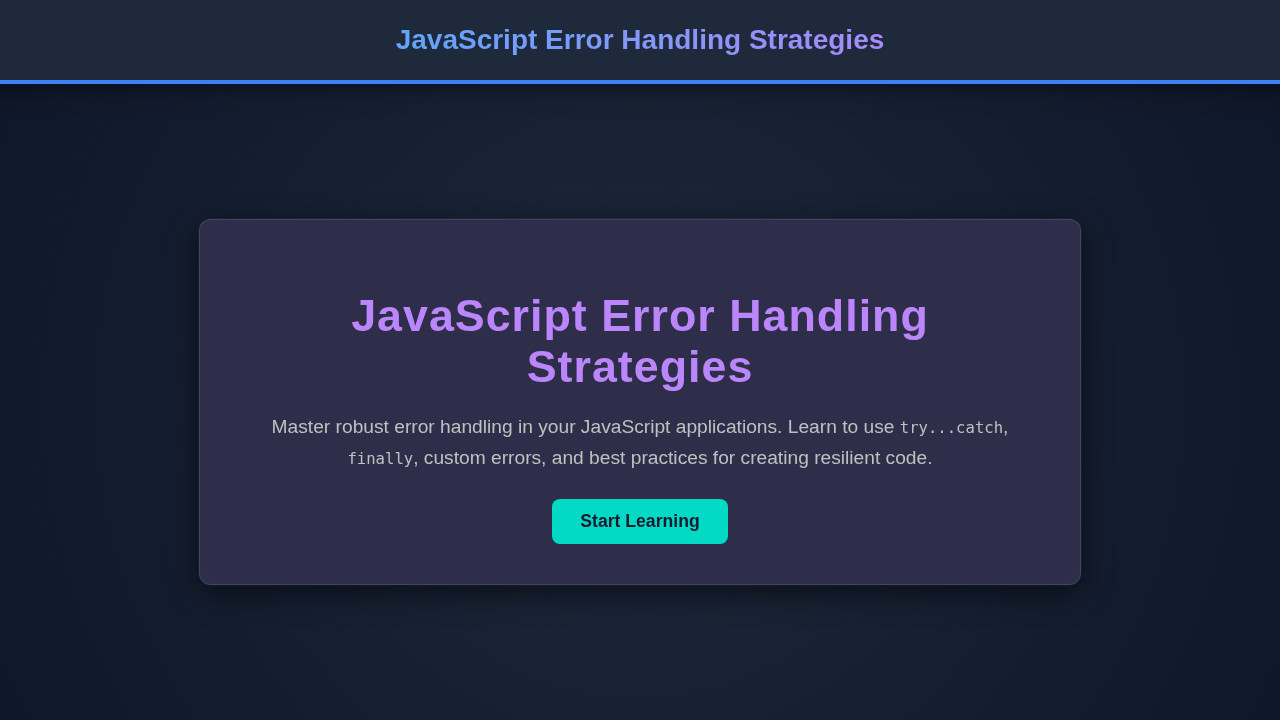
Demystifying JavaScript Error Handling for Robust Web Apps
JavaScript Error Handling is an essential skill for any developer aiming to build resilient and user-friendly web applications. Uncaught errors can crash your application, disrupt user experience, and leave your users frustrated. Implementing effective error handling strategies ensures your applications can gracefully recover from unexpected issues, provide meaningful feedback, and maintain stability. This guide will walk you through various techniques to anticipate, detect, and respond to errors, making your code more reliable.
What We Are Building: A Resilient Data Processing Dashboard
Imagine we are developing a dynamic dashboard. This dashboard fetches data from multiple APIs, processes it, and displays complex visualizations. Inspiration for such a project often comes from internal analytics tools or financial trading platforms, where data integrity and continuous operation are paramount. These applications are trending due to the increasing demand for real-time insights and interactive user experiences. They typically involve numerous asynchronous operations, external data sources, and user interactions, all ripe for potential errors.
In this context, robust error handling isn’t just a nicety; it’s a necessity. We must account for network failures, malformed API responses, server-side issues, and even invalid user inputs. A well-implemented strategy allows our dashboard to continue functioning even if one data source temporarily fails. It provides clear, actionable feedback to the user, preventing a blank screen or a frozen interface. Think of critical systems where downtime costs money or trust; that’s where these techniques shine.
We’ll conceptually apply our error handling strategies to build a dashboard that intelligently manages these diverse error scenarios. This component could be used in any data-intensive application, from e-commerce analytics to health monitoring systems. Our goal is to ensure that even when things go wrong, our application remains stable and user-friendly. Furthermore, well-structured error handling makes debugging significantly easier for developers.
HTML Structure: The Foundation of Our Dashboard
For our dashboard example, the HTML provides a simple container for displaying fetched data or error messages. We need elements to show loading states, the actual data, and distinct areas for error feedback. The structure is minimal, yet effective for demonstrating error states.
index.html
<!DOCTYPE html>
<html lang="en">
<head>
    <meta charset="UTF-8">
    <meta name="viewport" content="width=device-width, initial-scale=1.0">
    <title>JavaScript Error Handling Example</title>
    <link rel="stylesheet" href="styles.css">
</head>
<body>
    <div class="container">
        <h1>Error Handling in JavaScript</h1>
        <p>Explore different strategies for handling errors gracefully.</p>

        <section class="code-example">
            <h2>1. Basic Try-Catch Block</h2>
            <p>Demonstrates how to catch and handle synchronous errors.</p>
            <button id="syncErrorBtn">Trigger Sync Error</button>
            <div id="syncErrorOutput" class="output-box"></div>
        </section>

        <section class="code-example">
            <h2>2. Asynchronous Error Handling (Promises)</h2>
            <p>Learn to handle errors in Promises using <code>.catch()</code>.</p>
            <button id="asyncErrorBtn">Trigger Async Error</button>
            <div id="asyncErrorOutput" class="output-box"></div>
        </section>

        <section class="code-example">
            <h2>3. Using Finally Block</h2>
            <p>Ensure cleanup code runs regardless of error status.</p>
            <button id="finallyBtn">Trigger Finally Example</button>
            <div id="finallyOutput" class="output-box"></div>
        </section>

        <section class="code-example">
            <h2>4. Custom Error Classes</h2>
            <p>Create specific error types for better error identification.</p>
            <button id="customErrorBtn">Trigger Custom Error</button>
            <div id="customErrorOutput" class="output-box"></div>
        </section>
    </div>

    <script src="script.js"></script>
</body>
</html>
script.js
document.addEventListener('DOMContentLoaded', () => {

    // Helper function to update output boxes
    function updateOutput(elementId, message, isError = false) {
        const outputBox = document.getElementById(elementId);
        outputBox.innerHTML = message;
        outputBox.className = `output-box ${isError ? 'error' : ''}`;
    }

    // --- 1. Basic Try-Catch Block ---
    const syncErrorBtn = document.getElementById('syncErrorBtn');
    syncErrorBtn.addEventListener('click', () => {
        updateOutput('syncErrorOutput', 'Attempting synchronous operation...', false);
        try {
            const num = 'abc';
            // This line will throw a TypeError if we try to do arithmetic on 'abc'
            const result = num * 5;
            updateOutput('syncErrorOutput', `Result: ${result}`);
        } catch (error) {
            updateOutput('syncErrorOutput', `Caught synchronous error: ${error.name}: ${error.message}`, true);
            console.error('Sync Error:', error);
        } finally {
            console.log('Synchronous operation finished (try-catch finally block).');
        }
    });

    // --- 2. Asynchronous Error Handling (Promises) ---
    const asyncErrorBtn = document.getElementById('asyncErrorBtn');
    asyncErrorBtn.addEventListener('click', () => {
        updateOutput('asyncErrorOutput', 'Attempting asynchronous operation...', false);

        function fetchData() {
            return new Promise((resolve, reject) => {
                setTimeout(() => {
                    const success = Math.random() > 0.5; // Simulate network success/failure
                    if (success) {
                        resolve("Data fetched successfully!");
                    } else {
                        reject(new Error("Failed to fetch data from API."));
                    }
                }, 1500);
            });
        }

        fetchData()
            .then(data => {
                updateOutput('asyncErrorOutput', `Promise resolved: ${data}`);
            })
            .catch(error => {
                updateOutput('asyncErrorOutput', `Promise rejected: ${error.message}`, true);
                console.error('Async Error:', error);
            });
    });

    // --- 3. Using Finally Block ---
    const finallyBtn = document.getElementById('finallyBtn');
    finallyBtn.addEventListener('click', () => {
        updateOutput('finallyOutput', 'Running a task with finally...', false);
        let resource = null;

        try {
            updateOutput('finallyOutput', 'Resource acquired (simulated).', false);
            resource = { id: 1, name: 'temp_file' };

            const shouldThrow = Math.random() < 0.3; // Simulate an error occurring
            if (shouldThrow) {
                throw new Error("Simulated error during processing!");
            }

            updateOutput('finallyOutput', 'Processing resource...', false);

        } catch (error) {
            updateOutput('finallyOutput', `Caught error: ${error.message}`, true);
            console.error('Finally Example Error:', error);
        } finally {
            if (resource) {
                updateOutput('finallyOutput', document.getElementById('finallyOutput').innerHTML + '<br>Resource released in finally block.', false);
                console.log('Resource released (finally block).');
            } else {
                updateOutput('finallyOutput', document.getElementById('finallyOutput').innerHTML + '<br>No resource to release.', false);
                console.log('No resource to release (finally block).');
            }
        }
    });

    // --- 4. Custom Error Classes ---
    const customErrorBtn = document.getElementById('customErrorBtn');

    // Define a custom error class
    class UserAuthenticationError extends Error {
        constructor(message, errorCode) {
            super(message);
            this.name = "UserAuthenticationError";
            this.errorCode = errorCode;
            // Ensure the correct prototype chain for instanceof checks
            Object.setPrototypeOf(this, UserAuthenticationError.prototype);
        }
    }

    customErrorBtn.addEventListener('click', () => {
        updateOutput('customErrorOutput', 'Attempting user authentication (simulated)...', false);

        function authenticateUser(username, password) {
            if (username !== "admin" || password !== "password123") {
                if (username === "admin") {
                    throw new UserAuthenticationError("Invalid password.", 401);
                } else {
                    throw new UserAuthenticationError("User not found.", 404);
                }
            }
            return "Authentication successful!";
        }

        try {
            // Simulate a bad authentication attempt
            const result = authenticateUser("guest", "wrongpass");
            updateOutput('customErrorOutput', `Success: ${result}`);
        } catch (error) {
            if (error instanceof UserAuthenticationError) {
                updateOutput('customErrorOutput',
                    `Custom Error: ${error.name} [Code: ${error.errorCode}]: ${error.message}`,
                    true
                );
            } else if (error instanceof Error) {
                updateOutput('customErrorOutput', `Generic Error: ${error.name}: ${error.message}`, true);
            } else {
                updateOutput('customErrorOutput', `Unknown Error: ${error}`, true);
            }
            console.error('Custom Error Example:', error);
        }
    });
});
CSS Styling: Visualizing State Changes
The CSS styling for our dashboard will be straightforward, focusing on making various states, especially error messages, clearly visible. We’ll use basic flexbox for layout and apply styles to differentiate between data display, loading indicators, and error banners, ensuring good user feedback.
styles.css
body {
    font-family: Arial, Helvetica, sans-serif;
    background-color: #1e1e1e; /* Dark background */
    color: #f0f0f0; /* Light text */
    margin: 0;
    padding: 20px;
    line-height: 1.6;
    box-sizing: border-box; /* Crucial for layout */
    overflow-x: hidden; /* Prevent horizontal scroll */
}

.container {
    max-width: 900px;
    margin: 20px auto;
    background-color: #2d2d2d; /* Slightly lighter card */
    padding: 30px;
    border-radius: 8px;
    box-shadow: 0 4px 15px rgba(0, 0, 0, 0.4);
    border: 1px solid #444;
}

h1 {
    color: #bb86fc; /* Purple accent */
    text-align: center;
    margin-bottom: 30px;
    font-size: 2.2em;
}

h2 {
    color: #03dac6; /* Cyan accent */
    margin-top: 25px;
    margin-bottom: 15px;
    font-size: 1.6em;
}

p {
    margin-bottom: 10px;
}

button {
    background-color: #6200ee; /* Primary purple for buttons */
    color: white;
    border: none;
    padding: 10px 20px;
    border-radius: 5px;
    cursor: pointer;
    font-size: 1em;
    margin-top: 10px;
    margin-right: 10px;
    transition: background-color 0.3s ease;
}

button:hover {
    background-color: #7b29ee;
}

.output-box {
    background-color: #1a1a1a;
    border: 1px solid #444;
    padding: 15px;
    margin-top: 15px;
    border-radius: 5px;
    min-height: 40px;
    color: #a9fef7; /* Light cyan for output */
    white-space: pre-wrap; /* Preserve whitespace and break lines */
    word-wrap: break-word; /* Break long words */
    overflow: auto; /* Allow scroll if content is too large */
    max-height: 150px; /* Limit height for code blocks to prevent excessive scrolling in tutorial */
}

.output-box.error {
    color: #ff6b6b; /* Red for errors */
}

.code-example {
    border-bottom: 1px dashed #444;
    padding-bottom: 25px;
    margin-bottom: 25px;
}

.code-example:last-child {
    border-bottom: none;
    margin-bottom: 0;
    padding-bottom: 0;
}

code {
    background-color: #3a3a3a;
    padding: 2px 6px;
    border-radius: 4px;
    font-family: 'Consolas', 'Monaco', monospace;
    color: #03dac6;
    font-size: 0.95em;
}
Step-by-Step Breakdown: Mastering JavaScript Error Handling
Now, let’s dive into the core of effective JavaScript Error Handling. We will explore fundamental concepts and then move into more advanced techniques suitable for complex applications like our data dashboard.
Harnessing the Power of `try…catch`
The `try…catch` statement is JavaScript’s primary mechanism for synchronous error handling. It allows you to “try” a block of code and, if an error occurs within that block, “catch” it gracefully. This prevents the error from bubbling up and crashing your entire application. Think of it as a safety net. For instance, parsing user input often requires this protection. Perhaps a user provides a non-numeric value where a number is expected. This block ensures your application continues to run.
Inside the `try` block, you place the code that might throw an error. If an error is indeed thrown, execution immediately jumps to the `catch` block. The `catch` block receives the error object as an argument, providing details about what went wrong. You can then log the error, display a user-friendly message, or attempt to recover. This approach is fundamental for any robust application. It guards against unexpected runtime issues.
“`javascript
function processUserData(data) {
try {
const parsedData = JSON.parse(data); // This might throw a SyntaxError
if (typeof parsedData.age !== ‘number’) {
throw new Error(‘Age must be a number.’);
}
console.log(‘User data processed:’, parsedData);
} catch (error) {
console.error(‘Error processing user data:’, error.message);
// Display a user-friendly message on the UI
document.getElementById(‘error-display’).textContent = `Failed to process data: ${error.message}`;
}
}
// Example usage:
processUserData(‘{“name”: “Alice”, “age”: 30}’); // Success
processUserData(‘{“name”: “Bob”, “age”: “twenty”}’); // Custom error caught
processUserData(‘invalid json’); // JSON parsing error caught
“`
The Role of `finally` and Resource Cleanup
The `finally` block executes regardless of whether an error occurred or not. It’s an optional part of the `try…catch` statement. This block is incredibly useful for cleanup operations, ensuring resources are released. For example, if you open a file, close a network connection, or remove a loading spinner, `finally` guarantees these actions happen. This consistency is vital for preventing resource leaks and maintaining application performance. Even if an error occurs, your system remains tidy.
Consider a scenario where you’re showing a loading spinner while fetching data. You always want to hide that spinner once the operation completes, regardless of success or failure. The `finally` block is the perfect place for this logic. It ensures a consistent user interface state. It improves the user experience by not leaving orphaned UI elements. MDN Web Docs offer more details on `try…catch…finally` statements.
“`javascript
async function fetchDataAndDisplay() {
const loadingSpinner = document.getElementById(‘loading-spinner’);
loadingSpinner.style.display = ‘block’; // Show spinner
try {
const response = await fetch(‘/api/data’);
if (!response.ok) {
throw new Error(`HTTP error! status: ${response.status}`);
}
const data = await response.json();
document.getElementById(‘data-display’).textContent = JSON.stringify(data);
} catch (error) {
console.error(‘Failed to fetch data:’, error);
document.getElementById(‘error-display’).textContent = `Error: ${error.message}`;
} finally {
loadingSpinner.style.display = ‘none’; // Always hide spinner
}
}
“`
Handling Asynchronous Errors with `async/await` and Promises
Asynchronous operations are the backbone of modern web applications. Network requests, timers, and database calls all introduce potential points of failure. Errors in asynchronous code need special attention. Promises provide a structured way to handle success and failure, and `async/await` makes working with them much cleaner. When using `async/await`, `try…catch` works just as effectively for asynchronous code as it does for synchronous code.
Any `await` expression can throw an error if the underlying promise rejects. Wrapping your `await` calls in `try…catch` blocks is the standard pattern. For promises without `async/await`, you use `.catch()` chained to the promise. It allows you to specify a callback function that executes if the promise rejects. This distinction is important for managing callback hell. Learn more about effective promise handling on CSS-Tricks. You can also explore structured design patterns in components, similar to practices found in React Component Design: Clean JS & Styling Practices.
“Effective error handling isn’t about avoiding errors; it’s about gracefully recovering from them. It builds trust and delivers a smoother user experience.”
“`javascript
async function fetchDashboardData() {
try {
const response = await fetch(‘https://api.example.com/dashboard-metrics’);
if (!response.ok) {
throw new Error(`Network response was not ok, status: ${response.status}`);
}
const data = await response.json();
console.log(‘Dashboard data:’, data);
// Update UI with data
} catch (error) {
console.error(‘Failed to fetch dashboard metrics:’, error.message);
document.getElementById(‘error-display’).textContent = `Could not load dashboard: ${error.message}`;
}
}
“`
Creating Custom Error Types
Sometimes, JavaScript’s built-in error types (like `TypeError` or `ReferenceError`) aren’t specific enough. Creating custom error types provides more context and semantic meaning to your error handling. You can extend the built-in `Error` class to create your own. This allows you to differentiate between various application-specific issues. For instance, a `NetworkError` or `InvalidInputError` gives much clearer insights into the problem than a generic `Error`.
Custom errors make your `catch` blocks more precise. You can use `instanceof` to check the type of error that occurred. This allows for different recovery strategies based on the error’s nature. It’s a powerful way to organize complex error scenarios. For example, a `NetworkError` might trigger a retry mechanism, while an `AuthenticationError` redirects the user to a login page. This level of granularity truly elevates your error management.
“`javascript
class NetworkError extends Error {
constructor(message, status) {
super(message);
this.name = ‘NetworkError’;
this.status = status;
}
}
class DataProcessingError extends Error {
constructor(message, originalError) {
super(message);
this.name = ‘DataProcessingError’;
this.originalError = originalError;
}
}
async function getProtectedData() {
try {
const response = await fetch(‘/api/protected’);
if (response.status === 401) {
throw new NetworkError(‘Authentication failed’, response.status);
}
if (!response.ok) {
throw new NetworkError(`Failed to fetch: ${response.statusText}`, response.status);
}
const data = await response.json();
// … process data …
} catch (error) {
if (error instanceof NetworkError) {
console.error(`Network issue: ${error.message} (Status: ${error.status})`);
// Redirect to login or show network error message
} else if (error instanceof TypeError) {
console.error(‘Invalid data format received:’, error.message);
throw new DataProcessingError(‘Problem parsing data’, error);
} else {
console.error(‘An unexpected error occurred:’, error);
}
}
}
“`
Centralized Error Handling and Logging
Scattering `try…catch` blocks everywhere can become unwieldy in large applications. Centralized error handling provides a single point of truth for managing errors. You can use a global `window.onerror` event handler for unhandled synchronous errors or `window.addEventListener(‘unhandledrejection’, …)` for unhandled promise rejections. This approach is fantastic for logging errors to a remote service, giving you visibility into production issues. It ensures no error goes unnoticed.
A centralized handler can enrich error information, attach user data, and then send it to an error tracking service (like Sentry or Bugsnag). This dramatically improves debugging capabilities. It allows you to analyze error trends and proactively fix problems before they impact many users. Consistency in error reporting is crucial for maintaining a healthy application. You might even want to apply patterns similar to those used in building a robust Pagination Design: HTML, CSS & JS Component Guide, where consistent states are key.
“Errors are opportunities for improvement. Embrace them, handle them, and learn from them to build stronger applications.”
“`javascript
// For unhandled synchronous errors
window.onerror = function(message, source, lineno, colno, error) {
console.error(‘Global Error Caught:’, { message, source, lineno, colno, error });
// Send error to a logging service
return true; // Prevent default browser error handling
};
// For unhandled promise rejections
window.addEventListener(‘unhandledrejection’, event => {
console.error(‘Unhandled Promise Rejection:’, event.reason);
// Send rejection reason to a logging service
event.preventDefault(); // Prevent default browser console error
});
// Example of an unhandled error:
// setTimeout(() => { throw new Error(‘Oops!’); }, 100);
// Example of an unhandled promise rejection:
// Promise.reject(‘Something went wrong asynchronously!’);
“`
Making It Responsive: Error Messages on All Devices
Our conceptual dashboard, like any modern web application, must be responsive. This ensures that error messages, loading indicators, and data displays are clear and readable on any device, from a large desktop monitor to a small smartphone. Responsive design for error states primarily involves thoughtful CSS. We use media queries to adjust font sizes, spacing, and the layout of error banners or modals. A mobile-first approach is ideal here. Start by designing the error feedback for the smallest screen, then progressively enhance it for larger viewports.
For instance, an error message that appears as a subtle banner on a desktop might need to become a full-screen overlay on a mobile device to grab sufficient attention. Using relative units like `em`, `rem`, and percentages is crucial for fluid layouts. Flexbox and Grid CSS are powerful tools for arranging elements effectively, regardless of screen size. Consistent error feedback across devices contributes significantly to user trust and accessibility, similar to building a user-friendly Responsive Navbar: Accessible Design (HTML, CSS, JS).
Final Output: A Resilient User Experience
When all these strategies are in place, our conceptual data processing dashboard doesn’t just display data; it tells a story of robustness. The final output features a clean interface that smoothly transitions between loading states, successful data displays, and clearly articulated error messages. Key visual elements achieved include dynamic loading spinners, distinct red error banners for critical issues, and informative warning messages for less severe problems. Instead of a blank screen or a crashed application, users see helpful information. They understand what went wrong, and sometimes, even how to fix it. This creates a much more forgiving and professional user experience.
Conclusion: Build More Robust Applications
Mastering JavaScript Error Handling is fundamental to developing high-quality, stable web applications. We’ve covered everything from basic `try…catch` blocks to advanced custom errors and centralized logging. By proactively anticipating and managing errors, you not only prevent crashes but also enhance user satisfaction and simplify debugging for your team. Start applying these strategies in your next project. Your users and fellow developers will certainly thank you for the resulting resilience and reliability. A well-engineered application handles errors gracefully. It remains responsive even under duress. This commitment to robust error handling truly differentiates professional-grade software.