Hey there, fellow coder! If you’ve ever dreamed of building your own smart assistant, you’re in the perfect spot. Today, we’re going to build a powerful Flask OpenAI Chatbot from scratch. Imagine creating a web app that talks back, understands your questions, and helps you out with tasks. This project is not just incredibly fun, it’s a fantastic way to learn cutting-edge web development skills. You will see how a backend server, a beautiful frontend, and a powerful AI can all work together. We’ll demystify the process for you, step by step. Get ready to dive in and unleash your inner AI developer!
What We Are Building: Your Personal AI Web Assistant
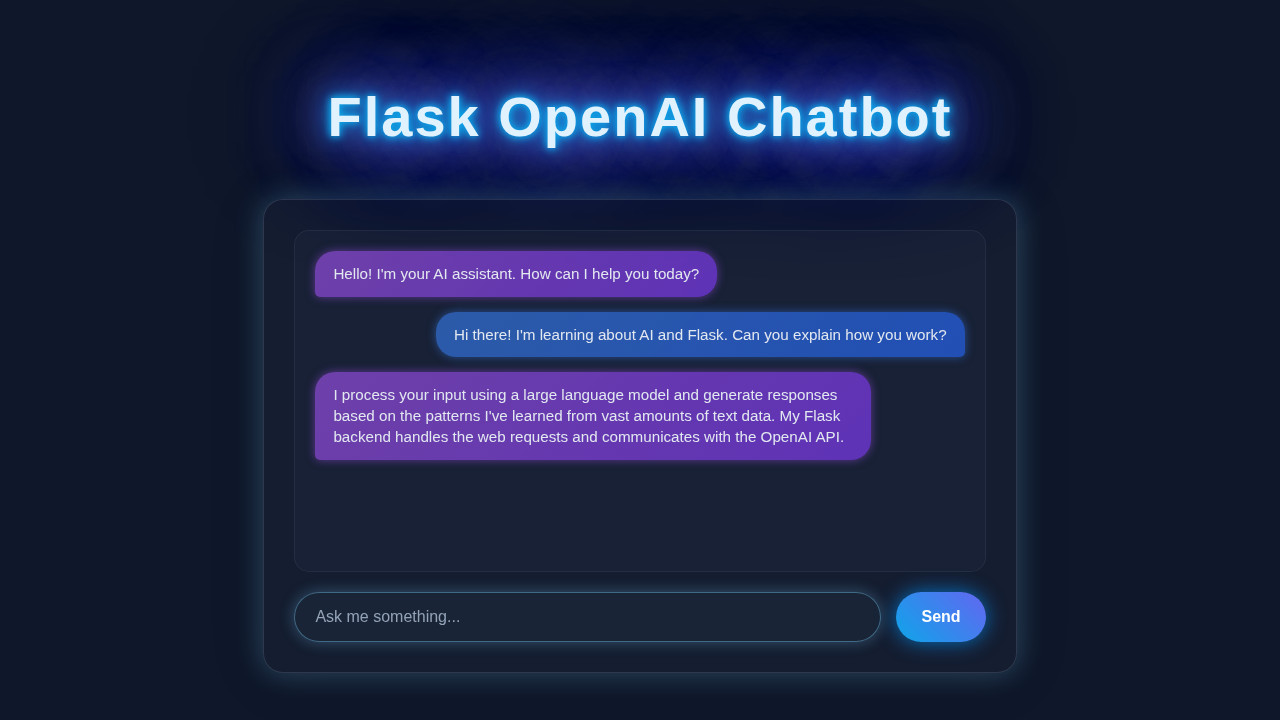
We are building a fully functional, sleek web-based chatbot. This isn’t just any chatbot; it uses the incredible, state-of-the-art power of OpenAI’s API. You will type a message into a clean, simple web form. Our Python Flask backend will then securely send your query to OpenAI’s servers. OpenAI processes your request with its advanced models and sends back a remarkably smart, relevant response. Finally, your browser will dynamically display the AI’s insightful answer right in the chat window. It’s a complete, real-time client-server interaction, powered by Python and AI. Prepare to be amazed by what you create!
Pro Tip: Building interactive web apps like this is a core skill for any developer. It teaches you how to connect your frontend (what users see) with your backend (the logic and data). This project will solidify those vital connections for you, preparing you for more complex applications.
HTML Structure: The Foundation of Our Chatbot
First, we need the solid bones of our web page. Our HTML will provide the basic, semantic layout for our chatbot interface. It includes a clear header, a dedicated area for displaying chat messages, and a well-defined input form. This structure makes our chatbot look clean, organized, and incredibly easy to use. It’s the blueprint that holds all the visual and interactive elements together. We’ll use simple, meaningful tags to make our code readable and accessible. This foundation is crucial for a smooth user experience.
index.html
<!DOCTYPE html>
<html lang="en">
<head>
    <meta charset="UTF-8">
    <meta name="viewport" content="width=device-width, initial-scale=1.0">
    <title>Flask OpenAI Chatbot</title>
    <!-- This file should be saved as 'index.html' inside a 'templates' folder
         in the same directory as your app.py. -->
    <!-- Link to external stylesheet for production-ready, clean separation -->
    <link rel="stylesheet" href="{{ url_for('static', filename='style.css') }}">
</head>
<body>
    <div class="chat-container">
        <div class="chat-header">
            OpenAI Flask Chatbot
        </div>
        <div class="chat-messages" id="chat-messages">
            <!-- Initial AI message to welcome the user -->
            <div class="message ai">
                <div class="message-bubble">Hello! I'm your AI assistant. How can I help you today?</div>
            </div>
        </div>
        <div class="chat-input-area">
            <input type="text" id="user-input" class="chat-input" placeholder="Type your message...">
            <button id="send-button" class="send-button">Send</button>
        </div>
    </div>

    <script>
        // Get references to DOM elements for manipulation
        const chatMessages = document.getElementById('chat-messages');
        const userInput = document.getElementById('user-input');
        const sendButton = document.getElementById('send-button');

        /**
         * Adds a new message bubble to the chat interface.
         * @param {string} sender - 'user' or 'ai' to apply appropriate styling.
         * @param {string} message - The text content of the message.
         */
        function addMessage(sender, message) {
            const messageDiv = document.createElement('div');
            messageDiv.classList.add('message', sender);

            const bubbleDiv = document.createElement('div');
            bubbleDiv.classList.add('message-bubble');
            bubbleDiv.textContent = message;

            messageDiv.appendChild(bubbleDiv);
            chatMessages.appendChild(messageDiv);

            // Automatically scroll to the bottom of the chat window to show the latest message
            chatMessages.scrollTop = chatMessages.scrollHeight;
        }

        /**
         * Handles sending a user message: displays it, sends it to the Flask backend,
         * and then displays the AI's response or an error.
         */
        async function sendMessage() {
            const message = userInput.value.trim();
            if (message === '') return; // Prevent sending empty messages

            addMessage('user', message); // Display user's message immediately
            userInput.value = ''; // Clear the input field after sending

            // Display a temporary loading indicator while waiting for the AI response
            const loadingDiv = document.createElement('div');
            loadingDiv.classList.add('loading-indicator');
            loadingDiv.textContent = 'AI is typing...';
            chatMessages.appendChild(loadingDiv);
            chatMessages.scrollTop = chatMessages.scrollHeight; // Scroll to make loading indicator visible

            try {
                // Send the user's message to the Flask backend's '/chat' endpoint
                const response = await fetch('/chat', {
                    method: 'POST',
                    headers: {
                        'Content-Type': 'application/json', // Specify content type as JSON
                    },
                    body: JSON.stringify({ message: message }), // Send message as JSON string
                });

                const data = await response.json(); // Parse the JSON response from the backend

                // Remove the loading indicator once a response is received
                chatMessages.removeChild(loadingDiv);

                if (data.response) {
                    addMessage('ai', data.response); // Display the AI's response
                } else if (data.error) {
                    // Display any error message returned from the backend
                    addMessage('ai', `Error: ${data.error}`);
                }
            } catch (error) {
                console.error('Network or API Error:', error);
                // Ensure loading indicator is removed even if a network error occurs
                chatMessages.removeChild(loadingDiv);
                addMessage('ai', 'Oops! Something went wrong while connecting to the AI. Please try again.');
            }
        }

        // Event listener for the send button click
        sendButton.addEventListener('click', sendMessage);

        // Event listener for the Enter key press in the input field
        userInput.addEventListener('keypress', (event) => {
            if (event.key === 'Enter') {
                sendMessage();
            }
        });

        // Focus on the input field when the page loads for better user experience
        window.addEventListener('load', () => {
            userInput.focus();
        });
    </script>
</body>
</html>
CSS Styling: Making Our Flask OpenAI Chatbot Look Amazing
Next, let’s make our chatbot visually appealing and user-friendly! CSS adds all the aesthetic flair and ensures a great user experience. We’ll meticulously style the chat bubbles, differentiating between user and AI messages. We’ll also design the input box, the submit button, and the overall layout of the application. Good, responsive styling improves the user experience immensely, making your app a joy to interact with. This part truly makes our application shine, giving it a polished, modern feel. For a deeper dive into CSS properties and their usage, be sure to explore the extensive documentation on MDN Web Docs on CSS.
style.css
/* This file should be saved as 'style.css' inside a 'static' folder
   in the same directory as your app.py. */

/* General Body Styles */
body {
    margin: 0;
    padding: 0;
    font-family: Arial, Helvetica, sans-serif;
    background-color: #f4f7f6; /* Light background for the overall page */
    display: flex;
    justify-content: center;
    align-items: center;
    min-height: 100vh; /* Full viewport height */
    box-sizing: border-box; /* Include padding and border in the element's total width and height */
    overflow: hidden; /* Prevent scrollbars if content slightly exceeds viewport */
}

/* Chat Container - The main wrapper for the chatbot UI */
.chat-container {
    width: 100%;
    max-width: 800px; /* Limit the maximum width of the chat interface */
    background-color: #fff; /* White background for the chat box */
    border-radius: 8px;
    box-shadow: 0 4px 8px rgba(0,0,0,0.1); /* Subtle shadow for depth */
    display: flex;
    flex-direction: column;
    overflow: hidden; /* Ensures rounded corners are respected for children elements */
    box-sizing: border-box;
    max-height: 90vh; /* Limit height to prevent overflow on smaller screens, allow some margin */
}

/* Chat Header */
.chat-header {
    background-color: #4CAF50; /* Green header background */
    color: white;
    padding: 15px;
    text-align: center;
    font-size: 1.2em;
    font-weight: bold;
    box-sizing: border-box;
}

/* Chat Messages Display Area */
.chat-messages {
    flex-grow: 1; /* Allows this area to take available vertical space */
    padding: 20px;
    overflow-y: auto; /* Enable vertical scrolling for messages if they exceed height */
    max-height: 60vh; /* Maximum height for the message area, adjustable */
    border-bottom: 1px solid #eee; /* Separator from input area */
    box-sizing: border-box;
}

/* Individual Message Styles */
.message {
    margin-bottom: 15px;
    display: flex;
    box-sizing: border-box;
}

.message.user {
    justify-content: flex-end; /* Align user messages to the right */
}

.message.ai {
    justify-content: flex-start; /* Align AI messages to the left */
}

.message-bubble {
    max-width: 70%; /* Limit message bubble width to prevent single long lines */
    padding: 10px 15px;
    border-radius: 20px;
    line-height: 1.5;
    word-wrap: break-word; /* Ensures long words break and don't overflow */
    box-sizing: border-box;
}

.user .message-bubble {
    background-color: #e0f7fa; /* Light blue background for user messages */
    color: #333;
    border-bottom-right-radius: 5px; /* Slightly different corner for visual distinction */
}

.ai .message-bubble {
    background-color: #4CAF50; /* Green background for AI messages */
    color: white;
    border-bottom-left-radius: 5px; /* Slightly different corner for visual distinction */
}

/* Chat Input Area */
.chat-input-area {
    display: flex;
    padding: 15px;
    border-top: 1px solid #eee;
    box-sizing: border-box;
}

.chat-input {
    flex-grow: 1; /* Takes up most of the available space */
    padding: 10px;
    border: 1px solid #ddd;
    border-radius: 20px;
    margin-right: 10px;
    font-size: 1em;
    box-sizing: border-box;
    max-width: calc(100% - 70px); /* Adjust based on button width to prevent overflow */
}

.chat-input:focus {
    outline: none;
    border-color: #4CAF50; /* Green border on focus */
    box-shadow: 0 0 0 2px rgba(76, 175, 80, 0.2); /* Subtle focus glow */
}

/* Send Button */
.send-button {
    background-color: #4CAF50; /* Green button background */
    color: white;
    border: none;
    padding: 10px 20px;
    border-radius: 20px;
    cursor: pointer;
    font-size: 1em;
    transition: background-color 0.3s ease; /* Smooth transition for hover effect */
    box-sizing: border-box;
    flex-shrink: 0; /* Prevent button from shrinking on smaller screens */
}

.send-button:hover {
    background-color: #45a049; /* Darker green on hover */
}

/* Loading Indicator */
.loading-indicator {
    text-align: center;
    color: #888;
    font-style: italic;
    padding: 10px 0;
    box-sizing: border-box;
}

/* Responsive Adjustments for smaller screens */
@media (max-width: 768px) {
    .chat-container {
        margin: 10px; /* Add some margin around the container on smaller screens */
        max-height: 95vh; /* Slightly more height for the container */
    }
    .chat-messages {
        max-height: 70vh; /* Adjust message area height on smaller screens */
    }
    .chat-input-area {
        flex-direction: column; /* Stack input and button vertically */
        gap: 10px; /* Space between input and button */
    }
    .chat-input {
        margin-right: 0; /* Remove right margin when stacked */
        max-width: 100%; /* Make input full width */
    }
    .send-button {
        width: 100%; /* Make button full width */
        padding: 12px;
    }
}
JavaScript: Bringing Our Chatbot to Life Dynamically
Now for the brains of the frontend! JavaScript handles all the dynamic and interactive elements of our chatbot. It captures your messages the moment you hit send. Then, it sends them to our Flask backend asynchronously, meaning the page doesn’t reload. This provides a wonderfully smooth and interruption-free experience. After the backend processes your request and gets a response from OpenAI, JavaScript also takes charge. It dynamically updates the chat window with the new AI responses. This real-time interaction is what makes our chatbot feel incredibly alive and responsive. We’ll use modern Fetch API for these network requests.
app.py
import os
from flask import Flask, render_template, request, jsonify
from openai import OpenAI # Import OpenAI client

# --- Configuration and Setup Guide ---
# 1. Install Flask and OpenAI library:
#    pip install Flask openai
#
# 2. Set your OpenAI API key as an environment variable.
#    This is the recommended secure way. Replace 'YOUR_API_KEY' with your actual key.
#    On Linux/macOS:
#    export OPENAI_API_KEY='sk-YOUR_API_KEY'
#    On Windows (Command Prompt):
#    set OPENAI_API_KEY=sk-YOUR_API_KEY
#    On Windows (PowerShell):
#    $env:OPENAI_API_KEY='sk-YOUR_API_KEY'
#
#    Alternatively, for quick testing (NOT recommended for production), you can uncomment
#    and set it directly in the script:
#    # os.environ['OPENAI_API_KEY'] = 'sk-YOUR_API_KEY_HERE'

# Check if the API key is set
if not os.getenv("OPENAI_API_KEY"):
    raise ValueError("OPENAI_API_KEY environment variable not set. Please set it before running the app.")

# Initialize the OpenAI client with the API key from environment variables
client = OpenAI(api_key=os.getenv("OPENAI_API_KEY"))

# Initialize the Flask application
# Create a 'templates' folder in the same directory as this app.py for index.html
# Create a 'static' folder for style.css
app = Flask(__name__)

# --- Routes and Chatbot Logic ---
@app.route('/')
def index():
    """
    Renders the main chat interface page.
    This function serves the 'index.html' file located in the 'templates' folder.
    """
    return render_template('index.html')

@app.route('/chat', methods=['POST'])
def chat():
    """
    Handles incoming chat messages from the frontend via a POST request.
    Extracts the user's message, sends it to the OpenAI API, and returns the AI's response.
    """
    user_message = request.json.get('message')
    if not user_message:
        return jsonify({'error': 'No message provided'}), 400

    try:
        # Call OpenAI's Chat Completion API to get a response
        # We use 'gpt-3.5-turbo' as a cost-effective and capable model.
        # You can experiment with 'gpt-4' for more advanced reasoning.
        completion = client.chat.completions.create(
            model="gpt-3.5-turbo",
            messages=[
                {"role": "system", "content": "You are a helpful and friendly AI assistant. Provide concise and informative answers. Keep responses under 100 words."}, # System message sets the AI's persona
                {"role": "user", "content": user_message} # User's actual message
            ]
        )
        ai_response = completion.choices[0].message.content
        return jsonify({'response': ai_response})

    except Exception as e:
        # Log the error for debugging purposes
        print(f"Error calling OpenAI API: {e}")
        # Return a user-friendly error message to the frontend
        return jsonify({'error': 'Failed to get response from AI. Please try again later.'}), 500

# --- Run the Flask Application ---
if __name__ == '__main__':
    # When running directly, Flask's built-in development server is used.
    # 'debug=True' enables reloader and debugger, useful for development.
    # In a production environment, you would use a production-ready WSGI server
    # like Gunicorn or uWSGI for better performance and stability.
    app.run(debug=True, port=5000)
How It All Works Together: The Flask OpenAI Chatbot Magic
Let’s tie everything together and understand the complete flow. Building a robust Flask OpenAI Chatbot involves several interconnected moving parts. Understanding how each piece contributes to the whole is absolutely key. We’ll use Python for our powerful backend server. Flask is a lightweight micro-framework that makes web development incredibly efficient and fun. The OpenAI API provides the cutting-edge artificial intelligence. It’s truly a powerful and exciting combination!
Setting Up Your Flask Backend: The Server’s Heartbeat
First, you need to create your Flask application. This Python script will act as our server, always listening for incoming requests from your browser. When you type a message and hit send, your browser sends that data directly to this Flask app. The app then acts as a crucial intermediary. It receives your message and carefully prepares it for the OpenAI API. You will define specific routes in Flask for different actions, such as handling a new chat message. Don’t worry, setting up these routes and managing requests with Flask is super straightforward and intuitive. If you’re curious about fetching data from other places, you might enjoy our Python Web Scraper Tutorial: Build Your First Script Today. It uses similar principles for data retrieval!
We’ll also set up a virtual environment for our project. This keeps your project dependencies clean and isolated. You’ll install Flask and the OpenAI Python library within this environment. This practice is essential for good project management. It prevents conflicts with other Python projects on your machine.
Communicating with OpenAI: Tapping into AI Intelligence
Here’s the cool, brainy part of our chatbot! Once our Flask backend receives your message, it securely contacts the OpenAI API. We use the official OpenAI Python client library. This library simplifies all the complex API calls into simple Python functions. Your message becomes a “prompt” for the AI, a clear instruction or question. OpenAI processes this prompt using its vast, sophisticated language models. It then generates a relevant, coherent, and often surprisingly insightful response. This entire process happens remarkably quickly. It feels almost instant, giving your chatbot a truly responsive feel!
Crucially, we’ll set up environment variables for your OpenAI API key. This keeps your secret key absolutely safe and out of your main codebase. Never hardcode sensitive information directly into your script; it’s a critical best practice for security and maintainability. Learning how to make efficient HTTP requests is absolutely vital for this communication. To deepen your understanding of these requests, take a look at the Python Requests Library: Explained Simply with Code for more on this.
Displaying Responses Dynamically with JavaScript: The User Experience
After OpenAI sends its intelligent answer back to our Flask app, Flask then relays that response to your browser. Your JavaScript code, working behind the scenes, then steps in. It eagerly receives this response from the server. It dynamically adds the AI’s message to the chat display area on your webpage. There’s no annoying page reload needed for this to happen. This creates an incredibly seamless and fluid chat experience for the user. We leverage JavaScript’s modern Fetch API for these asynchronous network requests. It’s a powerful and efficient way to handle data exchange between your browser and server. You can explore more about the Fetch API on MDN Web Docs.
Remember: A smooth and responsive user interface keeps users engaged and happy. Dynamic updates, powered by JavaScript, are absolutely key to modern web applications. They make your apps feel alive, interactive, and truly cutting-edge.
Each message, whether from you or the AI, is rendered beautifully as a distinct chat bubble. The styling makes it instantly clear who said what. This entire, elegant cycle of request, processing, and dynamic response happens for every single interaction. It’s truly amazing what you can build when all these powerful technologies work in harmony!
Tips to Customise Your Flask OpenAI Chatbot
You’ve built a truly fantastic foundation with your Flask OpenAI Chatbot! Now, the fun really begins as you think about making it uniquely yours. Here are some exciting ideas to extend and personalize your creation, pushing your skills even further:
- Add User Authentication: Secure your chatbot! Implement user authentication so only registered or logged-in users can interact. Flask-Login is an excellent library for this, teaching you essential security patterns.
- Implement Chat History with a Database: Make conversations persistent. Store previous chats in a database like SQLite (perfect for Flask apps!). This lets users pick up exactly where they left off, enhancing their experience.
- Change AI Persona and Instructions: This is a powerful customization point! Modify the “system message” that you send to OpenAI at the start of the conversation. Make your chatbot a helpful coding assistant, a witty conversationalist, a travel planner, or anything you can imagine! The possibilities for creative expression are truly endless here.
- Integrate More APIs for Enhanced Functionality: Connect your chatbot to other web services! Imagine it fetching real-time weather data, summarizing news headlines, or even controlling smart home devices. This adds incredible utility to your AI. For inspiration on gathering data from other sources, check out our guide on Python Web Scraping Tutorial: Build Your First Scraper – you could even have your bot summarize the content it scrapes!
- Improve the User Interface: Experiment with more advanced CSS frameworks like Tailwind CSS or Bootstrap. Add animations or custom components to make your chat interface even more engaging and visually appealing.
Conclusion: You Just Built an AI Web App!
Wow! Take a moment and truly appreciate what you’ve accomplished. You just built your very own, fully functional Flask OpenAI Chatbot. This is a massive, tangible accomplishment for any aspiring web developer! You masterfully combined elegant frontend design with a powerful Python backend. You successfully integrated with one of the most advanced artificial intelligence APIs available today. You are now equipped with incredibly valuable, modern web development and AI integration skills. These skills will serve you exceptionally well in countless future projects. Share your creation with your friends, family, or even on social media! Show off what you’ve learned and inspire others. Keep coding, keep experimenting, and most importantly, keep building amazing things!