Understanding GraphQL Fetching is a game-changer for modern web development, empowering you to retrieve precisely the data you need, nothing more, nothing less. Imagine building a dynamic web application where you’re not bound by rigid REST API endpoints, but instead, you craft custom data requests with surgical precision. This guide will walk you through the process, using the familiar JavaScript fetch API, making GraphQL accessible and straightforward for any frontend developer. We will explore how to set up your requests, handle responses, and display data seamlessly in your projects. Are you ready to level up your data fetching game?
What We Are Building: A Dynamic Dev Blog Listing
Today, we’re going to construct a simple yet powerful web application: a dynamic listing of blog posts for a developer’s portfolio or blog site. Think of a clean, minimalist design that beautifully displays post titles, author names, and brief snippets. Each post will be fetched from a GraphQL endpoint, demonstrating the real-world utility of this technology. We’re aiming for an engaging user experience, complete with loading indicators and error handling.
GraphQL is rapidly trending because it solves many pain points associated with traditional REST APIs, particularly over-fetching and under-fetching data. Frontend developers gain immense control, requesting exactly what’s necessary for their UI components. Consequently, this optimizes network requests and often leads to faster, more efficient applications. You can use GraphQL in almost any application requiring flexible data consumption, from e-commerce sites and social media feeds to complex dashboards.
Our blog listing component offers a perfect, tangible example. Furthermore, it showcases how to interact with a GraphQL API without needing heavy client libraries, relying solely on native browser capabilities. It’s a fantastic stepping stone for integrating GraphQL into your future projects, providing a solid foundation for more complex queries and mutations.
HTML Structure: The Blueprint for Our Content
Our HTML will be lean and semantic, providing the basic containers for our blog posts and UI feedback. We’ll include a main section to house everything, a header, a loading indicator, and a div where our fetched posts will eventually reside. The structure is simple, ensuring clarity and ease of styling.
index.html
<!DOCTYPE html>
<html lang="en">
<head>
    <meta charset="UTF-8">
    <meta name="viewport" content="width=device-width, initial-scale=1.0">
    <title>GraphQL Fetching Example</title>
    <link rel="stylesheet" href="styles.css">
</head>
<body>
    <div class="container">
        <h1>GraphQL Data Fetching with JavaScript</h1>
        <p>Click the button below to fetch user data from a placeholder GraphQL API.</p>
        <button id="fetchDataBtn">Fetch User Data</button>
        <h2>Fetched Data:</h2>
        <pre class="data-output" id="data-output">Click "Fetch User Data" to load...</pre>
    </div>

    <script src="script.js"></script>
</body>
</html>
script.js
document.addEventListener('DOMContentLoaded', () => {
    const fetchDataBtn = document.getElementById('fetchDataBtn');
    const dataOutput = document.getElementById('data-output');

    // Placeholder GraphQL API endpoint
    // This example uses a public mock GraphQL API for demonstration purposes.
    const GQL_ENDPOINT = 'https://graphqlzero.almansi.me/api';

    // Define your GraphQL query
    const query = `
        query GetPosts {
            posts(options: { paginate: { page: 1, limit: 3 } }) {
                data {
                    id
                    title
                    body
                    user {
                        id
                        name
                    }
                }
            }
        }
    `;

    async function fetchGraphQLData() {
        dataOutput.innerText = 'Fetching data...';
        try {
            const response = await fetch(GQL_ENDPOINT, {
                method: 'POST',
                headers: {
                    'Content-Type': 'application/json',
                    'Accept': 'application/json',
                },
                body: JSON.stringify({ query })
            });

            if (!response.ok) {
                const errorBody = await response.json();
                throw new Error(`HTTP error! Status: ${response.status}. Details: ${JSON.stringify(errorBody)}`);
            }

            const result = await response.json();

            if (result.errors) {
                throw new Error(`GraphQL Errors: ${JSON.stringify(result.errors)}`);
            }

            console.log('Fetched GraphQL Data:', result.data);
            dataOutput.innerText = JSON.stringify(result.data, null, 2);

        } catch (error) {
            console.error('Error fetching GraphQL data:', error);
            dataOutput.innerText = `Error: ${error.message}`;
        }
    }

    fetchDataBtn.addEventListener('click', fetchGraphQLData);
});
CSS Styling: Bringing Our Blog List to Life
With our HTML in place, we’ll apply some modern CSS to make our blog post list visually appealing and functional. We’ll utilize Flexbox for easy layout, style the individual post cards, and ensure our loading and error messages are clearly visible. Our styling approach prioritizes readability and a clean aesthetic.
styles.css
body {
    font-family: Arial, Helvetica, sans-serif;
    margin: 0;
    padding: 20px;
    background-color: #f4f7f6;
    color: #333;
    line-height: 1.6;
    box-sizing: border-box;
    overflow-x: hidden; /* Ensure no horizontal scroll */
}

.container {
    max-width: 900px;
    margin: 40px auto;
    padding: 30px;
    background-color: #ffffff;
    border-radius: 8px;
    box-shadow: 0 4px 15px rgba(0, 0, 0, 0.1);
    box-sizing: border-box;
}

h1 {
    color: #2c3e50;
    margin-bottom: 20px;
    border-bottom: 2px solid #eee;
    padding-bottom: 10px;
}

h2 {
    color: #34495e;
    margin-top: 30px;
    margin-bottom: 15px;
}

p {
    margin-bottom: 20px;
}

button {
    background-color: #3498db;
    color: white;
    border: none;
    padding: 12px 25px;
    border-radius: 5px;
    cursor: pointer;
    font-size: 1em;
    transition: background-color 0.3s ease;
    margin-bottom: 25px;
}

button:hover {
    background-color: #2980b9;
}

.data-output {
    background-color: #ecf0f1;
    border: 1px solid #ddd;
    border-radius: 5px;
    padding: 15px;
    min-height: 100px;
    white-space: pre-wrap; /* Preserve whitespace and wrap long lines */
    word-wrap: break-word;
    font-family: 'Courier New', Courier, monospace;
    font-size: 0.9em;
    color: #2c3e50;
    box-sizing: border-box;
    max-width: 100%; /* Ensure it doesn't overflow */
    overflow: auto; /* Allow scrolling if content is too wide/tall */
}

code {
    background-color: #f0f0f0;
    padding: 2px 5px;
    border-radius: 3px;
    font-family: 'Courier New', Courier, monospace;
}

pre {
    background-color: #f8f8f8;
    border: 1px solid #e1e4e8;
    border-radius: 6px;
    padding: 16px;
    overflow: auto; /* Allow scrolling for code blocks */
    max-width: 100%;
    box-sizing: border-box;
}
pre code {
    font-family: 'Courier New', Courier, monospace;
    font-size: 0.9em;
    line-height: 1.5;
    background-color: transparent;
    padding: 0;
    border-radius: 0;
}
Step-by-Step GraphQL Fetching Breakdown
Now, let’s dive into the core of our application: the JavaScript that performs the GraphQL Fetching. We will use the native fetch API to communicate with our GraphQL endpoint, construct our query, handle the response, and dynamically update the DOM. This section breaks down the entire process, making each part easy to understand.
Setting Up Our GraphQL Endpoint and Query
First, we need to define our GraphQL endpoint and the query we intend to send. The query specifies precisely what data we want from the server. For our blog posts, we’ll request the id, title, author‘s name, and a snippet.
const GQL_ENDPOINT = 'https://graphqlzero.almansi.me/api'; // A public mock GraphQL API

const blogPostsQuery = `
    query {
        posts {
            data {
                id
                title
                user {
                    name
                }
                body
            }
        }
    }
`;

const getPostSnippet = (body) => {
    const words = body.split(' ');
    return words.slice(0, 20).join(' ') + (words.length > 20 ? '...' : '');
};
Notice how straightforward the GraphQL query structure is. We ask for posts, and then within each post, we specify exactly which data fields we need. The getPostSnippet function is a little utility to create a shorter preview from the full post body, enhancing our UI presentation.
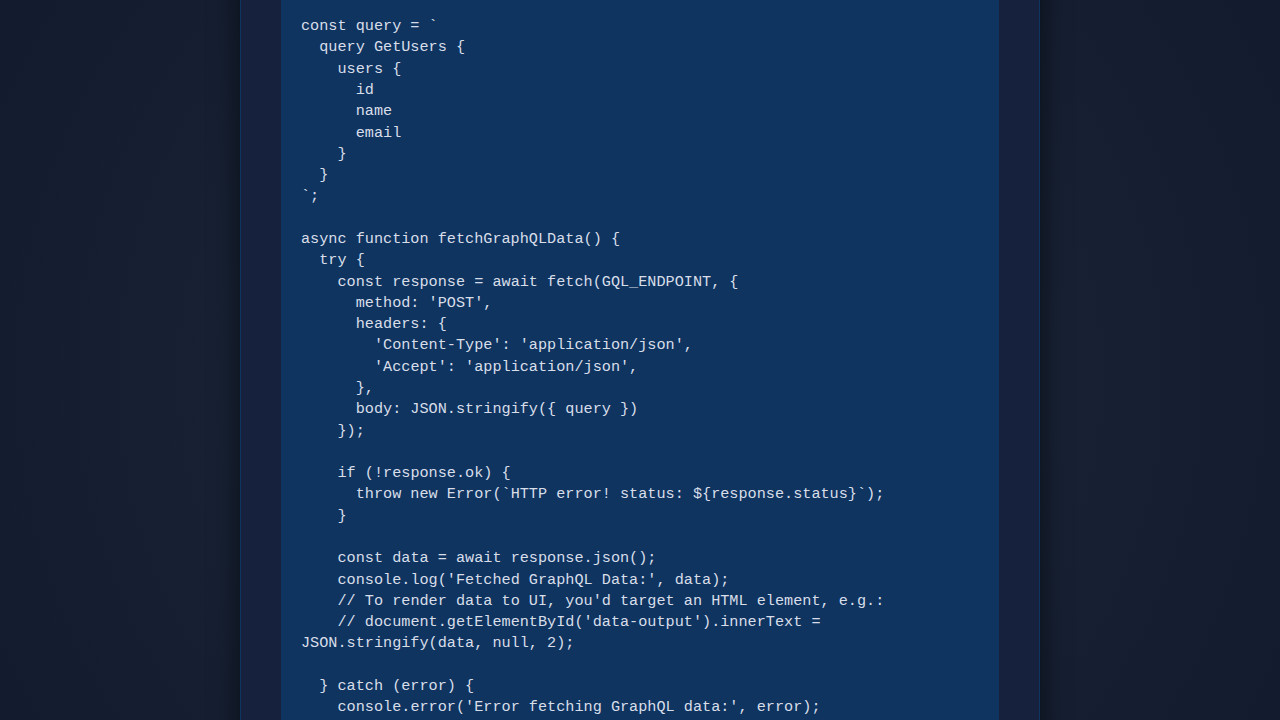
Executing the Fetch Request
Next, we wrap our fetching logic in an asynchronous function. This function will be responsible for making the actual HTTP POST request to our GraphQL endpoint using fetch. We must set the correct headers and stringify our query in the request body.
async function fetchBlogPosts() {
const loadingIndicator = document.getElementById('loading');
const postsContainer = document.getElementById('posts-container');
postsContainer.innerHTML = ''; // Clear previous content
loadingIndicator.style.display = 'block'; // Show loading
try {
const response = await fetch(GQL_ENDPOINT, {
method: 'POST',
headers: {
'Content-Type': 'application/json',
'Accept': 'application/json',
},
body: JSON.stringify({ query: blogPostsQuery })
});
if (!response.ok) {
throw new Error(`HTTP error! Status: ${response.status}`);
}
const result = await response.json();
if (result.errors) {
// Handle GraphQL errors specifically
throw new Error(result.errors.map(err => err.message).join(', '));
}
const posts = result.data.posts.data; // Adjust path based on API
// ... (rendering logic below)
} catch (error) {
console.error('Error fetching blog posts:', error);
postsContainer.innerHTML = ``;
} finally {
loadingIndicator.style.display = 'none'; // Hide loading regardless of outcome
}
}
This snippet carefully handles potential network issues and GraphQL-specific errors. Checking response.ok is crucial for HTTP errors, while inspecting result.errors helps identify issues with the GraphQL query itself. For even more robust applications, you might consider tools like TypeScript Basics: Learn TS Fundamentals using JS to add type safety to your data structures, ensuring your frontend expectations align with the GraphQL schema.
“The beauty of GraphQL lies in its declarative nature. You declare what data you want, and the server figures out how to get it, reducing client-side complexity significantly.”
Rendering the Fetched Data
Once we successfully receive our data, the final step is to dynamically render it into our HTML. We iterate over the fetched posts and create a card for each, injecting it into our posts-container div. This approach keeps our UI updated with fresh content.
// ... inside try block, after const posts = result.data.posts.data;
if (posts.length === 0) {
postsContainer.innerHTML = 'No blog posts found at the moment.
';
} else {
postsContainer.innerHTML = posts.map(post => `
`).join('');
}
This mapping transforms each post object into an HTML string, which is then joined together and set as the innerHTML of our container. Remember to consider accessibility when injecting dynamic content, providing appropriate `aria-label` attributes for links, just like in our example. Furthermore, you can find more information on web accessibility best practices on MDN Web Docs about Accessibility.
Initializing the Fetch on Page Load
Finally, we need to ensure our fetchBlogPosts function runs as soon as the DOM is fully loaded. This initiates the data fetching process automatically when a user visits the page.
document.addEventListener('DOMContentLoaded', fetchBlogPosts);
Placing this event listener at the end of your script ensures that all HTML elements are available for manipulation by the time the script attempts to interact with them. This is a standard and robust practice for modern web development.
Making It Responsive: Adapting to Every Screen
A good user experience means our blog post list looks great on any device, from large desktop monitors to small mobile screens. We achieve this by using CSS media queries and designing with a mobile-first approach. This ensures our layout fluidly adjusts, maintaining readability and usability.
@media (max-width: 768px) {
    .posts-grid {
        grid-template-columns: 1fr;
        padding: 10px;
    }

    .post-card {
        padding: 15px;
    }

    h1 {
        font-size: 1.8em;
    }
}

@media (max-width: 480px) {
    body {
        padding: 10px;
    }

    h1 {
        font-size: 1.5em;
    }
}
By setting our `posts-grid` to a single column on smaller screens, we ensure each blog post card gets ample space, preventing cramped layouts. Mobile-first design principles dictate that you style for the smallest screen first, then progressively enhance for larger viewports. For more advanced responsive design techniques, including how to make dynamic UI elements like error messages truly accessible, check out this guide on an Accessible Tooltip: HTML, CSS & JavaScript Component.
Final Output: A Clean and Functional Blog List
The culmination of our efforts is a visually pleasing and fully functional blog post listing. When the page loads, you’ll first see a subtle loading indicator. Soon after, a grid of blog post cards will elegantly populate the screen, each displaying a title, author, and a concise snippet. Any issues during data retrieval will result in a clear, user-friendly error message, enhancing the overall reliability of our application.
Key visual elements achieved include responsive card layouts, clear typography, and immediate user feedback during data fetching. This setup provides a solid foundation, allowing you to easily extend functionality, perhaps by adding a detail view for each post or implementing search capabilities. Furthermore, you can learn more about creating compelling UI experiences by reading articles on CSS-Tricks, a great resource for all things frontend.
“Simplicity is the ultimate sophistication. By mastering the basics, we unlock the power to build complex, maintainable applications.”
Conclusion: Empowering Your Data Fetching Skills
Congratulations! You’ve successfully learned how to implement robust GraphQL Fetching using vanilla JavaScript and the powerful fetch API. We built a dynamic blog post listing, understanding how to construct GraphQL queries, send them, and gracefully handle responses and errors. This foundational knowledge is incredibly valuable for any modern web developer.
The ability to precisely request data offers significant performance benefits and reduces unnecessary network traffic, making your applications faster and more efficient. You can apply these techniques to a myriad of projects: building interactive dashboards, e-commerce product pages, user profiles, or any scenario where flexible data retrieval is paramount. If you ever need to display more detailed information or handle user interactions that require more complex UI elements, consider reviewing resources like Accessible Modal: HTML, CSS & JS Dialog Tutorial to enhance user experience further. Keep experimenting, keep building, and continue to explore the vast possibilities that GraphQL and JavaScript offer!