CORS Errors Explained: A Visual Guide to Cross-Origin Issues
Ever tried to fetch data for your cool new web app? You know, the one where your amazing front-end needs info from your super-smart back-end? Then, out of nowhere, you’re hit with a cryptic error message. It usually mentions something about “CORS policy” or “cross-origin request.” Sound familiar? You’re definitely not alone. That dreaded console message, often referred to as a CORS errors explained, can feel like a brick wall. It’s super frustrating, right? Especially when you’re just trying to make two parts of your own project talk to each other!
For a long time, these errors made no sense to me. They felt like a random roadblock. But here’s the thing: CORS errors are not arbitrary. They are your browser’s way of keeping you safe. Once you understand the “why,” the “how to fix it” becomes much clearer. We’re going to demystify these errors together. You’ll learn what they are, why they pop up, and how to get past them with confidence.
What Even Are CORS Errors Explained?
Let’s start with the basics. CORS stands for Cross-Origin Resource Sharing. You might be wondering, what’s an “origin”? Think of an origin as a website’s unique address. It’s made up of three parts: the protocol (like http:// or https://), the domain name (like procoder09.com), and the port (like :80 or :3000). If any of these three parts differ between two web resources, they are considered “cross-origin.”
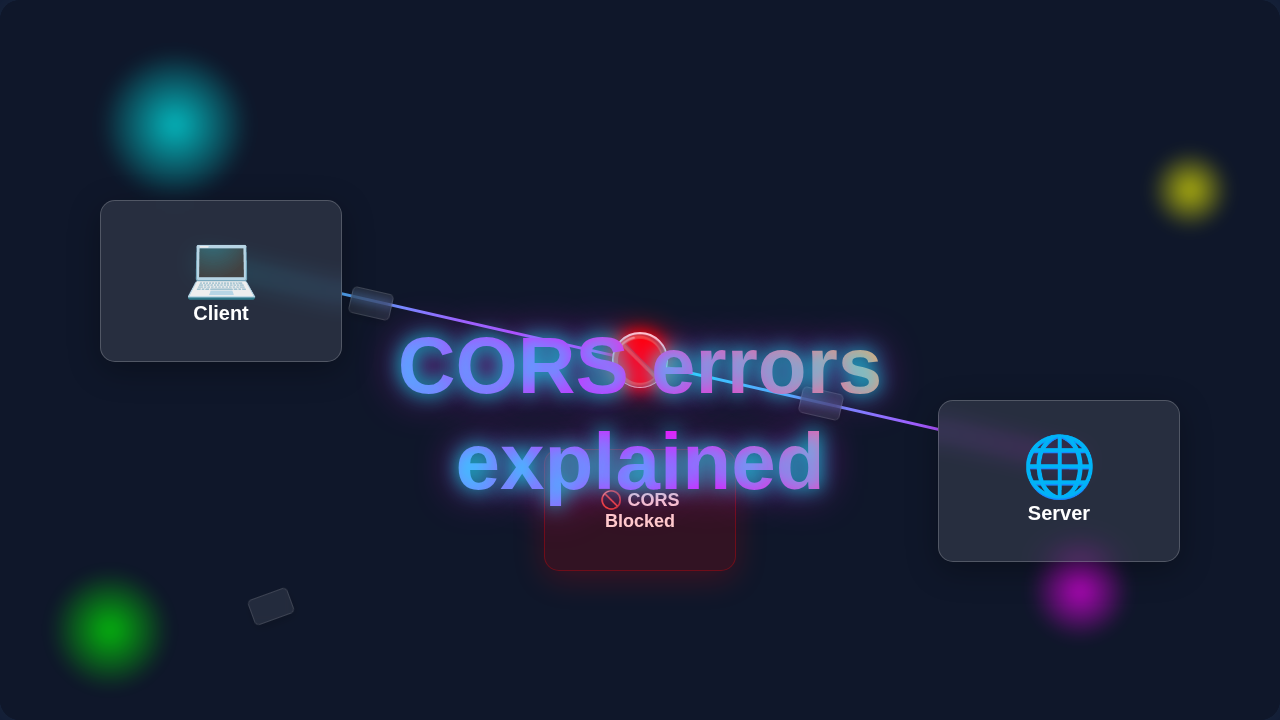
So, what does Cross-Origin Resource Sharing mean? It’s a security feature built into web browsers. Your browser acts like a very strict bouncer at a exclusive club. This bouncer only lets people (data) in if they’re from the same club (the same origin) by default. If your front-end application (say, running on localhost:3000) tries to ask for data from your API (maybe running on api.yourapp.com), that’s a cross-origin request. They have different domains!
The browser, in its bouncer role, sees this. It pauses and asks, “Is this request allowed?” If the server doesn’t explicitly give permission, the bouncer (your browser) blocks the data. It then throws a CORS error. This is a good thing for security. It stops malicious websites from snooping on your data or making unauthorized requests on your behalf. But it can be a headache for legitimate applications.
Your Browser’s Gatekeeper: Understanding Cross-Origin Security
Your browser’s default security measure is called the Same-Origin Policy. It’s like a default setting that says, “Trust only requests from the exact same address.” This policy prevents a website from one origin from interacting with resources from another origin. Imagine browsing your bank’s website. You wouldn’t want a malicious website you accidentally clicked on to be able to read your bank statements, right? That’s what the Same-Origin Policy protects against.
When you make an HTTP request from your client-side JavaScript, say to fetch some user data, your browser checks the origin of your current page. Then, it checks the origin of the resource you’re trying to reach. If they don’t match exactly, boom! You’ve triggered a cross-origin scenario. This is when CORS steps in. You might be using JavaScript’s fetch API, but the core idea of sending data across the internet is similar to how you’d send data using, say, the Python Requests Library on a server. The browser’s security model is always active for client-side requests.
Here’s a crucial point: CORS errors are *client-side* errors. Your request actually reached the server just fine. The server processed it and sent a response. The problem happens when your *browser* receives that response. It then checks the response headers to see if the server has explicitly granted permission for your origin to access the data. If that permission is missing, your browser refuses to let your JavaScript code see the response. It then logs the infamous CORS error in your developer console. You need to tell your browser, “It’s okay, this data is safe!”
Pro Tip: CORS errors always mean your request reached the server. The issue isn’t the server *receiving* the request, but your browser *accessing* the response. Look at your server logs; you’ll likely see the request completed successfully!
The “Lightbulb Moment”: Solving CORS Errors Explained
So, if your browser is the bouncer, who’s the manager who can override the bouncer’s default stance? That would be your server! The solution to most CORS errors explained lies on the server side. Your server needs to send specific HTTP headers in its response. These headers tell your browser, “Yes, this origin is allowed to access my data.”
The most important header is Access-Control-Allow-Origin. This header is the server’s explicit permission slip. When your browser gets a response that includes this header, it finally relaxes. It thinks, “Okay, the manager says it’s fine!” Then, it allows your front-end JavaScript to process the response. Without this header, your browser will always block the cross-origin request, regardless of whether the server processed it.
Imagine you’re building a sleek front-end, maybe even with components like a Tailwind Product Card. This card needs product data from your API. If that API lives on a different domain, your browser will check for this header. If your server sends Access-Control-Allow-Origin: https://yourfrontend.com, your browser will allow it. If it sends Access-Control-Allow-Origin: * (a wildcard), it allows *any* origin to access the resource. The wildcard is convenient for development but often too permissive for production environments. You usually want to specify exact origins in production for better security.
How to Think About It: A Mental Model for Cross-Origin Requests
When you encounter a CORS error, you should immediately think: “My server didn’t give my browser permission.” The error is not about your front-end code being wrong. It’s about a mismatch in security expectations between your browser and the server you’re talking to. The server needs to explicitly permit the interaction. Your client-side code is simply *requesting* data. The server’s response determines success or failure.
Always inspect the error message in your browser’s developer console carefully. It often tells you exactly what header is missing or what origin isn’t allowed. For instance, you might see, “Origin http://localhost:3000 has been blocked by CORS policy: No ‘Access-Control-Allow-Origin’ header is present.” This message is your roadmap. It tells you that your server needs to add that specific header for http://localhost:3000.
Think of it as filling out a form. Your browser sends the request with its origin. The server looks at the origin and decides if it’s on its approved list. It then stamps the response with the `Access-Control-Allow-Origin` header, telling the browser its decision. If the stamp says “approved,” the data flows. If not, the browser steps in and blocks it. Your task, as the developer, is to configure that server-side approval process.
What to Do Next: Practical Steps to Fix CORS Errors Explained
Okay, you’ve hit a CORS error. Now what? Here are the practical steps you can take to resolve those pesky CORS errors explained:
Step 1: Configure Your Server
This is the most common and robust solution. You need to modify your server’s code. Add the Access-Control-Allow-Origin header to your responses. The exact method depends on your server-side technology. For Node.js with Express, you might use middleware. In Python with Flask, you could add it to a response object. For PHP, you’d use header() calls.
You can set it to a specific origin (e.g., https://yourfrontend.com). This is the most secure option for production. Or, for development, you might use a wildcard: *. Be careful with wildcards in production! They open your API to requests from any domain. You can learn more about the Access-Control-Allow-Origin header on MDN.
Step 2: Use a Proxy (Mainly for Local Development)
Sometimes, during local development, configuring your server is tedious. Or maybe you don’t control the server (e.g., a third-party API). In these cases, a proxy can be a lifesaver. A proxy server acts as an intermediary. Your front-end makes a request to your *own* local proxy server. This request is same-origin, so your browser is happy. Then, your proxy server forwards the request to the actual cross-origin API. The API responds to the proxy. The proxy then sends that response back to your front-end. Since the proxy is now the “same origin” as your front-end, the browser allows the data. For React apps, tools like `create-react-app` offer a proxy setting in your package.json. This is incredibly useful!
Step 3: Understand Preflight Requests
Sometimes, simple GET requests don’t trigger preflight. But for “non-simple” requests, your browser does an extra step. These include requests using methods other than GET, HEAD, or POST (like PUT or DELETE). They also trigger for requests with custom headers. Before sending the actual request, your browser sends an OPTIONS request. This is called a “preflight” request. It’s like asking the server, “Hey, if I send a real request with these headers and this method, would you allow it?”
Your server needs to respond to this OPTIONS request. It must send specific CORS headers in that response. These tell the browser what methods and headers are allowed for the actual request. Only if the preflight is approved will the browser send the real request. If your server isn’t configured to handle OPTIONS requests with the right headers, you’ll get a CORS error. You can dive deeper into CORS preflight requests on MDN.
Remember This: When fixing CORS, always assume the problem is on the server-side configuration. Your client-side code is usually fine; it’s the server’s permission slip that’s missing!
Beyond the Basics: Advanced CORS Scenarios
While Access-Control-Allow-Origin is your primary tool, other headers come into play for more complex scenarios. You might need Access-Control-Allow-Methods to specify which HTTP methods (GET, POST, PUT, DELETE) are permitted. If your front-end sends custom headers, your server will also need to whitelist those using Access-Control-Allow-Headers.
And what about authentication? If your cross-origin requests need to send cookies, HTTP authentication, or client-side SSL certificates, you’ll need two things. First, you set credentials: 'include' in your client-side fetch request. Second, your server must respond with Access-Control-Allow-Credentials: true. Remember, you cannot use Access-Control-Allow-Origin: * with credentials. You must specify a concrete origin for security reasons. Once your requests succeed and your data streams in, you’ll be able to manage it cleanly in your front-end framework, perhaps dealing with concepts like React derived state to keep your UI perfectly synced.
Wrapping Up
CORS errors might seem daunting at first. They throw up confusing messages. But once you understand the underlying security mechanism, they make perfect sense. Your browser is just doing its job: keeping you safe. Your role as a developer is to tell the server to give the browser the green light.
You now know that the solution usually lies in your server’s configuration. You need to provide the correct HTTP headers. You also have tools like development proxies and an understanding of preflight requests. Don’t let these errors stop you. You’ve got the knowledge to tackle them head-on. Keep building, keep learning, and your web applications will be communicating smoothly in no time!