JavaScript Code Review is an indispensable practice for any development team aiming to ship high-quality, maintainable, and robust applications. It’s more than just catching bugs; it’s about knowledge sharing, enforcing consistent standards, and collectively elevating the codebase. As developers, we understand the thrill of writing elegant code, but also the challenge of maintaining it over time. Effective code reviews transform individual contributions into a cohesive, high-performing product.
Many developers view code review as a necessary chore, but I see it as a powerful collaboration tool. It’s a chance to refine your skills, learn from peers, and ensure that every line of code contributes positively to the project’s health. In this guide, we’ll explore best practices for JavaScript code reviews and even build a simple tool to help streamline the process.
What We Are Building: A Dynamic JavaScript Code Review Dashboard
Today, we’re not just discussing theory; we’re rolling up our sleeves to build a simple, interactive “Code Review Dashboard.” Think of it as a personal or team checklist, a practical manifestation of our JavaScript Code Review best practices. This dashboard will help us visualize and track common review items, making the process more structured and less prone to oversight. It’s designed to be clean, actionable, and user-friendly.
The inspiration for this dashboard comes from the need for concrete, repeatable review steps. In many teams, code reviews can be ad-hoc, leading to inconsistent quality. By centralizing key review points, we create a shared understanding of what constitutes a “good” review. This trending focus on developer productivity tools is vital, especially in fast-paced environments. We can use this dashboard in various scenarios: a solo developer self-checking their work, a small team maintaining review consistency, or even as a training tool for new team members.
Creating effective APIs is crucial when developing applications that interact with data, as our dashboard could eventually do. Learning about API Design: Principles Explained with JavaScript can significantly enhance how such a tool might communicate with backend services, ensuring scalability and maintainability.
HTML Structure
Our HTML will lay the foundation for the dashboard, providing the basic containers for our checklist items and input fields. We’ll keep it semantic and straightforward.
index.html
<!DOCTYPE html>
<html lang="en">
<head>
    <meta charset="UTF-8">
    <meta name="viewport" content="width=device-width, initial-scale=1.0">
    <title>JavaScript Code Review Tutorial</title>
    <link rel="stylesheet" href="styles.css">
</head>
<body>
    <header class="page-header">
        <h1>JavaScript Code Review: Best Practices</h1>
        <p>A comprehensive guide to enhance your JavaScript projects through effective code reviews.</p>
    </header>

    <main class="tutorial-content">
        <section class="intro-section">
            <h2>Why Code Review Matters</h2>
            <p>Code reviews are a critical part of the software development lifecycle. They improve code quality, share knowledge, and reduce bugs. For JavaScript, understanding specific idioms and best practices is crucial.</p>
        </section>

        <section class="principles-section">
            <h2>Core Principles for JavaScript Code Reviews</h2>
            <ul>
                <li><strong>Focus on Readability:</strong> Is the code easy to understand for someone else?</li>
                <li><strong>Maintainability:</strong> Can this code be easily modified or extended in the future?</li>
                <li><strong>Performance:</strong> Are there any obvious performance bottlenecks?</li>
                <li><strong>Security:</strong> Are there any common vulnerabilities or insecure patterns?</li>
                <li><strong>Testing:</strong> Is the code adequately tested?</li>
                <li><strong>Idempotency & Purity:</strong> For functions, are side effects managed appropriately?</li>
            </ul>
        </section>

        <section class="best-practices-section">
            <h2>Practical Best Practices</h2>
            <p>Here are some actionable tips:</p>
            <ol>
                <li><strong>Establish Clear Guidelines:</strong> Agree on coding standards (ESLint, Prettier).</li>
                <li><strong>Small, Focused Pull Requests:</strong> Easier to review and less error-prone.</li>
                <li><strong>Automate What You Can:</strong> Linters, formatters, and static analysis tools.</li>
                <li><strong>Provide Constructive Feedback:</strong> Focus on the code, not the person.</li>
                <li><strong>Understand the "Why":</strong> Ask for clarification on design decisions.</li>
            </ol>
        </section>
    </main>

    <footer class="page-footer">
        <p>© 2023 Your Company. All rights reserved.</p>
    </footer>
</body>
</html>
CSS Styling
With CSS, we’ll transform our raw HTML into an inviting and functional dashboard. We’ll focus on readability, clarity, and a responsive design approach.
styles.css
/* Basic Reset & Body Styles */
:root {
    --bg-color-dark: #1a1a1a;
    --text-color-light: #f0f0f0;
    --accent-color: #00bcd4;
    --secondary-bg-color: #282828;
    --border-color: #444;
    --code-bg-color: #0d0d0d;
}

body {
    margin: 0;
    padding: 0;
    font-family: Arial, Helvetica, sans-serif;
    background-color: var(--bg-color-dark);
    color: var(--text-color-light);
    line-height: 1.6;
    box-sizing: border-box;
    overflow-x: hidden; /* Prevent horizontal scroll */
}

*, *::before, *::after {
    box-sizing: inherit;
}

/* Header */
.page-header {
    background-color: var(--secondary-bg-color);
    color: var(--text-color-light);
    padding: 40px 20px;
    text-align: center;
    border-bottom: 1px solid var(--border-color);
}

.page-header h1 {
    font-size: 2.8em;
    color: var(--accent-color);
    margin-bottom: 10px;
    letter-spacing: 0.03em;
}

.page-header p {
    font-size: 1.1em;
    max-width: 800px;
    margin: 0 auto;
    color: #ccc;
}

/* Main Content */
.tutorial-content {
    max-width: 900px;
    margin: 40px auto;
    padding: 0 20px;
}

.tutorial-content section {
    background-color: var(--secondary-bg-color);
    border-radius: 8px;
    padding: 30px;
    margin-bottom: 30px;
    box-shadow: 0 4px 15px rgba(0, 0, 0, 0.3);
}

.tutorial-content h2 {
    color: var(--accent-color);
    font-size: 2em;
    margin-top: 0;
    margin-bottom: 20px;
    border-bottom: 2px solid var(--border-color);
    padding-bottom: 10px;
}

.tutorial-content p, .tutorial-content li {
    font-size: 1.1em;
    color: #e0e0e0;
}

.tutorial-content ul, .tutorial-content ol {
    margin-left: 20px;
    padding-left: 0;
}

.tutorial-content li {
    margin-bottom: 10px;
}

/* Code Block Styling (Placeholder for future code examples) */
pre {
    background-color: var(--code-bg-color);
    color: #e0e0e0;
    padding: 15px;
    border-radius: 6px;
    overflow: auto; /* For long lines of code */
    font-family: 'Consolas', 'Monaco', 'Lucida Console', monospace;
    font-size: 0.95em;
    max-width: 100%;
}

code {
    font-family: 'Consolas', 'Monaco', 'Lucida Console', monospace;
    background-color: rgba(0, 0, 0, 0.2);
    padding: 2px 4px;
    border-radius: 3px;
}

/* Footer */
.page-footer {
    text-align: center;
    padding: 20px;
    margin-top: 50px;
    border-top: 1px solid var(--border-color);
    color: #888;
    font-size: 0.9em;
    background-color: var(--secondary-bg-color);
}

/* Responsive Adjustments */
@media (max-width: 768px) {
    .page-header h1 {
        font-size: 2.2em;
    }
    .tutorial-content {
        margin: 20px auto;
        padding: 0 15px;
    }
    .tutorial-content h2 {
        font-size: 1.8em;
    }
}
Step-by-Step Breakdown: Implementing Features for Effective JavaScript Code Review
Now, let’s dive into the core JavaScript that powers our Code Review Dashboard. This section will walk you through setting up the application, managing review items, and adding interactivity. We are, in essence, building a tool that embodies principles for an effective JavaScript Code Review.
Initializing the Dashboard and Loading Items
First, we need to ensure our JavaScript runs only after the entire HTML document has been loaded. This prevents errors that might occur if we try to manipulate elements that don’t yet exist in the DOM. We’ll then define some initial review items. Consequently, this ensures the user has a starting point.
“A well-defined checklist is not a crutch for memory, but a launchpad for deeper critical thinking during code review.”
The items will be stored in an array of objects, each with a text description and a completion status. We’ll also define functions to render these items to the UI. This modular approach keeps our code clean and manageable. For instance, the displayReviewItems function will iterate through our array and create the necessary DOM elements for each item.
document.addEventListener('DOMContentLoaded', () => {
const reviewItemsContainer = document.getElementById('review-items');
const newItemInput = document.getElementById('new-item-input');
const addItemButton = document.getElementById('add-item-button');
let reviewItems = [
{ id: 1, text: 'Check for consistent formatting (ESLint, Prettier).', completed: false },
{ id: 2, text: 'Verify error handling and edge cases.', completed: false },
{ id: 3, text: 'Ensure adequate test coverage for new features/fixes.', completed: false },
{ id: 4, text: 'Remove dead code or commented-out sections.', completed: false },
{ id: 5, text: 'Review variable and function naming for clarity.', completed: false },
{ id: 6, text: 'Optimize performance critical sections.', completed: false }
];
function renderReviewItems() {
reviewItemsContainer.innerHTML = ''; // Clear existing items
reviewItems.forEach(item => {
const itemElement = document.createElement('div');
itemElement.className = `review-item ${item.completed ? 'completed' : ''}`;
itemElement.dataset.id = item.id;
itemElement.innerHTML = `
${item.text}
`;
reviewItemsContainer.appendChild(itemElement);
});
}
// Initial render
renderReviewItems();
// ... more event listeners below
});
Managing and Interacting with Review Items
Interaction is key for any dashboard. We’ll implement functionality to add new review items and mark existing ones as complete or remove them. The addItemButton will trigger a function to add new entries from the newItemInput field. Furthermore, each item will have a checkbox to toggle its completion status. This state change will be reflected both in our reviewItems array and in the UI.
When handling user input, it’s wise to consider patterns for validation. For instance, you might want to ensure that a new review item isn’t empty or contains specific characters. This is where a good understanding of Regex Patterns: JS Explained – Quick Guide can become incredibly useful for validating structured inputs or ensuring data integrity before adding items to your list. Indeed, robust input handling makes your applications more resilient.
    addItemButton.addEventListener('click', () => {
        const text = newItemInput.value.trim();
        if (text) {
            const newId = reviewItems.length ? Math.max(...reviewItems.map(item => item.id)) + 1 : 1;
            reviewItems.push({ id: newId, text, completed: false });
            newItemInput.value = '';
            renderReviewItems();
        }
    });

    reviewItemsContainer.addEventListener('change', (event) => {
        if (event.target.type === 'checkbox') {
            const itemId = parseInt(event.target.closest('.review-item').dataset.id);
            const itemIndex = reviewItems.findIndex(item => item.id === itemId);
            if (itemIndex !== -1) {
                reviewItems[itemIndex].completed = event.target.checked;
                renderReviewItems(); // Re-render to update class
            }
        }
    });

    reviewItemsContainer.addEventListener('click', (event) => {
        if (event.target.classList.contains('remove-item')) {
            const itemId = parseInt(event.target.closest('.review-item').dataset.id);
            reviewItems = reviewItems.filter(item => item.id !== itemId);
            renderReviewItems();
        }
    });
Enhancing the Feedback Loop
The interactive nature of this dashboard inherently improves the feedback loop. Reviewers can quickly tick off items, indicating progress, or add new observations directly to the list. While this example doesn’t persist data to a server, in a real-world scenario, you could easily integrate a backend to save state, allowing teams to share and track their collective review progress. This provides a tangible artifact of the review process, making it more transparent and accountable.
A crucial aspect of effective JavaScript development involves efficient DOM manipulation and event handling. For further details on handling events and interacting with the Document Object Model, you can always refer to the comprehensive resources available on MDN Web Docs. This ensures your code is both performant and maintainable, especially as your application scales.
Making It Responsive
In today’s multi-device world, a responsive design isn’t just a nicety; it’s a necessity. Our dashboard, though simple, should look great and function perfectly whether viewed on a large desktop monitor or a compact smartphone screen. We’ll achieve this by employing media queries in our CSS.
Our approach will be mobile-first. This means we’ll design for smaller screens initially, then progressively enhance the layout for larger viewports. It forces us to prioritize content and ensures a solid baseline experience for everyone. Consequently, for our dashboard, this might involve adjusting font sizes, padding, and perhaps changing the display of the review items from a wider grid to a more stacked layout on mobile. Think about how this impacts the perceived speed; optimizing for mobile is also a performance gain. For similar performance considerations in other areas, like delivering images efficiently, check out Image Lazy Loading with JavaScript for Performance.
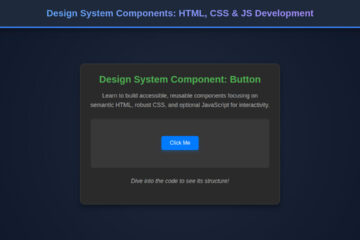
Final Output
Upon completing all the steps, you’ll have a functional, interactive Code Review Dashboard. The key visual elements achieved include a clear header, an intuitive input field for new checklist items, and a scrollable list of review points. Each item will feature a checkbox for completion tracking and a removal button for dynamic management. The design will be clean and responsive, offering a seamless experience across various devices. It’s a small step, yet it significantly organizes the code review process.
Conclusion
Mastering JavaScript Code Review best practices is a journey, not a destination. It demands consistent effort, open communication, and the right tools. By embracing structured reviews, fostering a culture of constructive feedback, and even building simple aids like our dashboard, teams can dramatically improve their code quality and developer satisfaction. Furthermore, remember that the goal isn’t just to find errors, but to foster growth and knowledge sharing within your team.
“Code review is a conversation, not a courtroom.”
This dashboard serves as a foundational example, but you can expand it with features like user authentication, persistence, or even integration with Git hooks. Ultimately, applying these principles will lead to more robust, maintainable, and higher-performing JavaScript applications. For advanced layout techniques that could enhance your dashboard’s visual appeal, explore resources like CSS-Tricks’ Flexbox Guide.